7 Commissioning
(also after a reset with factory setting (Fact-Setup))
7.1 Requirements
• The drive unit is completely installed and correctly
connected to the door panel
• The parts delivered separately such as the program
switch and activator (microwave detector, night/
bank key switch) are installed and connected.
• The motor is cold.
7.2 Commissioning the drive unit
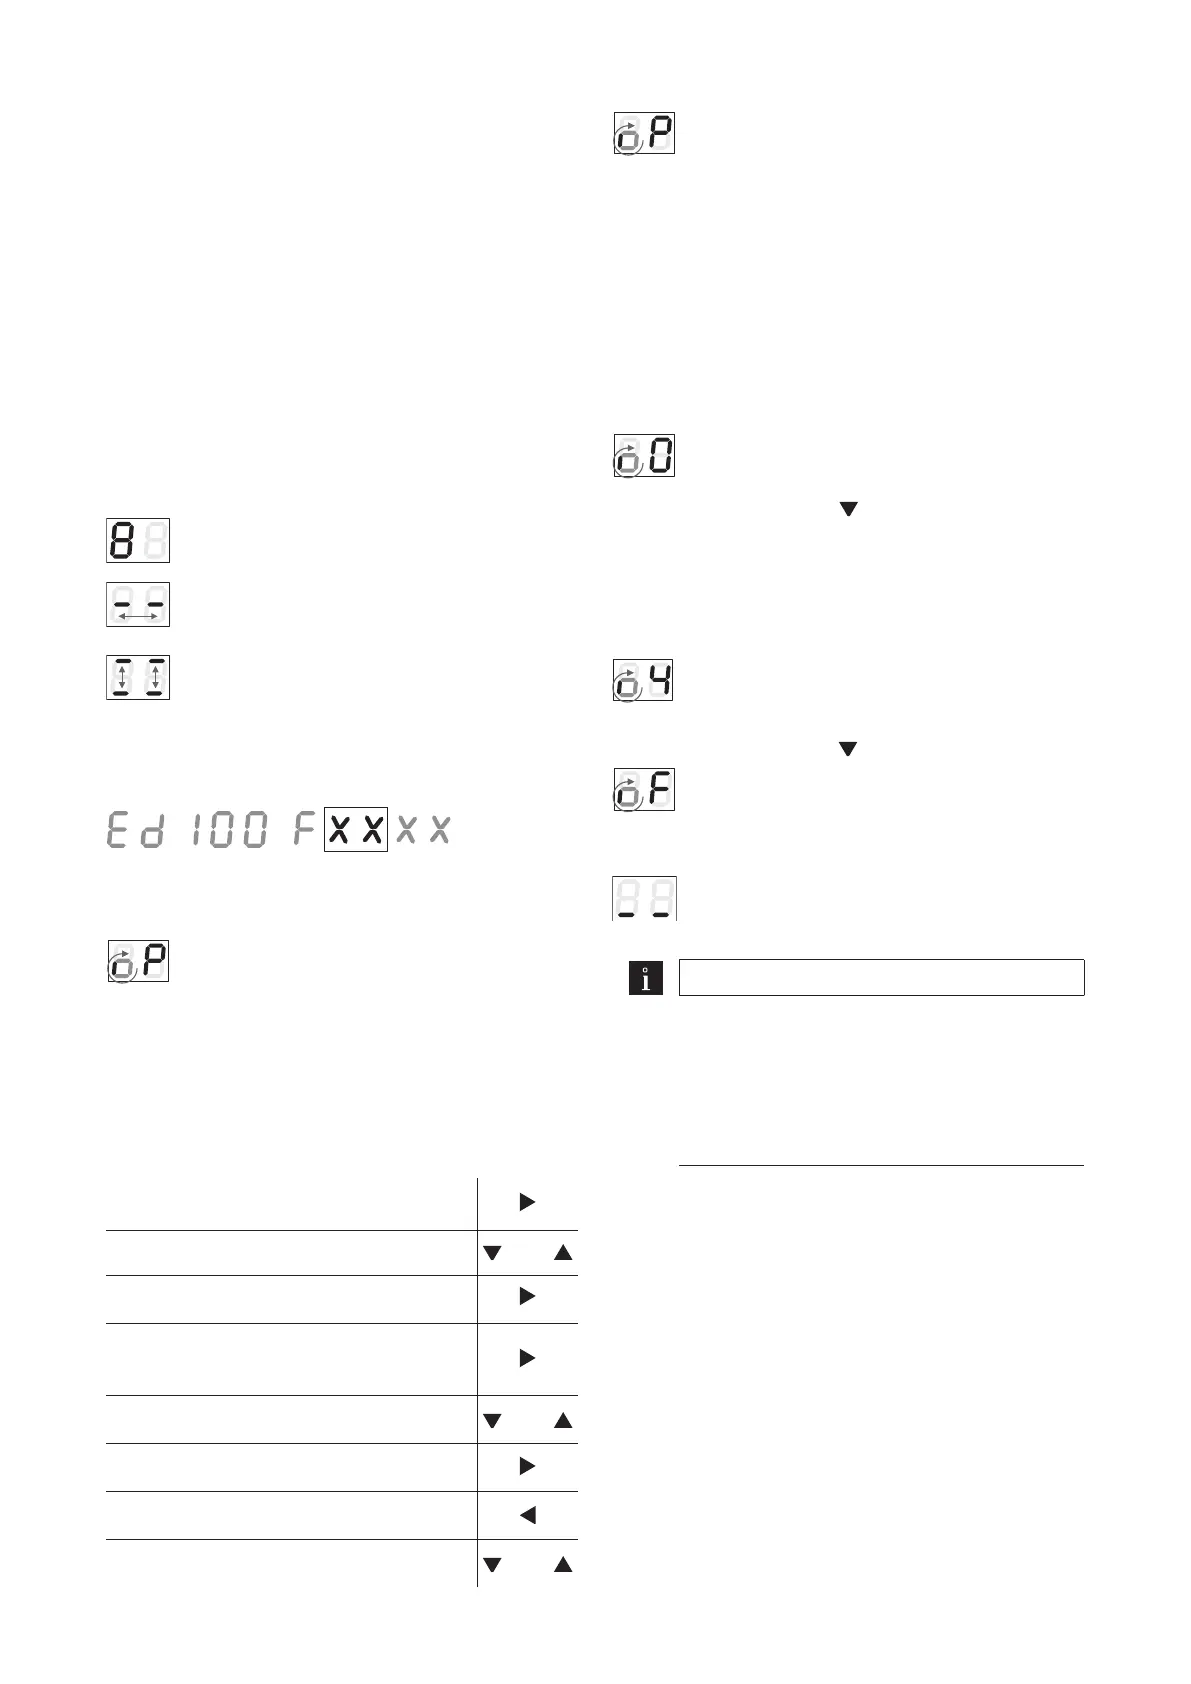
1. Turn on the drive unit using the mains switch.
The display shows a sequence of characters
that indicate the current processing status.
The system is being tested.
2 segments in the center moving back and
forth indicate that the control unit is waiting
for internal signals (maximum 1 second).
2 underlines moving up and down indicate
the mounting position can be entered. In case
of an incorrect input, the characters on the
display are upside down.
2. Press the lower pushbutton (possible only during
the initial commissioning).
The device identification will “run“ through
the display. ED 100 or ED 250 and the
firmware version (indicated by XX XX).
A small, spinning “o“ and “P“ indicate that
a further parameterization is required (only
during the initial commissioning or after a
reset with factory setting).
3. Set the following parameters: type of mounting
(AS), lintel depth (rd) and door width (Tb). For the
meaning and the value ranges of the parameters,
please refer to the table on page 34.
7.3 Changing the parameters
1. Press the pushbotton for 3 seconds in
order to call up the parameter menu.
2. Press the pushbuttons in order to
select the desired parameter.
oder
3. Press the pushbutton in order to
display the parameter value.
4. Press the pushbutton in order to
select the value for the change.
=> The value flashes.
5. Press the pushbuttons in order to set
the desired value.
oder
6. Press the pushbutton in order to save
the changed value.
7. Press the pushbutton in order to
return to the parameter menu.
8. Press the pushbuttons in order to
select the next parameter.
oder
After leaving the parameterization mode, the
display will show a small, spinning “o“ and “P“.
7.4 Performing a teach-in run
The teach-in run must be carried out while the motor
is cold. The door panel may not be moved manually
and stopped during the teach-in run. The control unit
would otherwise not be able to correctly determine
the parameters.
1. Secure the movement range of the door panels.
2. Close the door and turn the program switch to
the OFF position.
A spinning “o“ and “O“ indicate that a teach-
in run is required.
3. Press the pushbutton for 3 seconds.
The door performs various movements and
the display shows a sequence of characters.
Do not stop the movements of the door
panel.
The door is in the 70° position and waiting for
the opening width to be set.
4. Push the door to the desired open position and
press the pushbutton .
In case the spring force is too low, the display
will show the small spinning “o“ and “F“.
5. In this case, increase the spring force and restart
the teach-in run.
The door is now operational.
TIPS AND RECOMMENDATIONS
Due to system tolerances, the actual forces
on the door panel have to be measured
after the teach-in run and adjusted, if
necessary, in order to comply with the local
standards and regulations.
33
dormakaba Commissioning
ED 100, ED 250
Mounting instructions
WN 059799 45532 2019-07



 To Next Page