CONTACT US AT www.DRpower.com 15
Before performing any adjustment, maintenance procedure or inspection, stop
the engine, wait five (5) minutes to allow parts to cool and disconnect the
spark plug wire, keeping it away from the spark plug.
Figure 21
Figure 22
Figure 23
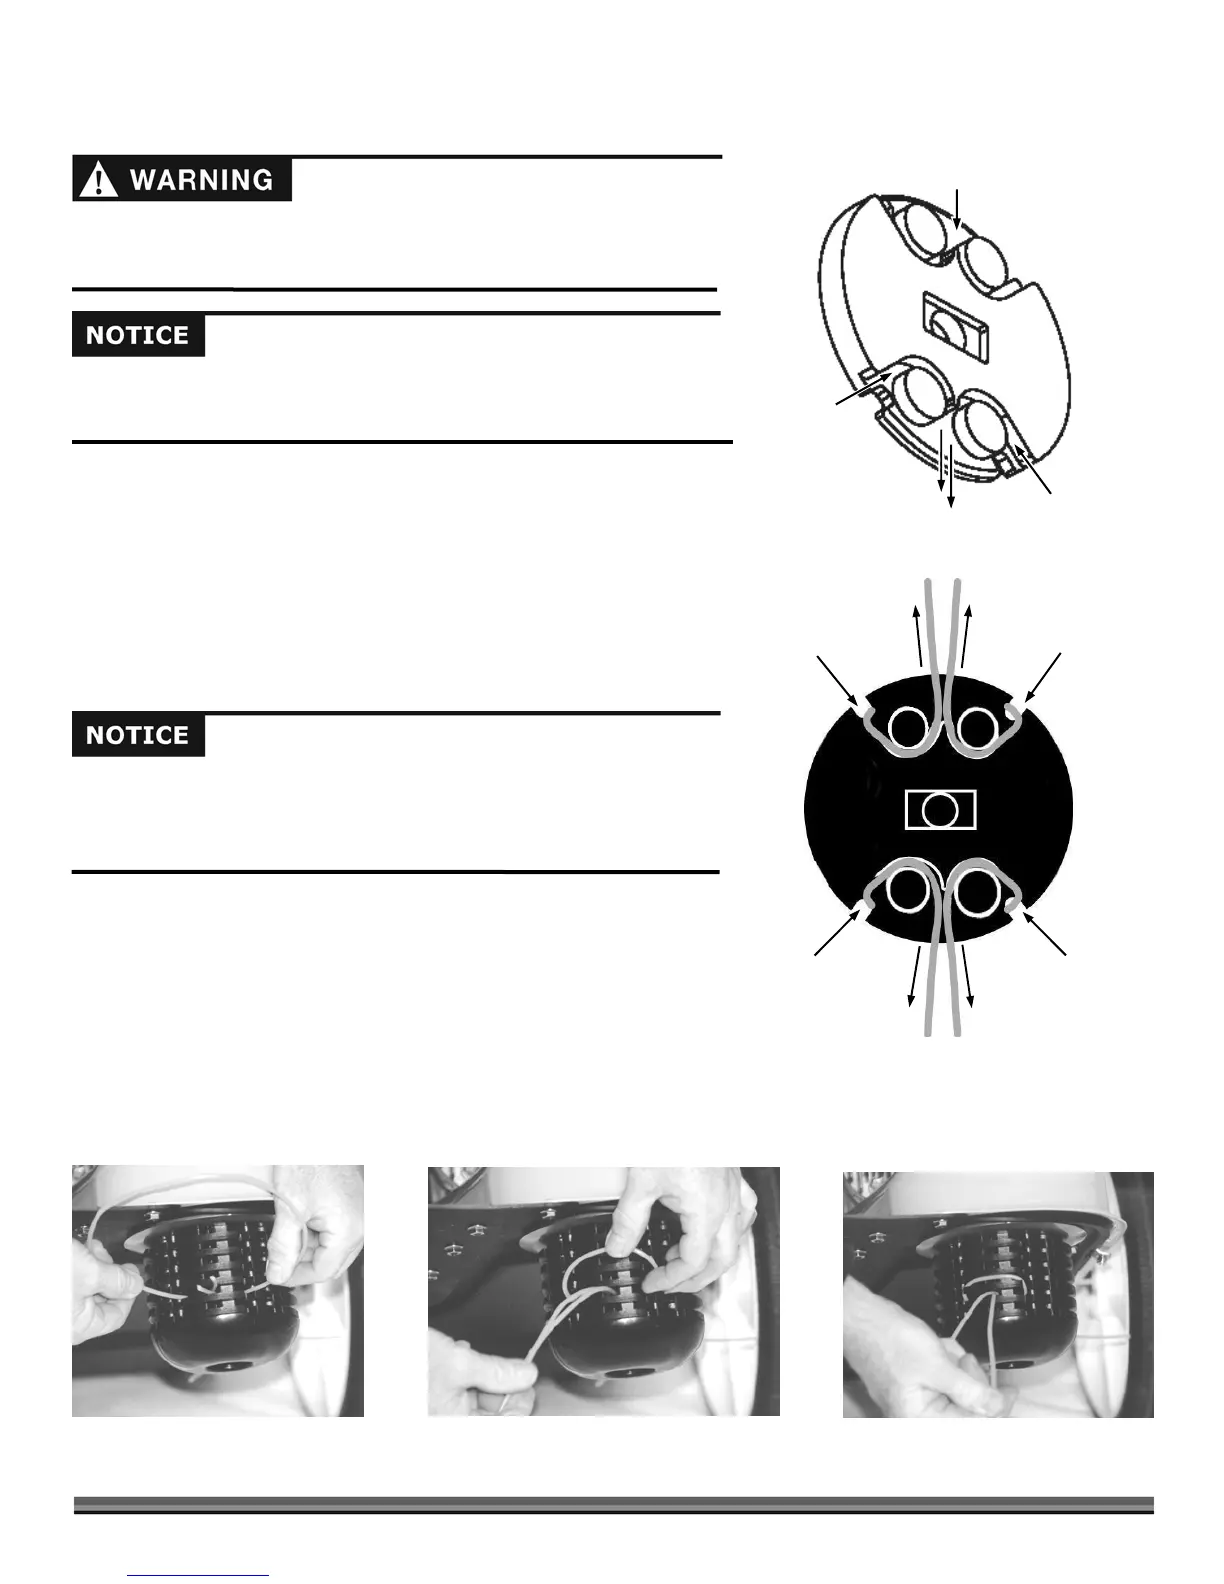
The DR TRIMMER/MOWER Cutting Cords
The following figures (Figures 19 and 20) illustrate the Cords installation on the
Line Plates. These figures show the Line Plates from a cross section point of
view. It may look complicated, but once you have done it a couple of times, it’s
easy. There are two (2) installation points on each Line Plate. Each point is 180
degrees apart. Always install two (2) Cords, one opposite the other.
Installing Cords
Reference Figures 21–23 for Cord installation. Your DR TRIMMER/MOWER
shipped from the factory with the Cords installed in this manner.
NOTE: After you install the Cords, and before trimming, engage the Cutting Head
with the Engine running and spin new Cords for a few seconds so they pull
tight and are set.
1. Insert the ends of the Cords into the openings in the Line Plate (Figure 21).
2. Push the Cord through until it comes out the center hole in the Line Plate
(Figure 22). You may also reference Figures 19 and 20 for installing the
Cords. Adjust the Cords so the tips are even.
3. Pull the Cords through the loop and push the loop up into the Line Plate
groove above them (Figure 23) and then pull the Cords tight.
When using PTA™, install the cutting cords in one of the bottom four line
plates. Installing the cutting cords on the upper line plates can cause the
cord to hit the wheel. For more information on using PTA™, see using PTA™
on page 13.
Running the trimmer with only one cord installed, or cords installed at other
than 180 degrees apart can cause excessive vibration and may damage the
machine.
Figure 20
In Here
Out Here
Out Here
In Here
In Here
In Here
Out Here
Out Here
Top View
Figure 19
In Here
In Here
Out Here
Same on
This Side