Do you have a question about the Dräger Oxylog and is the answer not in the manual?
Emphasizes understanding and adherence to instructions for safe and effective operation.
Details inspection and servicing by experts at regular intervals for optimal performance.
Describes connecting the Oxylog to a central gas supply for operation.
Step-by-step instructions for assembling the non-rebreathing valve correctly.
Describes checking the ventilation frequency against set parameters.
Details how to test the safety valve's pressure limits for proper function.
Verifies gas supply adequacy and Minute Volume settings.
Instructs on setting ventilation ratio and minute volume based on patient needs.
Emphasizes checking for airway obstruction as a cause of pressure issues.
Addresses causes and indications of abnormal airway pressures and troubleshooting steps.
Specifies the intended application for this optional configuration.
Step-by-step instructions for assembling the non-rebreathing valve correctly.
Specifies essential pre-use checks for the demand valve's operational readiness.
Addresses issues with the device not building up pressure and potential causes.
Troubleshoots the device stopping during inspiration and related causes.
Addresses problems with patient exhalation and potential causes.
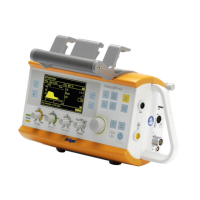
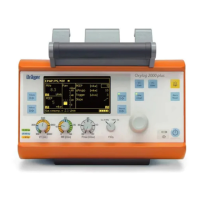
The Dräger Oxylog is an emergency ventilator designed for controlled ventilation of infants (from 5 kg body weight) and adults. It operates on a time-cycled, volume-constant basis, making it suitable for mobile use by rescue services, for patient transportation in ambulances or helicopters, and for ventilation in emergency admissions departments or during transfers between hospital departments.
The Oxylog functions as a ventilator, providing controlled ventilation. It can be operated from a central gas supply or a gas cylinder with a pressure reducer. The device requires an inlet pressure of at least 2 bar at a flow rate of 60 L/min for operation.
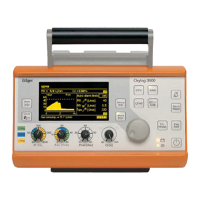
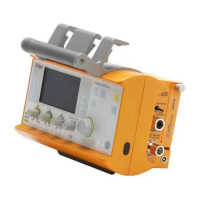
The device features an airway pressure gauge (scale range -10 mbar to +80 mbar) with a zero adjustment. Ventilation ratio and minute volume (MV) are set using rotary knobs. A heart symbol on the ventilation ratio knob serves as an adjustment aid for ventilation during cardiopulmonary resuscitation, specifically for a ratio of 12 min⁻¹.
A pneumatic main switch controls the device's primary function. The "Air Mix" switch allows for selection between "Air Mix" and "No Air Mix" settings. The "Air Mix" setting reduces drive-gas consumption by approximately 50% by drawing in ambient air, while the "No Air Mix" setting delivers unblended drive gas (e.g., O2) to the patient.
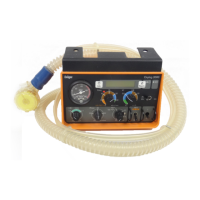
The patient system includes ventilation tubing and a non-rebreathing valve. The non-rebreathing valve has an external taper (ISO, dia. 22) for connection to a breathing mask or catheter connector and an internal taper (ISO, dia. 15) for tube connection. It also features a waste-gas socket with an internal taper (ISO, dia. 22) for connecting a PEEP valve. The diaphragm within the non-rebreathing valve comprises a control diaphragm and a check valve, marked yellow and red, respectively, to ensure correct installation.
An optional demand valve can be used with the Oxylog to facilitate spontaneous breathing, particularly in toxic atmospheres. This configuration allows for time-cycled, volume-constant ventilation alongside spontaneous breathing. However, spontaneous breathing under positive airway pressure (CPAP) is not possible with this setup.
The Oxylog can also be used for controlled ventilation of injured persons in a toxic ambient atmosphere by setting the switch to "No Air Mix." If the patient breathes spontaneously or if spontaneous breathing has been restored, the device does not prevent the partial spontaneous intake of toxic ambient air. For this reason, a special Oxylog with a spontaneous breathing device (available as an accessory) is recommended to facilitate spontaneous breathing with an airway pressure of 0 in addition to controlled ventilation.
Optional accessories include a pressure limiting valve, adjustable from 10 to 45 mbar, which can be latched onto the patient connection. This valve helps limit inspiration pressure, becoming effective in exceptional circumstances like coughing. An expiratory volume measurement system, comprising a Volumeter 3000, support, and silicone hose, can be used to measure tidal volume and minute volume. However, expiratory volume measurement is not possible when using the PEEP valve.
Initial Preparation: Before operation, ensure the inlet pressure at the compressed-gas connection is at least 2 bar at a flow rate of 60 L/min. Any upstream closing or metering elements must be fully open. When operating from a central gas supply, screw the O2/air connecting hose to the device and insert the connector into the wall outlet valve. For gas cylinder operation, screw a pressure reducer to the cylinder, check the 2-6 bar delivery pressure setting, and connect the hose to the device and reducer. Fully open cylinder valves. If using a Dräger Oxator® head, connect the Oxylog via the designated connection piece. The Oxylog must not be fed via the flow control valves at the Oxator head. When using gas blenders for lengthy ventilation or repatriation flights requiring low, defined O2 concentrations, connect the blender upstream of the Oxylog, ensuring the inlet pressure remains at least 2 bar at 60 L/min. The switch should be set to "No Air Mix."
Equipping the Device: Assemble the non-rebreathing valve, ensuring the diaphragm and red check valve are correctly positioned and not out of shape. Attach the ventilation tubing to the Oxylog's socket and the "Inspiration" socket on the non-rebreathing valve. If an optional pressure limiting valve is used, attach it first to the Oxylog's socket, then connect the ventilation tubing to it. If PEEP is applied, insert the PEEP valve into the waste-gas socket of the non-rebreathing valve. Set the airway pressure gauge to zero. Preselect the O2 concentration; the "Air Mix" setting reduces drive-gas consumption by approximately 50%.
Operational Use: Continuously observe the airway pressure gauge to detect incorrect ventilation promptly. Set the ventilation ratio and minute volume (MV) according to the patient's needs. For rapid presetting, the MV scales have color bands (green for infants 5-20 kg, blue for children 20-40 kg, brown for adults 40 kg and above). The switch should be set to "No Air Mix" for high O2 concentration requirements (O2 drive) or in toxic atmospheres (and respiratory standstill). For low O2 concentrations or small gas supply, use the "Air Mix" setting, which blends drive gas with ambient air. Connect the non-rebreathing valve to a mask or tube, ensuring airways are completely free. Check the airway pressure gauge; normal inspiratory airway pressure values should be around 20 mbar. In cases of excessively high airway pressure, check the MV setting and the non-rebreathing valve's function. High airway pressure (50-70 mbar) with a buzzing noise indicates incorrectly positioned airways or a kinked tube. If airway pressure is too low, check the MV setting and hose connections for tightness and leaks. For cardiopulmonary resuscitation in adults with a 1:5 ratio, ensure a ventilatory impulse after every 5th cardiac compression. For a cardiac massage frequency of 60 min⁻¹, this means ventilation must be at 12 min⁻¹. The 12 min⁻¹ ventilation ratio on the Oxylog is marked with a heart symbol to facilitate this setting.
Shut-Down Actions: Set the main switch to "0." If using a compressed-gas cylinder, close the cylinder valve.
Regular Inspection and Service: The apparatus must be inspected and serviced by experts at regular 2-year intervals, with a record kept. A service contract with DrägerService is recommended. Repairs and general overhaul may only be carried out by experts. General overhaul of pressure reducers should occur every 6 years. Only original Dräger spare parts may be used for maintenance.
Functional Checks: After upkeep and assembly, the Oxylog must undergo functional checks. Testing Ventilation Ratio: Set the pneumatic main switch to I (ON), MV to 3 L/min, ventilation ratio to 15 min⁻¹, and switch to "No Air Mix." Seal the non-rebreathing valve at the patient connection, use a stopwatch to time 10 complete cycles, and determine the ventilation frequency. The ventilation ratio should be between 13 and 17 min⁻¹. Testing Safety Valve: With the same settings and the patient connection sealed, the maximum airway pressure should be between 50 and 80 mbar. Testing Compressed-Gas Supply and Minute Volume: Insert a catheter adapter (size 5) into the patient connection of the non-rebreathing valve. Read the maximum inspiration pressure for MV settings of 7, 15, and 20 L/min. The Oxylog should switch at regular intervals from inspiration to expiration. The operating prerequisites (at least 2 bar at 60 L/min) are indirectly checked at the MV = 20 L/min setting. Remove the catheter adapter after the check.
Care and Cleaning: After ventilation, prepare the Oxylog for thorough cleaning and disinfection. Remove the mask or tube, detach ventilation tubing, and disassemble the non-rebreathing valve. The red check valve must not be removed from the yellow control valve. The PEEP valve should also be disassembled. Clean disassembled patient system parts with hot water and detergent, then rinse well. Do not use a hard brush. The component parts can also be washed in Dräger Purfactor®, which disinfects and dries the material. The surface of the device can be disinfected by wiping it with a soft cloth impregnated with detergent/water. Do not use petrol, ether, or similar solvents. Carefully rinse the Volumeter 3000 with hot running water, avoiding drain holes in the control section. Remove residual water and dry all parts thoroughly.
Disinfection: Cleaned and dried patient system parts can be disinfected in a cold disinfectant solution. The device surface can be disinfected by wiping. Only use disinfectants that do not attack the materials, ensuring prescribed concentrations. The cleaned and dried components of the patient system and the device itself can be disinfected in the Dräger Aseptor®. However, ventilation tubing and breathing masks (silicone rubber) must not be disinfected in the Aseptor. After disinfection, reassemble the device and perform a functional check.
Sterilization: The valve housing of the Oxylog with a demand valve is not suitable for sterilization. Cleaned and dried patient system parts can be sterilized in superheated steam. PEEP valve components and Volumeter 3000 can be sterilized at 121 °C. Non-rebreathing valve components and ventilation tubing can be sterilized at 134 °C. The Oxylog itself cannot be sterilized. Plastic and rubber moldings must be disassembled prior to sterilization. After autoclave sterilization, the device must be disassembled and subjected to a functional check.
Leak Test of Non-Rebreathing Valve: Perform after each assembly. Establish a test setup with a conical sealing plug, catheter connector, silicone hose, and disposable syringe. Detach the cap from the check valve, attach the syringe, seal the inspiratory port, extract 3 mL with the syringe, and hold the plunger. The black diaphragm of the check valve should adapt to the valve body shape and not return to its original state within 15 seconds.
Leak Test of Oxylog with Demand Valve Attached: Perform every 6 months. Remove the Oxylog from its mount, unscrew the pressure-gas line of the demand valve, and seal connections. Establish a test setup with the non-rebreathing valve, ventilation hose, demand valve, Oxylog, pressure-gas line, cap nut, screw plug, and mouthpiece. Open the oxygen-cylinder valve, set the Oxylog switch to "0," and fit the non-rebreathing valve to the silicone hose. Generate a negative pressure of about -10 mbar with your mouth. The unit is sufficiently leakproof if the pressure change from -6 mbar to -2 mbar takes at least 20 seconds.
Storage: Keep the Oxylog and its accessories dust-free and dry.
| Power Source | AC Power, Internal Battery |
|---|---|
| Peak Flow | Up to 120 L/min |
| Type | Ventilator |
| Operating Modes | SIMV |
| Tidal Volume Range | 50 mL to 2000 mL |
| PEEP | 0 to 20 cm H2O |
| FiO2 | 21 to 100 % |