46
Replacing the Sensors
Replacing the Sensors
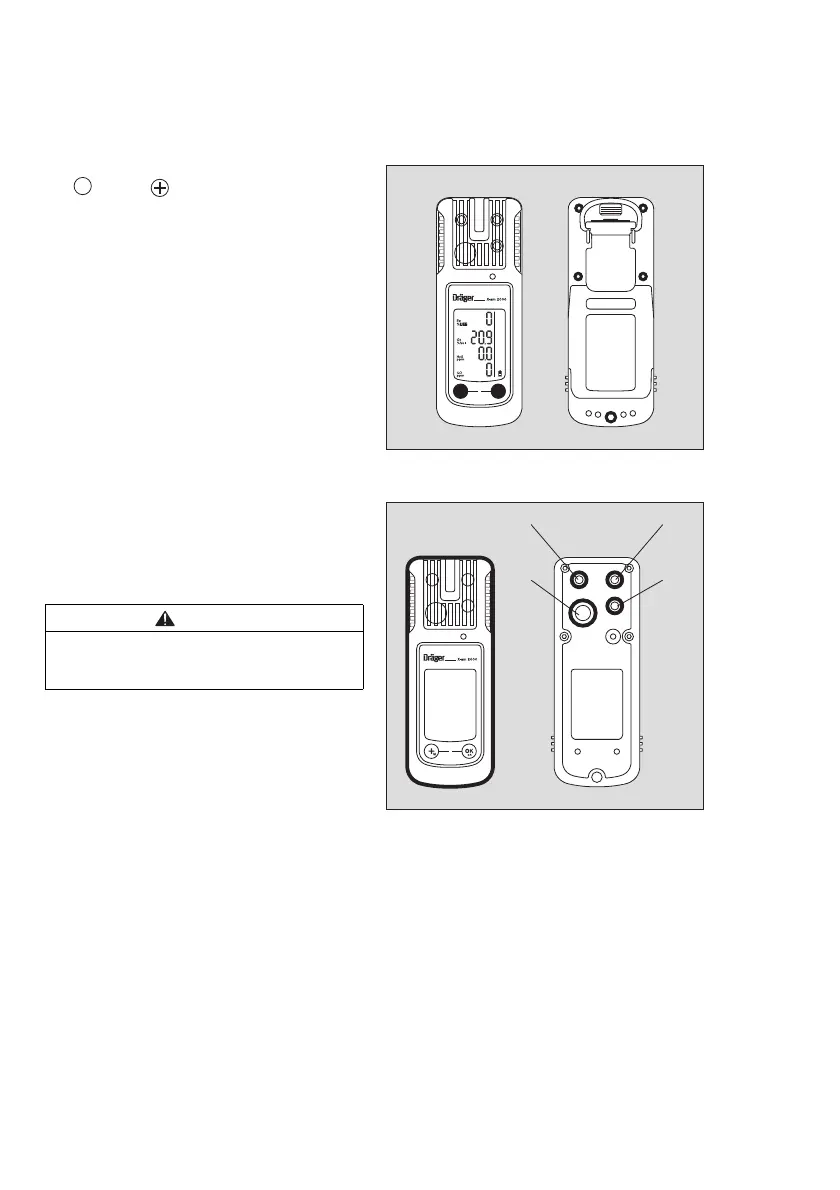
● Switch off the device: keep the key
and the key depressed at the same
time.
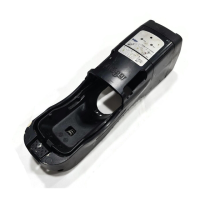
● Loosen the screw (2.0 mm hexagon sok-
ket) on the power pack and remove the
power pack.
● Loosen the 4 screws (1.5 mm hexagon
socket) on the rear panel of the device.
● Remove the upper half of the housing.
Position of the sensors:
1 DrägerSensor CatEx 125 PR –
68 12 950
2 DrägerSensor XXS O
2
– 68 10 881
(blue marking)
3 DrägerSensor XXS H
2
S LC – 68 11 525
(yellow marking)
4 DrägerSensor XXS CO – 68 10 882 (gray
marking)
● Remove the sensor to be replaced from
the sensor receptacle – in the case of the
DrägerSensor CatEx 125 PR, disconnect
the flat cable connection before.
● Insert the new sensor into the sensor re-
ceptacle.
● Insert the flat cable connection of the
DrägerSensor CatEx 125 PR into the
plug-in connector on the board.
● Check that the sensors are positioned
correctly and make adjustments if neces-
sary.
● Attach the upper half of the housing and
tighten the 4 screws on the rear panel.
● Insert the power pack into the device and
tighten the screw.
● Switch on the device –
Allow the sensors to warm up completely
(max. 15 minutes).
CAUTION
The position of the sensors must not be
swapped! If the position is swapped, it can
result in damage to the sensors.
 Loading...