4
3
3
.
.
2
2
C
C
e
e
i
i
l
l
i
i
n
n
g
g
-
-
m
m
o
o
u
u
n
n
t
t
I
I
n
n
s
s
t
t
a
a
l
l
l
l
a
a
t
t
i
i
o
o
n
n
(
(
P
P
l
l
a
a
s
s
t
t
e
e
r
r
b
b
o
o
a
a
r
r
d
d
C
C
e
e
i
i
l
l
i
i
n
n
g
g
)
)
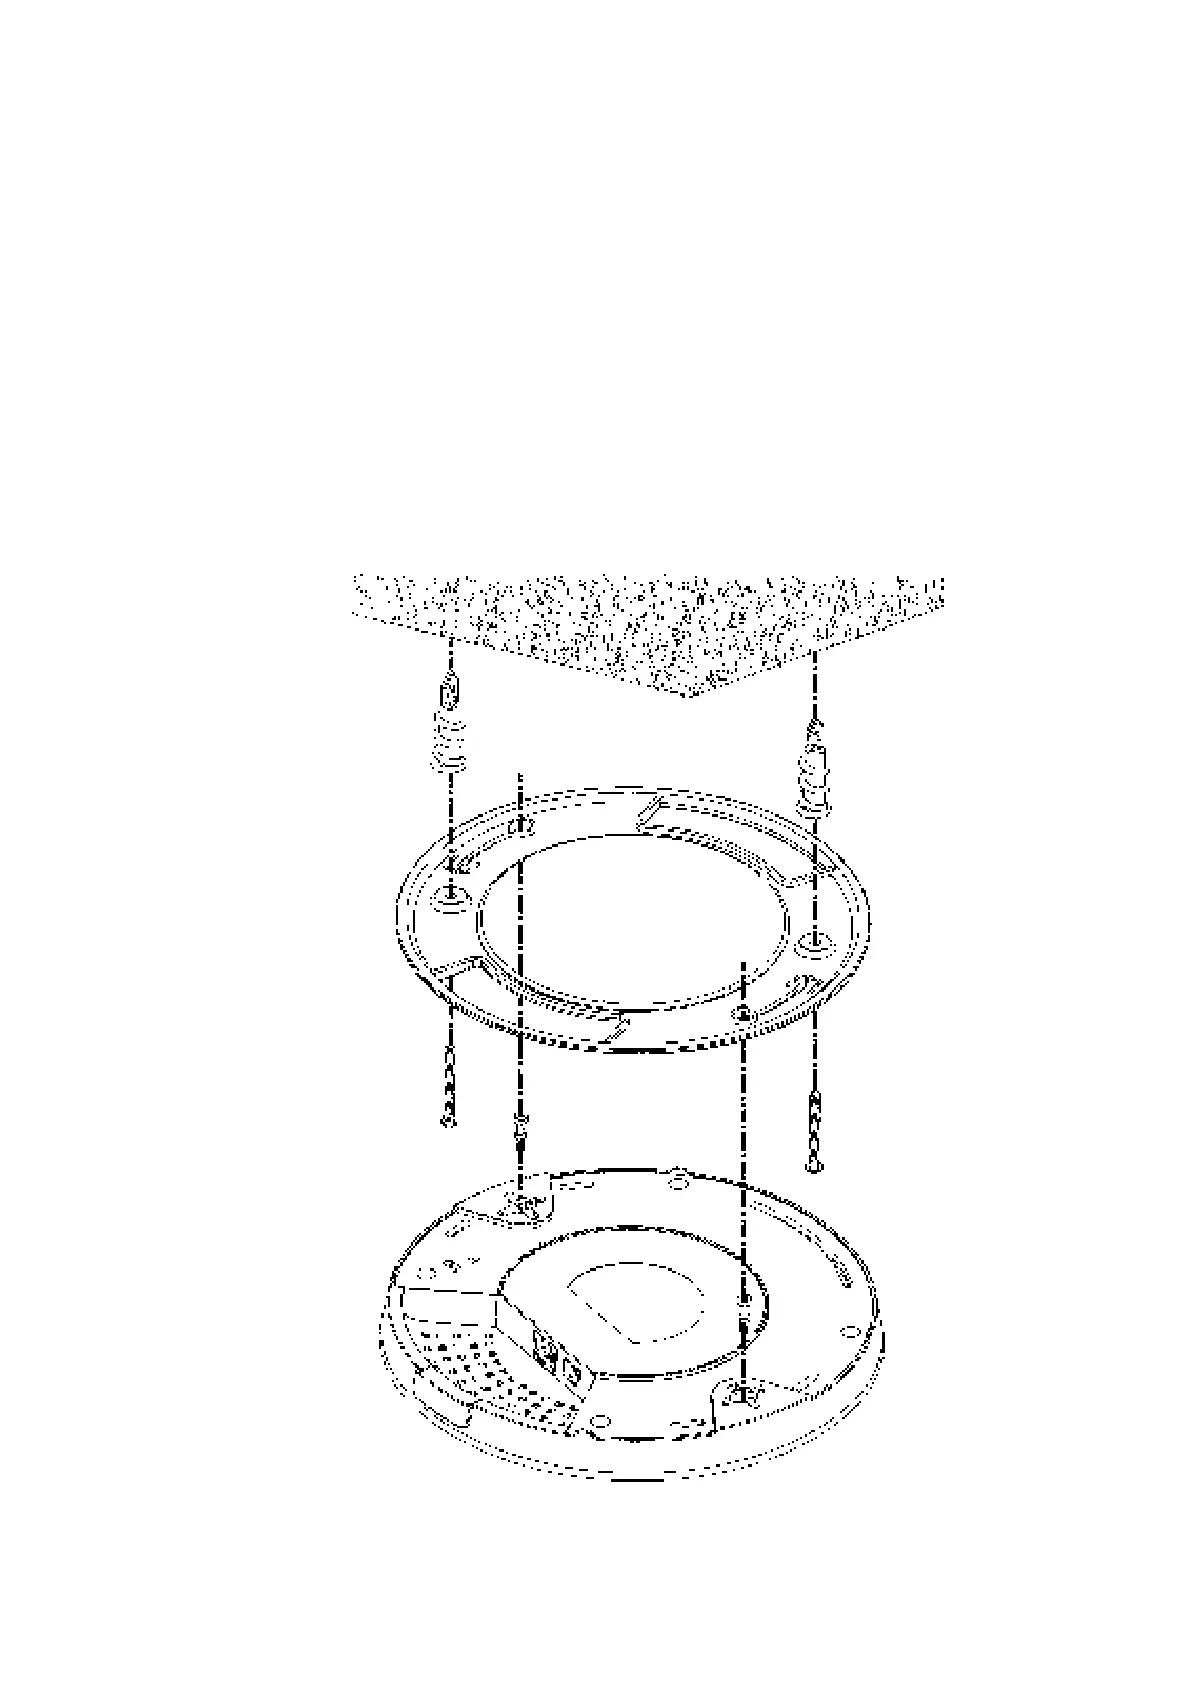
1. Place t he bracket under t he plast erboard ceiling and fast en t wo t urnbuckles
firmly (as shown in Figure below, St ep 1).
2. Make t he screws pass t hrough t he bracket and insert int o t he t urnbuckles (as
shown in Figure below, St ep 2). Fast en t hem t o of f er more powerf ul
support ing f orce.
3. When t he bracket is in place, f ast en t wo screws firmly (as shown in Figure
below, St ep 3) on t he bot t om of VigorAP.
4. Make t he device j ust below t he bracket . Put t he screws inst alled in St ep 3 on
t he screw holes of t he bracket (as shown in Figure below, St ep 4).
5. Gent ly rot at e t he device t o make screws slide int o t he not ches of t he
bracket and move f orward t ill it is firmly fixed.
Bracket
St ep 1
St ep 2
St ep
3
St ep
4