GB
5
3.2 Assembling the stand components
– Mount the individual parts of the frame as shown in the diagram
below.
Fig. 3
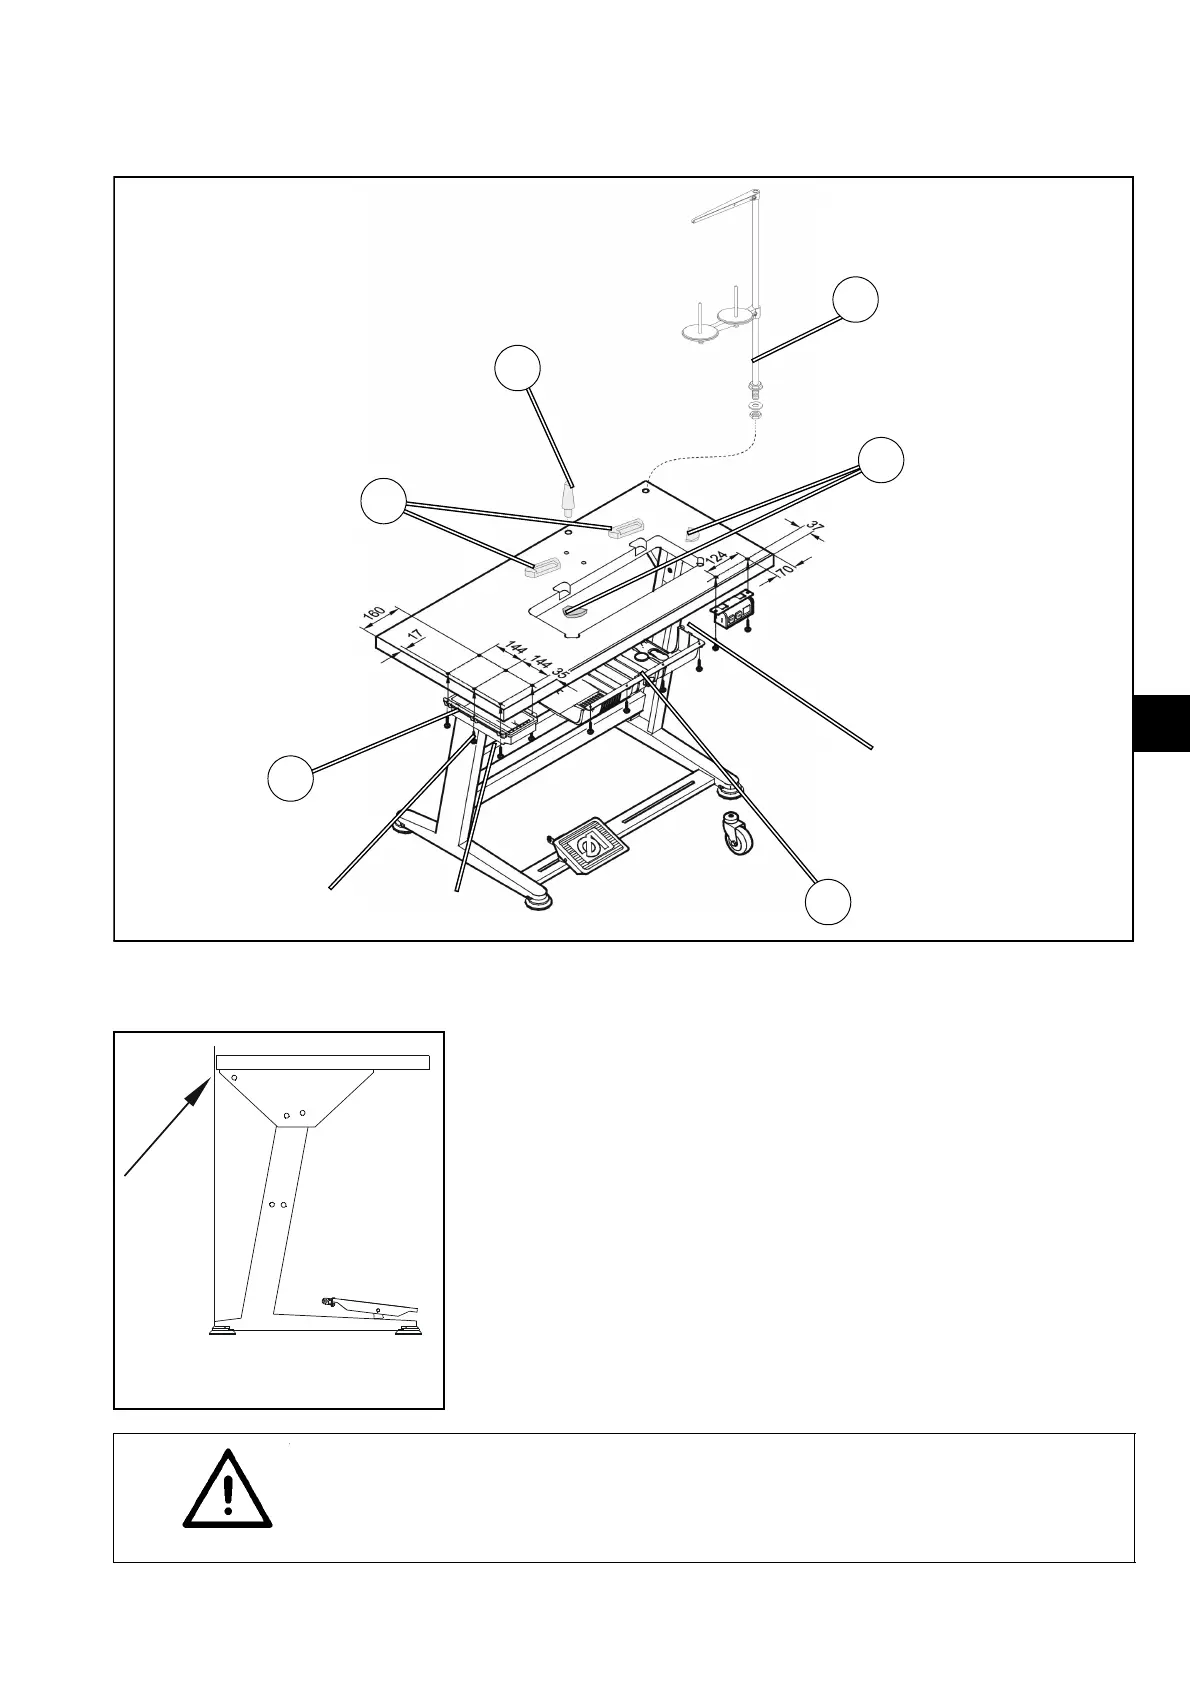
3.3 Assembling the table plate
– Screw the drawer 5 with two holders to the left side of the table
bottom.
– Fix the oil tray 4 with screws.
– Screw the main switch 3 to the right side of the table bottom.
– Insert the support 7 into the bore on the table top.
– Insert the hinge leafs 6 for the machine head into the cutout on the
table top.
– Insert the rubber corners 2.
– Fix the table top with wood screws (B8 x 35) to the stand. (Position
as shown in the diagram).
– Insert the yarn stand 1 into the bore on the table top and fix it with
nuts and washers. Assemble the spool holder and the thread guide
bar and align it. Spool holder and thread guide bar must be parallel
to each other.
ATTENTION!
The stand should be mounted as close as possible to the rear edge of
the table in order to increase the table's stability when the sewing head is
tilted (see sketch)..
3
2
1
6
4
3,5 x 17 (x 6)
5
B8 x 35(x 4)
3,9 x 15 (x 8)

 Loading...