12
Installation and Operation of: Tri-Channel Cold Pan
Installation - Tri-Channel Cold Pan - continued
III. INSTALLATION AND ADJUSTMENT OF END GLASS (end of lineup)
TOOLS REQUIRED: Phillips screw driver, 3/32 allen wrench, 7/16 wrench
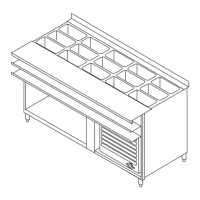
1. After the base units are installed and
leveled, place PLASTIC SPACER in END
GLASS on the outside of the GASKET and
MOUNTING ANGLE and align the holes.
NOTE: Loosen HEX HEAD BOLTS if needed
`fastening angle to the top of the unit, to
allow for adjustment.
2. Use 1/4-20 x 3/4” BOLT and 1/4-20 CAP
NUT provided in kit to fasten end glass to
the angle (2 places).
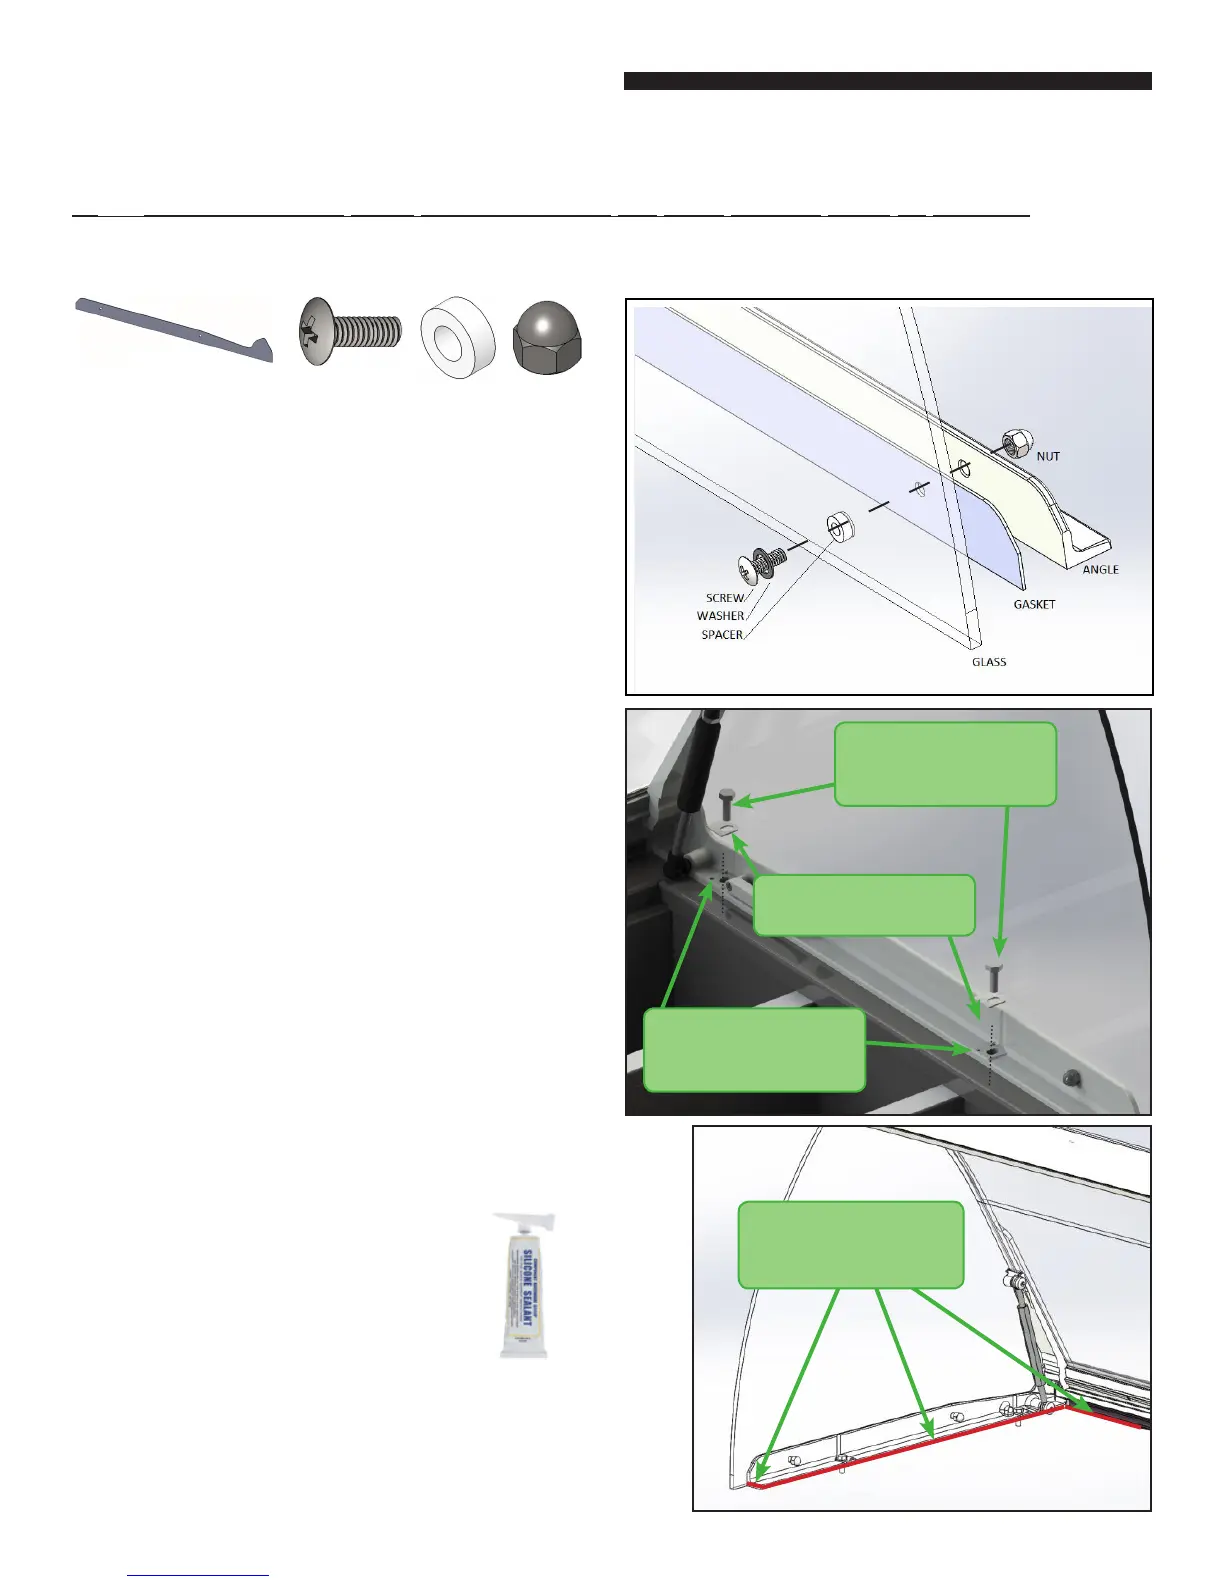
6. Apply clear Silicone
along these edges
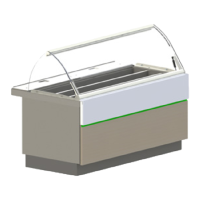
4. Hex Head Bolts
& Washers
3. Adjustment Set
Screws (4/Side)
5. Silicone under
Washer
3. If necessary, use adjusting set screws
(located next to hex head bolts) to adjust
end glass until it is aligned with the edge of
the front glass, and both edges are spaced
evenly from top to bottom.
5. Apply a bead of silicone on bottom of
stainless steel washers.
4. Tighten 4 hex bolts (2) on each side.
6. Apply a bead of clear silicone
along bottom edge of the day
cover as shown in digram at
right.
1/4-20 X 3/4”
 Loading...