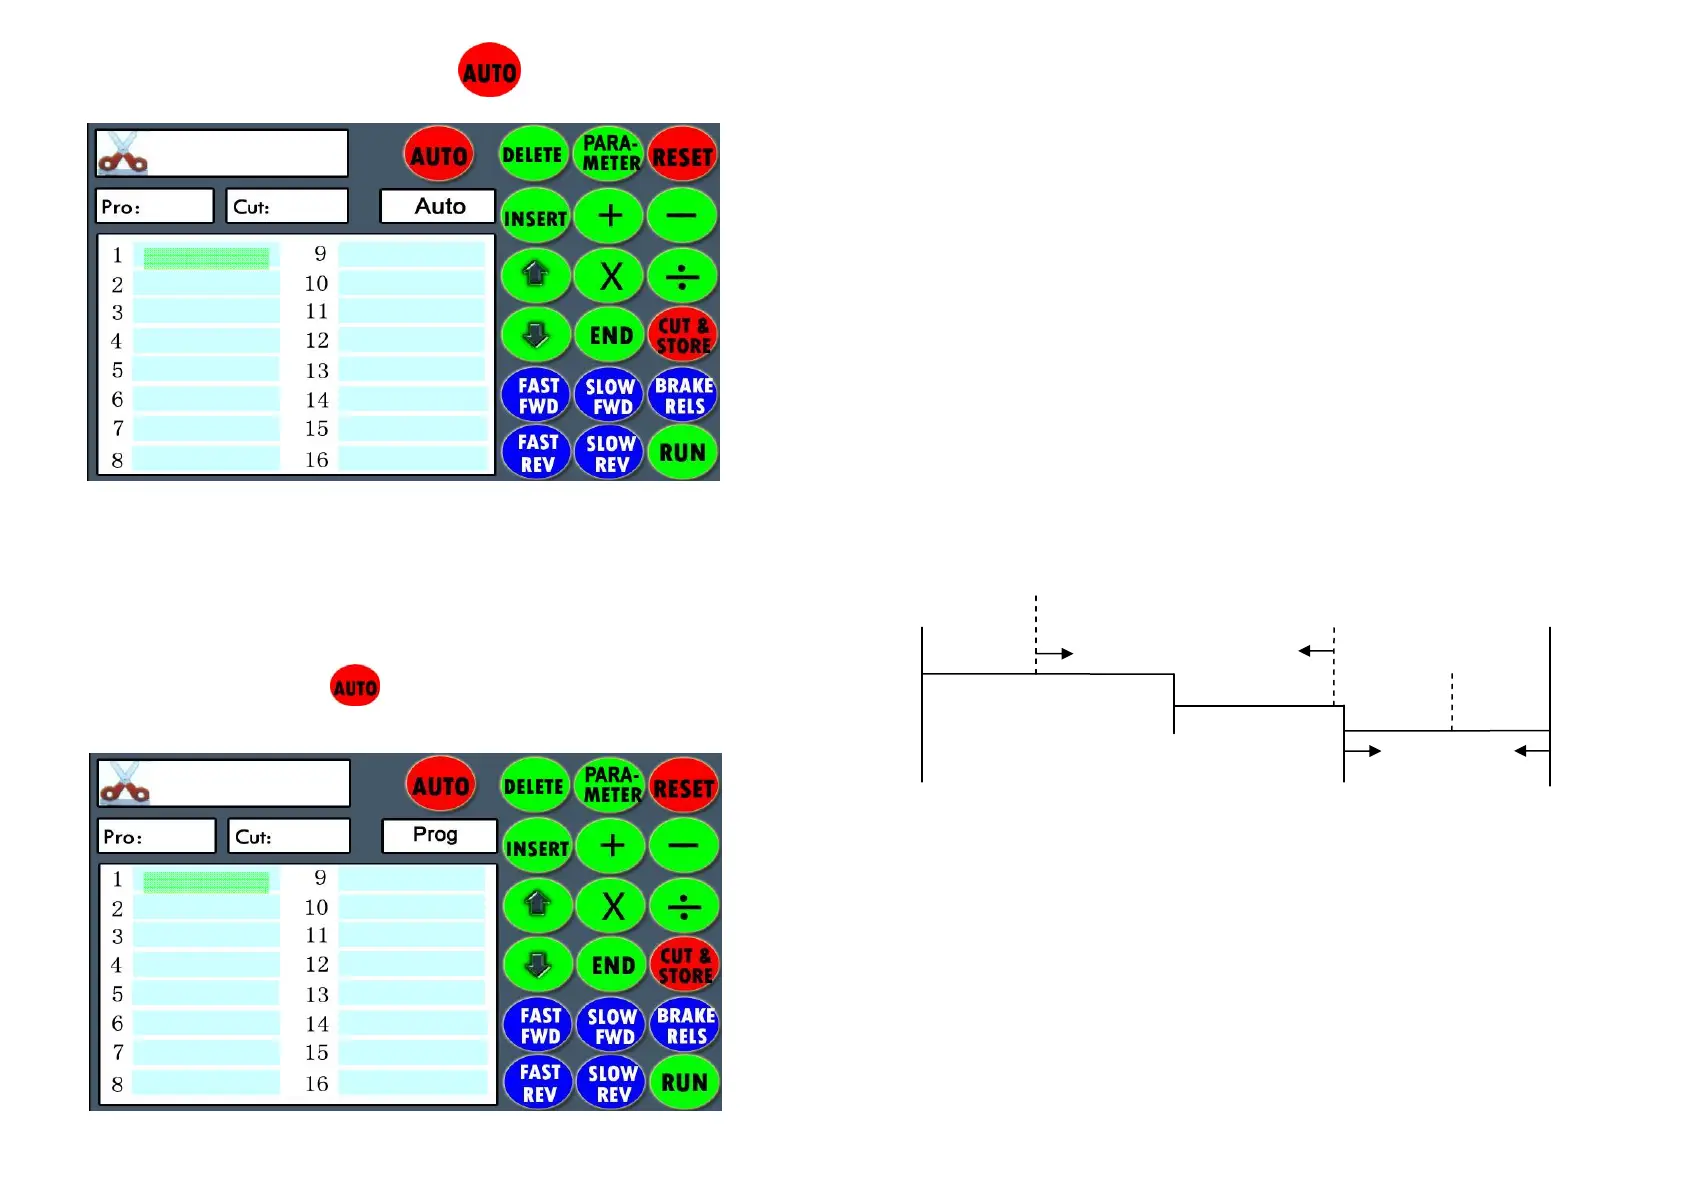
If you want to get into auto cut, press , backgauge will move to
the 1
st
cut position and the following screen appears:
Place paper and make the 1
st
cut, after finish the 1
st
cut, backgauge
moves to the 2
nd
cut position. Adjust paper and make 2
nd
cut,
backgauge moves to the 3
rd
cut position after finish the 2
nd
cut.
Adjust paper and make 3
rd
cut, after finish the cuts, backgauge
moves to the 1
st
cut position and readies itself for the next cut cycle.
After finish all cuts, press to remove the backgauge automatic
movement, AUTO disappear on the screen and screen appears:
MARK VII back gauge speed adjustment method
1. Change the Hi~Lo setting in program setting to a higher
parameter. Stop the back gauge at position over 1 mm.
2. Adjust the parameter for Hi~Lo, stop the back gauge near
between 0.5~0.8 mm.
3. When back gauge moves in low speed and stops at 0.5~0.8
mm.
4. Adjust the parameter for R5 setting till the back gauge stops at
the correct position.
First stop
point Stop point at
Hi Lo speed change 0.5~0.8mm
High speed
Low speed 1mm
Extra slow speed
~ 48~
~47 ~
15.000
5 1
15.000
13.000
8.000
0.000
0.000
0.000
0.000
0.000
0.000
0.000
15.000
5 1
15.000
13.000
8.000
0.000
0.000
0.000
0.000
0.000
0.000
0.000
15.000
13.000
8.000
0.000
0.000
0.000
0.000
0.000
0.000
0.000
0.000
0.000
0.000
0.000
0.000
0.000
15.000
13.000
8.000
0.000
0.000
0.000
0.000
0.000
0.000
0.000
0.000
0.000
0.000
0.000
0.000
0.000