49
APPENDIX
A - Troubleshooting Guide for Spine Adjustment
Note: Before you perform the spine adjustment, try to use the following methods
to correct it.
(A) Round / hollow middle through the spine
(1) Increase the certain quantity of hot-melt glue by the glue meter.
(2) Turn VR knob clockwise to increase the nipping pressure.
(B) Nail head through the spine:
(1) Decrease the certain quantity of hot-melt glue by the glue meter.
(2) Turn VR knob counter clockwise to decrease the nipping pressure.
There are two types of the spine adjustment: A1- Clamp Spine Adjustment and A2 -
Nipping Plates Adjustment. In order to make good spine of books, we suggest that
you can use the clamps / the nipping plates to hold three different amount of inner
pages. For example: 25, 150 , and 300 pages or 1/8” (3 mm), ¾” (18 mm), and 1 1/2”
(40 mm) in thickness of book block and do the adjustment accordingly.
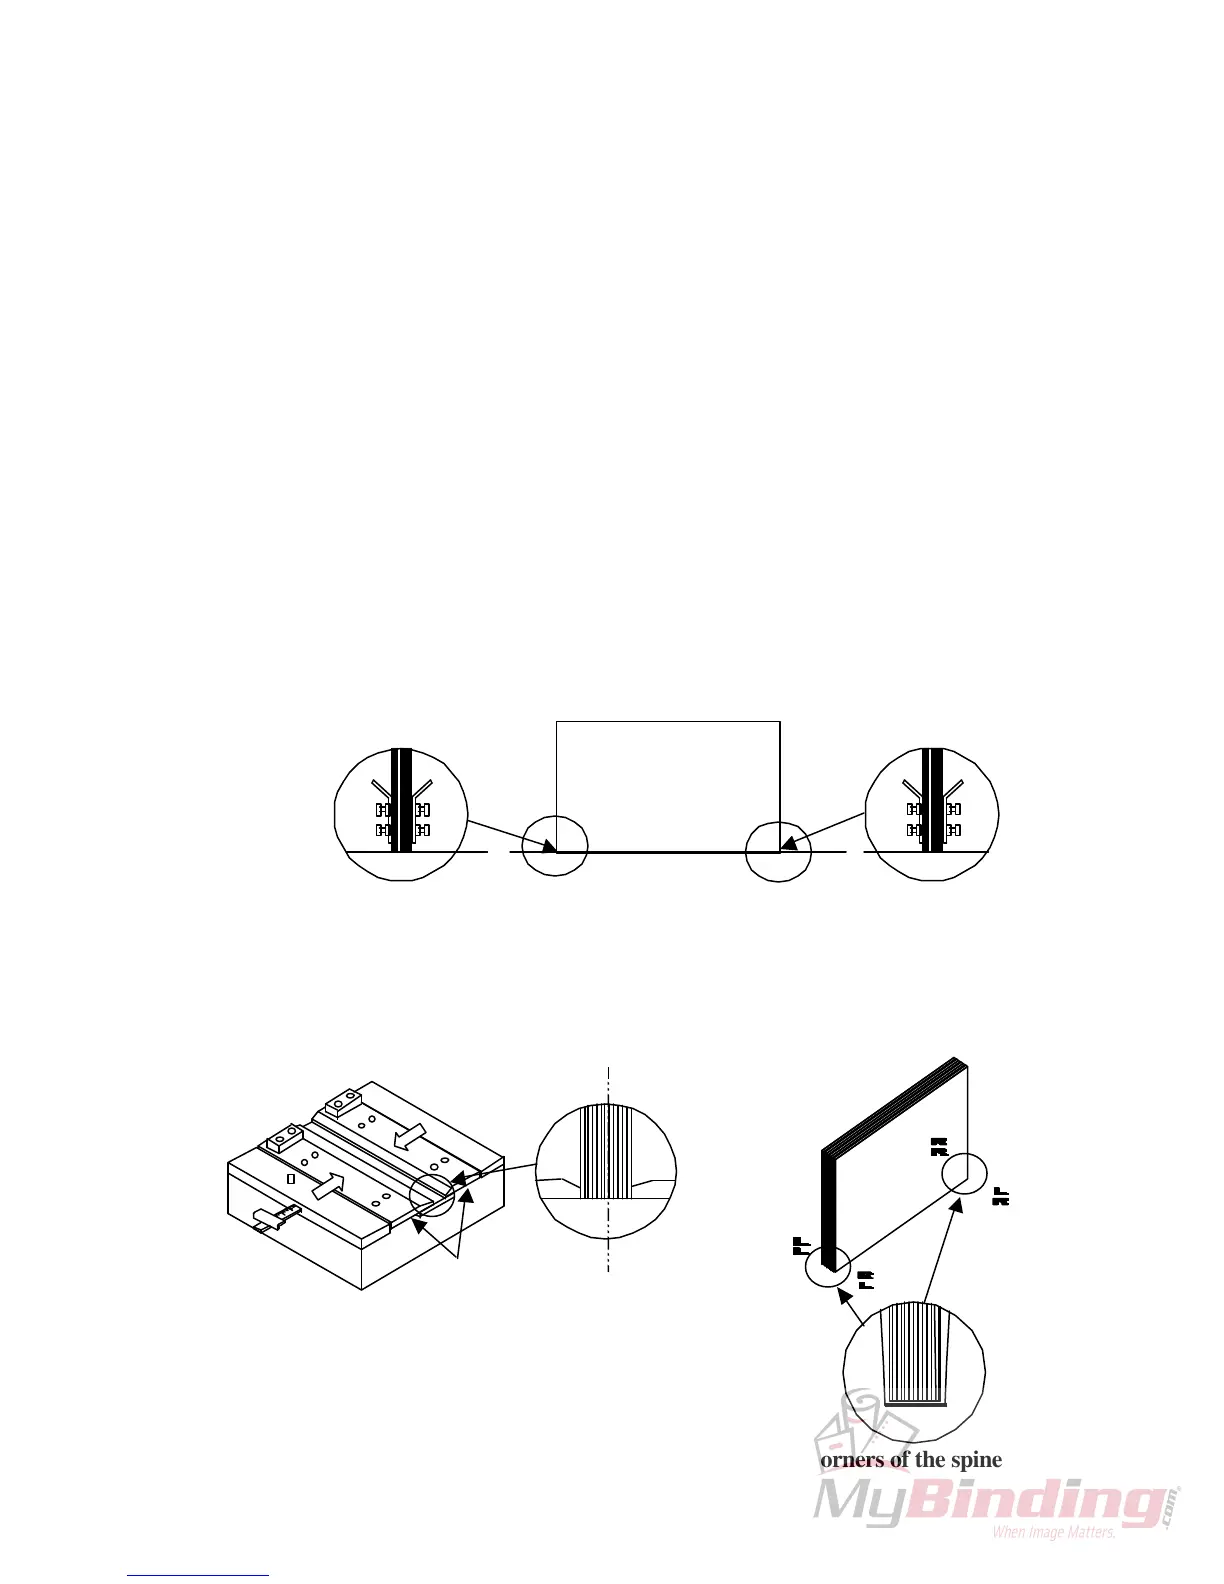
• Clamp Spine Adjustment:
Use the “CLOSE” button to hold one amount of inner pages on the clamps. Then
check if there is no gap between the nipping plate surface and inner pages as shown
below. Otherwise you need to do the adjustment for the clamps. Repeat the same
procedures for different amount of inner pages.
• Nipping Plates Spine Adjustment:
Use the “MOTOR 2” of the “TEST2” to hold one amount of inner pages on the
nipping plates. Then check if both nipping plates can evenly hold the inner pages
without off the centerline as shown below. Otherwise you need to do the adjustment
for the nipping plates. Repeat the same procedures for different amount of inner pages.
Centerline
Nipping plates
LL: Left corner of left-end spine
RL: Right corner of left-end spine
LR: Left corner of right-end spine
RR: Right corner of right-end spine
Good spine should be: LL = RL = RR = LR Four corners of the spine