1-6
11C-M12M0-0004-0
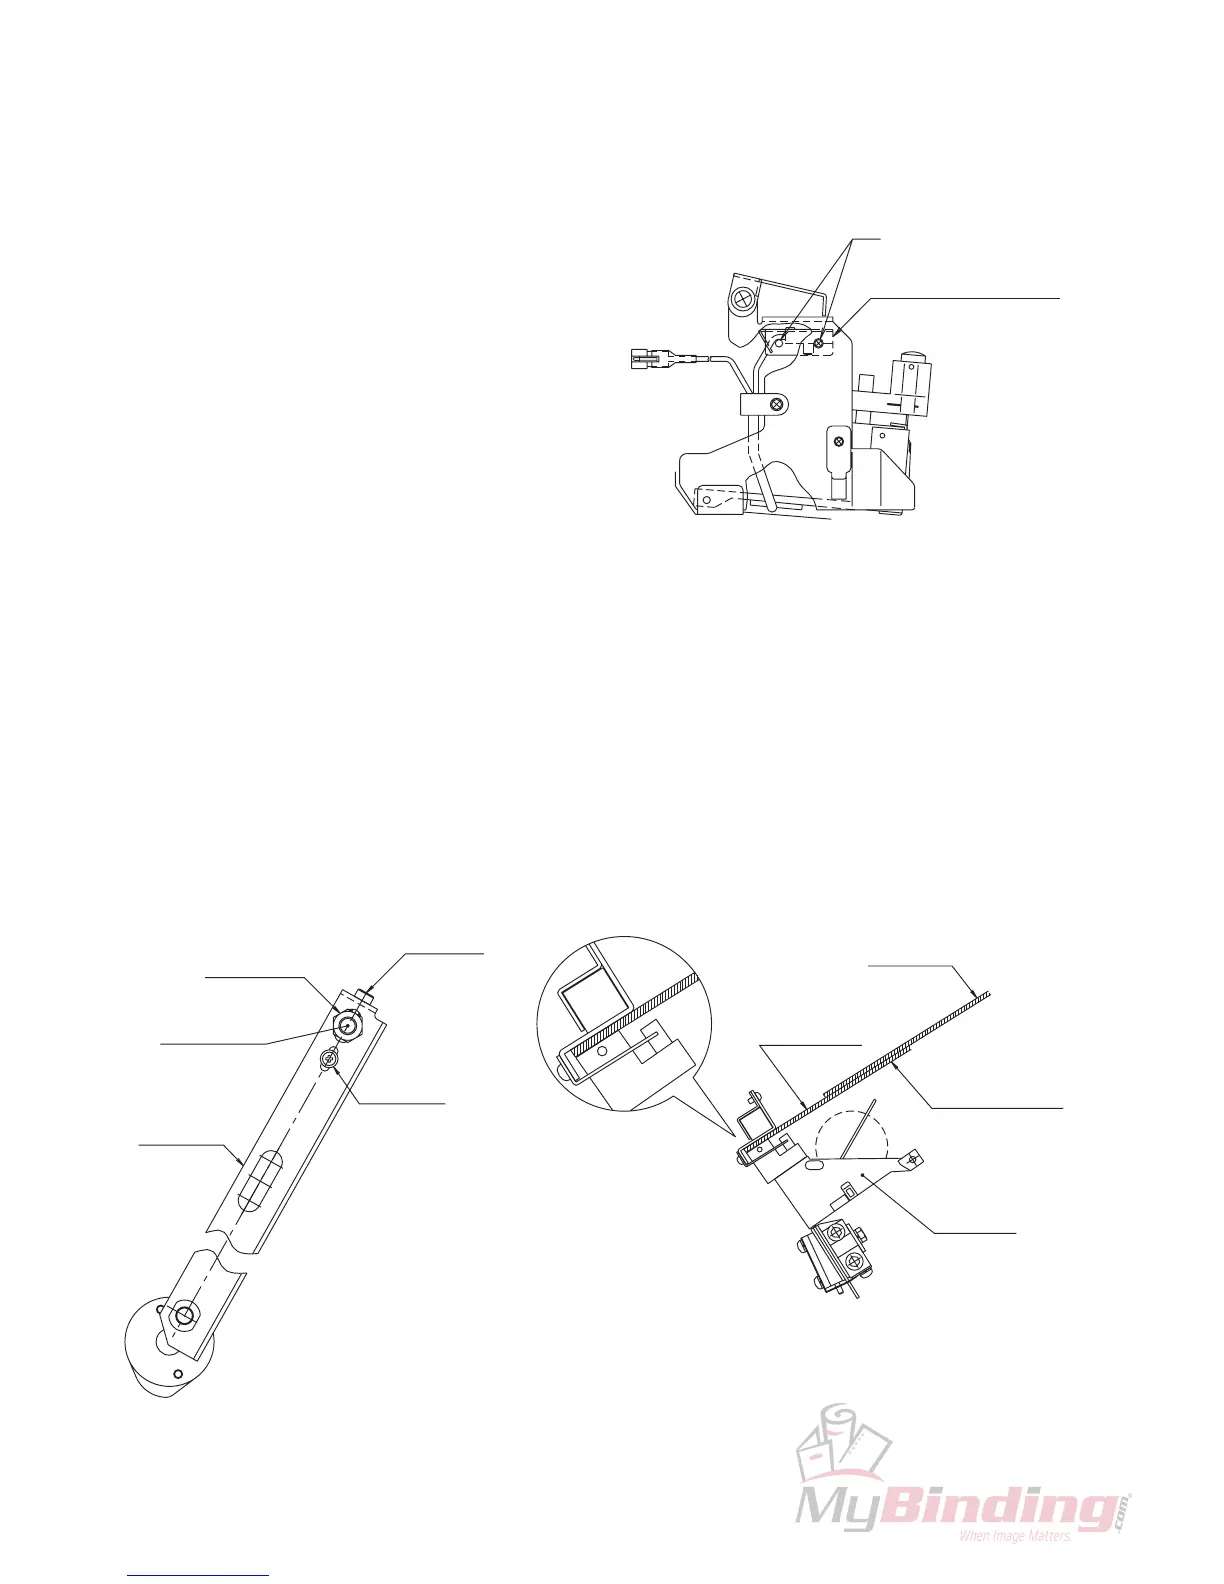
(3) Adjusting the pushing amount of the stapler
unit
Set to the stapling position (bottom dead point) and
check the pushing amount of the stapler unit by
inserting the tool.
q Remove the M3 screws, and remove the staple
remaining detection sensor (upper side).
w Set the stapler unit with the staple cartridge removed and clincher at the 140 (5" 1/2) position of the indication
label.
e Loosen the M8 nut and M4 bolt.
r Set the stapling state (bottom dead point), and check the pushing amount of the stapler unit using the tool.
As the thickness of the tool differs between the two ends, if the thinner end fits the space while the thicker end
does not, it means it has been adjusted.
∗ If both ends of the tool fit the space, rotate the adjusting screw (M4 capscrew bolt) to the left.
If both ends of the tool do not fit the space, rotate the adjusting screw to the right.
t After adjusting, tighten the M8 nut and M4 bolt, and attach the staple remaining detection sensor (upper side)
removed at q.
Staple remaining detection
sensor (Upper side)
M3
Stapler unit
98R-2004X
(2.6 mm)
Thicker end
(2.3 mm)
Thinner end
(Clearance gauge)
Tool
CFR4 × 20
11C-2036X
Rod
N8, SW8, W8
Staple bar unit
11C-2026X
MSKW4 × 8
 Loading...