GraphicProducts.com | 800.788.5572
5.2 Graphics | 13
5. Choosing Driver Settings
We recommend checking your Bronco’s settings before beginning any print job. Changes
to these settings may not take effect correctly if your label design software is already
running; we recommend closing any open programs, making the necessary changes,
and then opening your label design.
In most cases, you will only need to change these settings when you load a new type
of label stock or printing ribbon, so that is an excellent time to make the necessary
changes.
The best way to adjust these settings is through the Devices and Printers window:
1. In your computer’s Start menu, choose “Devices and Printers.” (If you do not see
this option, open the Control Panel and choose “Devices and Printers” there.)
2. Right-click the entry for your Bronco and choose Printing Preferences. The driver
settings window will open.
This window has several tabs: Page Setup, Graphics, Stock, Options, and About. (The
About tab has no options, only information about your driver software.)
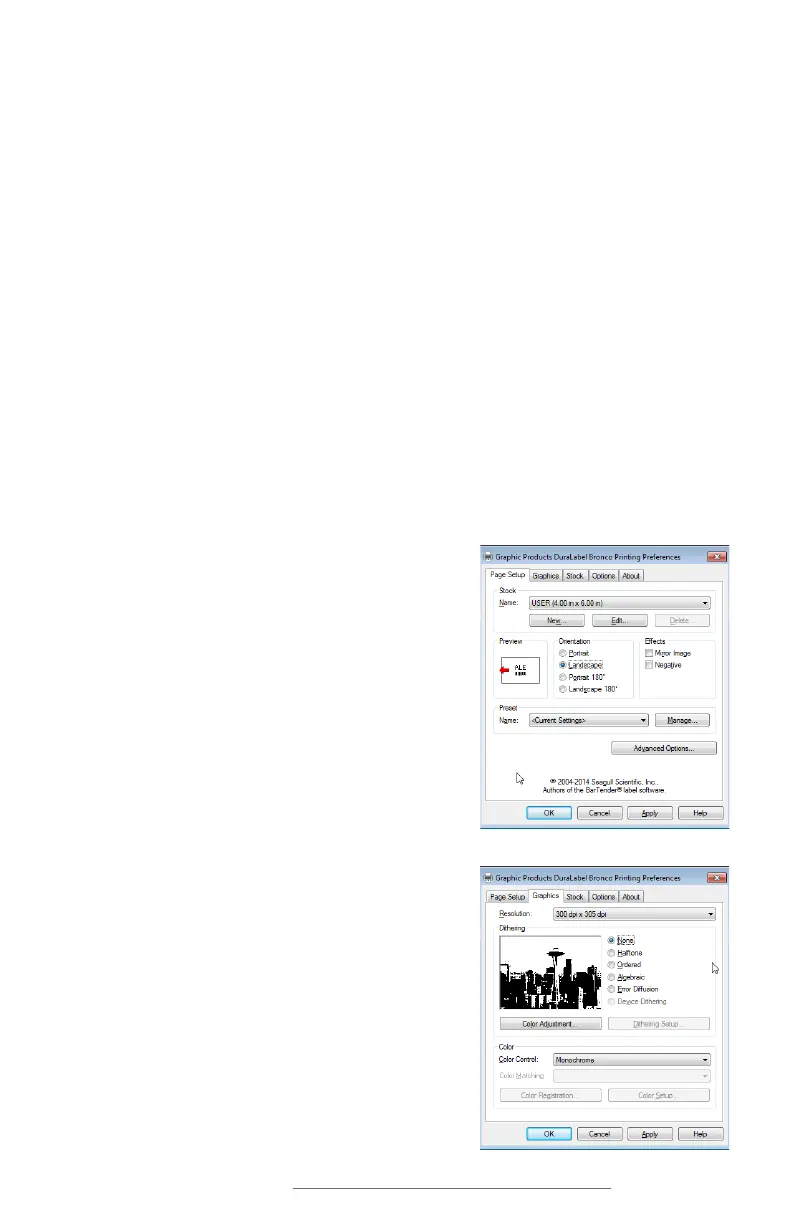
5.1 Page Setup
The first tab of the driver settings is for basic label
controls, such as print orientation. For most label
designs, the orientation will need to be set to
Landscape. The Stock Name setting, which lets you
set custom label dimensions, can be left on the
default setting (USER) when you use label design
programs such as DuraSuite or LabelForge.
5.2 Graphics
This tab includes options for Dithering, which
describes using a pattern of small dots to
approximate different levels of darkness. For bold,
clear labels, this should typically be set to None;
for complex labels with multiple shades of gray, the
Halftone option is usually best.