6
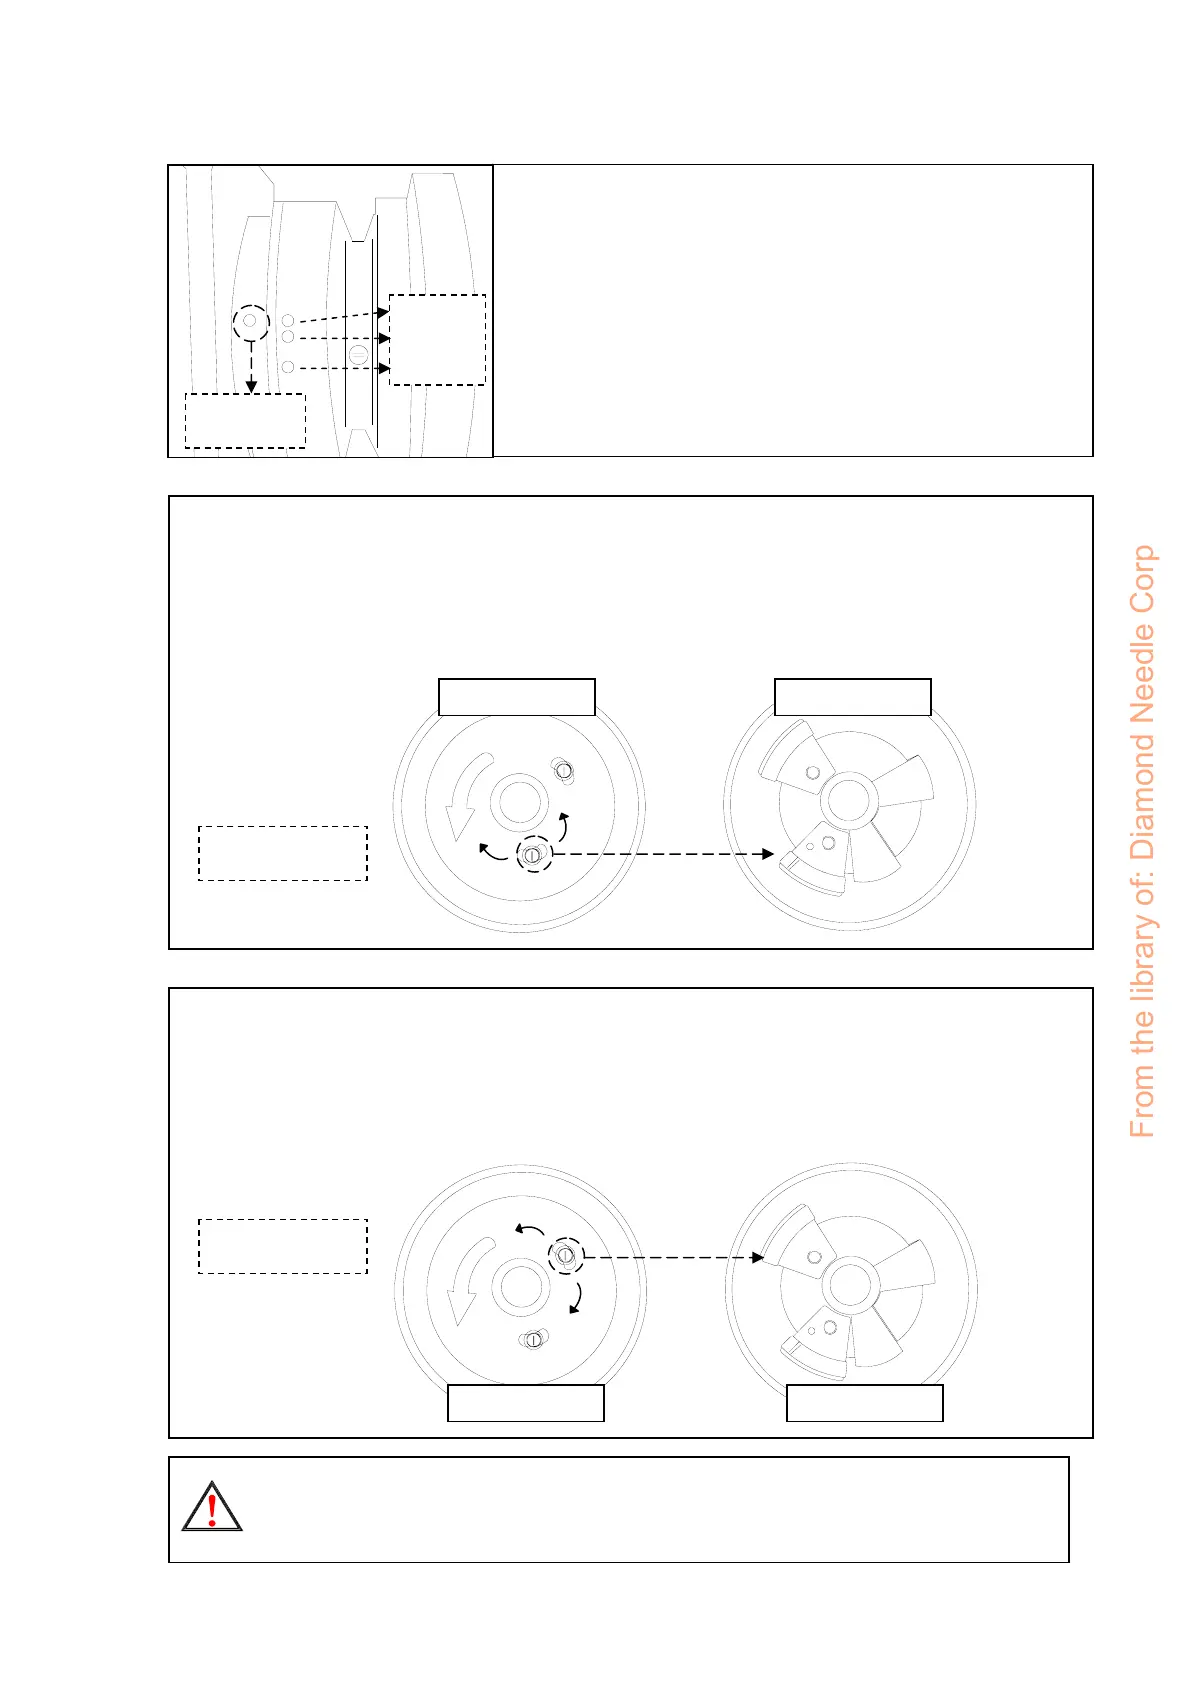
(8). Needle position adjustment :
Index dot
(a). After installing the synchronizer, toe down the pedal
and let the machine running few stitches, then check
the needle position.
(b). If motor stop at up position, the top white dot on hand
wheel should be aligned with the index dot on the
sewing machine.
Note : The dots in some machine head’s hand wheel
have different colors or different locations.
White
Green
Red
Ou
side view Inside view
Up position
(c). Up position (or position after trimming) adjustment :
Stop the needle in its highest position, loosen screw
to perform adjustment
within the slot of the screw.
1. The needle stop timing is advanced if you adjust the screw in direction Ⓐ.
2. The needle stop timing is delayed if you adjust the screw in direction Ⓑ.
Ⓑ
Ⓐ
Down position
Ou
side view Inside view
(d). Down position adjustment :
Stop the needle in its lowest position, loosen screw
to perform adjustment
within the slot of the screw.
1. The needle stop timing is advanced if you adjust the screw in direction Ⓒ.
2. The needle stop timing is delayed if you adjust the screw in direction Ⓓ.
Note :
If you have any question about needle position adjustment, please consult with the sewing machine distributor or
sewing machine mechanician.
From the library of: Diamond Needle Corp
 Loading...