Do you have a question about the Dynaudio 9S and is the answer not in the manual?
Explains safety symbols (lightning, exclamation mark) and hazard levels (Caution, Warning, Danger).
Identifies and labels all controls and connection terminals on the subwoofer's rear panel.
Detailed explanation of each control: Power, Gain, Phase, High-pass, Low-pass, and input/output types.
Instructions for setting up multiple subwoofers in a Master-Slave configuration for enhanced performance.
Step-by-step guide to connect power and switch on the subwoofer, including LED indicators.
Addresses common problems like no power, no sound, or auto-shutoff, with step-by-step solutions.
This document serves as a user manual for Dynaudio Professional Audio Subwoofers, providing comprehensive instructions for setup, operation, and maintenance. The manual is structured into three main chapters: "Before you start," "Operation," and "Optimising settings / Troubleshooting," ensuring users can easily navigate through the necessary information.
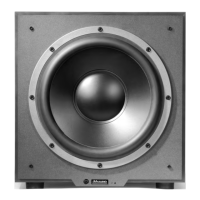
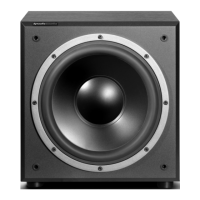
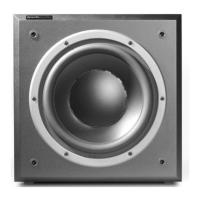
The subwoofer is designed to enhance the low-frequency response of a professional audio system, working in conjunction with satellite speakers. Its primary function is to reproduce bass frequencies that smaller speakers might struggle with, creating a more full and immersive sound experience.
The Dynaudio Professional Audio Subwoofer features a robust set of controls and connections on its rear panel, allowing for flexible integration into various audio setups. It offers both LFE/Slave and SAT/SUB input options, catering to different signal sources and system configurations.
The LFE/Slave input is specifically designed for the Low Frequency Effect channel, commonly found in surround sound systems. When a signal is connected to this input, the subwoofer reproduces these low frequencies and can also route them to a second subwoofer via the Slave output. Notably, the low-pass control does not affect signals received through the LFE/Slave input, as these signals are typically already pre-filtered.
The SAT/SUB input, on the other hand, accepts a full bandwidth signal. When connected here, the subwoofer reproduces the low frequencies from this signal. The signal is also routed to the SAT output terminals, where high frequencies are filtered according to the high-pass setting, making them suitable for connection to satellite speakers. Additionally, the signal can be routed to the Slave output for connecting another subwoofer. This input is crucial for systems where the subwoofer is responsible for bass management for the main speakers.
The subwoofer incorporates a low-pass filter, continuously variable from 50 to 150Hz, which defines the upper frequency limit of the subwoofer's output. This control is vital for achieving a seamless blend between the subwoofer and the main speakers. A high-pass filter is also available for the SAT output, with settings for Flat (no filter), 60Hz, and 80Hz. This feature helps protect smaller satellite speakers from damaging low frequencies and improves their overall performance.
Phase adjustment, with settings for 0° and 180°, allows users to fine-tune the phase relationship between the subwoofer and the main speakers. This is critical for preventing cancellations or boosts in the overlap frequency range, which can lead to an uneven bass response.
The subwoofer also includes a Gain control for adjusting its volume level, ensuring it can be balanced with the rest of the audio system. An auto ON/OFF feature allows the subwoofer to switch on automatically when an input signal is detected and enter standby mode after a period of inactivity, promoting energy efficiency.
Setting up the subwoofer begins with careful unpacking, ensuring all accessories are present and the unit is handled gently. The manual provides a step-by-step guide for safely removing the subwoofer from its packaging.
Connecting a single subwoofer can be done in two primary ways: as an LFE channel or as a subwoofer for satellites. For LFE channel use, the signal is connected to the LFE/Slave input. For satellite integration, the full bandwidth signal is connected to the SAT/SUB input, and the Mode switch is set to LFE. Both connection types can be used simultaneously, with the subwoofer intelligently combining and routing the signals.
For larger rooms or challenging acoustic environments, multiple subwoofers can be connected in a Master-Slave configuration. The first subwoofer acts as the "Master," with its Mode switch set to LFE, and subsequent "Slave" subwoofers are connected via XLR cables from the Master's Slave output to their LFE/Slave input, with their Mode switches set to Slave. This setup allows the Master subwoofer to control the settings of all connected Slaves, simplifying system calibration. Alternatively, multiple subwoofers can be used with individual control by setting each to LFE mode and using a Y-connector from the source.
Connecting loudspeakers involves routing the signal from the subwoofer's SAT output to the inputs of the power amplifier driving the main speakers. This ensures that the high-pass filtered signal reaches the satellites, optimizing their performance and protecting them from excessive low-frequency demands.
Operation of the subwoofer involves switching it on, adjusting the volume (Gain), selecting the appropriate low-pass filter frequency, setting the phase, and choosing the satellite cut-off frequency (high-pass). The Power switch on the rear panel allows for manual ON/OFF control, while the Power mode switch (ON/AUTO) determines whether the subwoofer is permanently on or activates automatically upon signal detection. The status LED indicates the current operational mode (red for standby/mute, green for active).
Adjusting the Gain control is crucial for balancing the subwoofer's output with the main speakers. The low-pass filter frequency should be set to blend seamlessly with the main speakers, typically between 50 and 150Hz. The phase setting (0° or 180°) is adjusted by playing a bass-rich track and toggling the switch to find the setting that yields the most consistent bass response. The high-pass filter for the satellite output should be selected based on the capabilities of the main speakers, with options for Flat, 60Hz, or 80Hz.
The manual emphasizes the importance of proper maintenance to ensure the longevity and optimal performance of the subwoofer. Cleaning the subwoofer should only be done when the unit is switched off and unplugged from the mains power to avoid electric shock or damage. The cabinet and other plain parts can be cleaned with a soft, dry, or slightly damp cloth, while a fine furniture brush can be used for dusting the woofer diaphragms.
The manual also provides clear instructions for changing the fuse, a critical maintenance task. It warns against using the wrong fuse type, as this can lead to overheating and fire hazards. The fuse is located on the rear of the subwoofer, below the mains power input. The process involves switching off the mains power, unplugging the power cable, pulling out the fuse holder, replacing the fuse with one of the same type and rating, and then firmly pushing the holder back into position.
Troubleshooting guidance is provided to help users diagnose and resolve common issues, such as the subwoofer switching off during playback, failing to switch on, or producing no sound. The checklist covers verifying cable connections, checking bass management settings on the source, and adjusting volume levels. This proactive approach helps users address minor problems before needing to contact professional support.
The warranty information outlines the coverage period for defects in components and workmanship, which varies depending on the purchase location (two years within the EU, one year outside the EU). It also specifies conditions that would void the warranty, such as unauthorized repairs, mechanical damage, misuse, or operation with incorrect power. This section ensures users are aware of their rights and responsibilities regarding product care and service.