_ _CHANGING THE
34
STEP 5
INSERTING A NEW CARTRIDGE
(Video available on your personal client page)
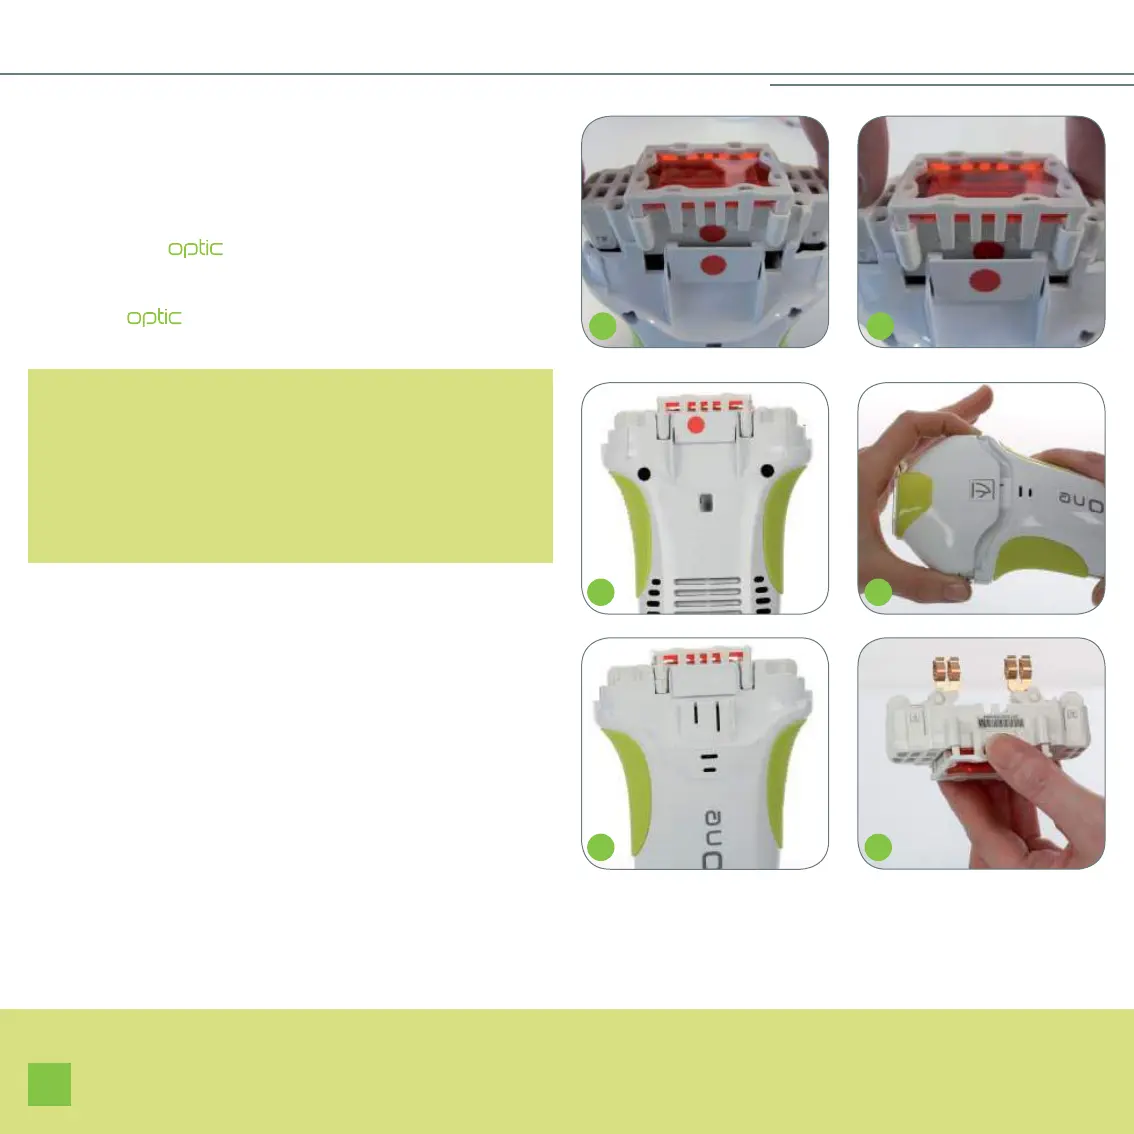
• Take the new cartridge and check the direction for
inserting this new cartridge.
• Align the cartridge with the applicator with the help
of the red dots (28).
NOTE: The cartridges are not symmetrical, so they must
be inserted in a specific way, and certainly not any other
way. To help find your way, a red dot indicates the part
underneath the cartridge. This dot must be oriented to
match the side of the applicator that contains a ventilation
grid, which is also marked by a red dot. You must therefore
align the 2 red dots.
• Push it into the slide way of the applicator by pressing on
both sides (29), so as to ensure that it is properly maintained
(30).
• Re-attach the mobile part of the applicator by pressing
simultaneously on the locking tabs of the mobile head (31)
making sure to align the internal red dot on the head with the
red dot on the applicator.
• After attaching the cartridge, you must make sure that it is
positioned correctly: it must be aligned to the fix part of the
applicator (32).
If this is not the case (if it overtakes by more than 2 mm),
it means that the cartridge was inserted incorrectly: you
must take it out and check that:
28
29
30
31
32
33
S
S
S
S