Do you have a question about the Eaglemaster E5 G7 and is the answer not in the manual?
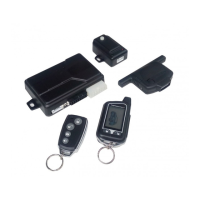
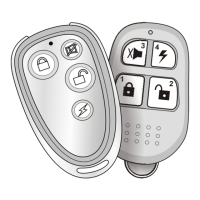
Describes the buttons on the remote transmitters and their functions.
Explains how to arm the vehicle using the simple remote and its indicator lights.
Details the process of disarming the system with the simple remote and its indicator feedback.
How to open the car trunk remotely using the simple 2-way remote.
Activating panic mode on the simple remote for emergencies.
How to arm the system silently using the simple remote.
Describes the standby anti-hijack mode activated via the simple remote.
Explains the remote activation of the anti-hijack feature.
How to enter and exit Valet mode using the simple remote.
How to bypass the Zone-1 sensor using the simple remote.
Using the simple remote to locate the vehicle.
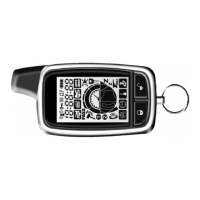
How to enable or disable battery conserve mode on the 2-way remote.
Locking and unlocking buttons on the 2-way remote to prevent accidental activation.
Enabling or disabling the vibrate feature for the 2-way remote.
Confirmation page sent from the system upon receiving a command.
How to clear page alerts and notifications on the remote.
Step-by-step guide to arm the vehicle security system.
How the system bypasses and alerts for defective zones when arming.
System behavior after a violation, including reset and continuous protection.
Arming the system without audible chirps for discretion.
Guide to disarm the vehicle security system.
How the system indicates intrusion attempts via siren and lights.
How the 2-way LCD remote indicates intrusion alerts.
Disarming the system without audible chirps.
How to activate silent arming mode for the system.
System feature that automatically rearms if doors are not opened after disarming.
Describes the passive arming feature and its operation.
Activating panic mode for immediate attention in emergencies.
Explanation of how the dual-stage shock sensor operates and detects impacts.
How to bypass the Zone 1 sensor remotely.
How to bypass the Zone 2 sensor remotely.
Using the system to locate the vehicle.
Instructions for entering and exiting Valet mode.
Automatic door locking/unlocking based on ignition status.
How the passive immobilizer prevents engine starting.
Arming/disarming the system using the original key or valet switch.
Methods to arm the system without using the remote control.
A two-step process for disarming the system, potentially silencing triggers.
Using the remote to open the car's trunk.
How to enable or disable siren chirps for system events.
How the system retains settings after power loss.
Functions controlled by the positive input wire, like reverse warning.
Explanation of the LED indicator's blinking patterns based on time.
Using the vehicle's horn for system alerts.
Procedure for emergency system reset, typically for installers.
Automatic window closing feature when arming the system.
Unlocking passenger doors as a second stage function.
How to operate a channel remotely and exit the latched state.
Control of the dome light upon system disarming.
System outputting when triggered, for pager notification.
Keeping the engine running while the vehicle is armed.
Feature to keep the engine running for turbo cool-down after parking.
Programmable time output for Channel 6, controlled by remote buttons.
Programmable time output for Channel 7, controlled by remote buttons.
How the system controls parking light flashing for arming/disarming.
Manual disarming procedure using the Valet switch.
Manual disarming procedure using a pre-set PIN code.
Activating anti-car-jacking mode remotely.
Activating anti-car-jacking mode via door switch standby.
How door switch activity triggers anti-car-jacking mode.
A table detailing the system's response in anti-car-jack mode.
Steps to access and change the system's programmable features.
Guidelines for selecting an appropriate location to mount the control unit.
Recommendations for installing the shock sensor for optimal detection.
Wiring for factory-installed central door lock systems.
Wiring for directly connecting a 2-wire actuator for door locks.
Wiring for central door locks with built-in electric switches.
Wiring for vacuum-type central door lock systems.
| Brand | Eaglemaster |
|---|---|
| Model | E5 G7 |
| Category | Car Alarm |
| Language | English |