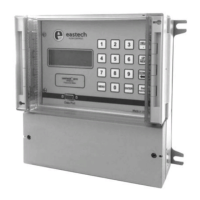
Vantage Series 2200
>03) Status Continued
05) History: View logged data in graphic form for each of the eight channels
available to log. Select the channel to be viewed by pressing the number
on the keypad. Press the UP or DOWN key to scroll through the data.
06) Daily Sum: View the Average, Minimum and Maximum flows and the
time of the event for the last eight days of flow.
Press the ENTER key to return to the main program menu.
>04) Data Logger
The next selection in the program menu is the data logger selection. There are
five selections in the data logger menu.
1) Set Time/Date. Press the UP key to move the arrow to the date or time
that is to be changed. Press the number value on the key pad to change.
Note the time is entered and viewed as military time.
2) Storage Rate. This will allow the user to select the storage rate for the
logging. Selections are:
01) 1 minute 03) 10 minute 05) 30 minute
02) 5 minute 04) 15 minute 06) 60 minute
3) Secondary. This will allow the user to select a secondary log rate to store
logging at a different interval than the main interval. This may be used to
store at faster intervals during storms or flow events. The selections
available are:
01) Not active 02) Setpoint #1 03) Setpoint #2 04) Setpoint #3
If setpoints are selected then the next screen will be storage rate times
available.
4) Log Channels. There are up to 8 channels available for logging. The
selections for each channel are:
01) Not Used 04) Flow 1 07) Total 2 10) Sensor2 Temp
02) Level 1 05) Flow 2 08) Setpoints 11) Lvl1-Lvl2
03) Level 2 06) Total 1 09) Sensor 1 Temp
5) Clear Data. Press the 5 key to clear all stored data.
2200 Data Logger Download Program
Refer to the Data Download software manual for instructions in retrieving the data
from the meter.
3-9
>04) Data Logger
 Loading...