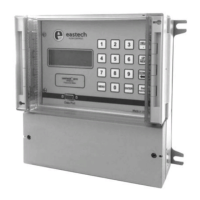
Vantage Series 2200
>6 Calibration
The next option in the programming menu is Calibration. The options
available in the Calibration menu are:
01) Flow Simulation: The flow simulation screen will allow the user to
check the flow curve programmed into the unit. Enter the flow level in
the engineering units displayed. The Flow line will display the flow at
the entered interval. If the flow displayed is different than expected
check the programming of the flume, weir or special H/Q programming.
Pressing the UP key will allow the user to test the totalizer function.
02) 4-20 Adjustment: To adjust or calibrate the 4-20mA DC output, Press
the 1 key. The screen shown on the left will appear.
To adjust Zero: Press the 5 key, the cursor arrow will appear before the
5) 4 mA line. Press the 3 key for coarse adjustment or the 4 key for fine
adjustment. Now press the 1 key to adjust the mA upwards or the 2 key
to adjust downwards.
To adjust Span: Press the 6 key, the cursor arrow will appear before the
6) 20 mA line. Press the 3 key for coarse adjustment or the 4 key for
fine adjustment. Now press the 1 key to adjust the mA upwards or the 2
key to adjust downwards.
03) Sensor Cal: This option will allow the user to calibrate the system by
measuring the distance between the face of the sensor and the target (or
water) and adjusting the displayed distance value up or down with the 1
or 3 key to calibrate the unit to the correct distance of the target.
There is a Near and Far distance adjustment when calibrating the meter.
The Near distance adjustment should be made with a target being at least
the offset value from the face of the sensor. This distance should be no
more than 36 inches. The meter automatically determines the distance is
less than 36 inches. Use the 1 or 3 keys to adjust the displayed distance
value to the actual target distance. Should the distance be greater than 36
inches, the meter can be forced into the Near adjustment mode by
pressing the 4 or 6 keys. “Near” is displayed when the 4 or 6 key is
pressed.
The Far distance adjustment should be made with a target being at the
Vertical Mounting (Vmt) value or at least 37 inches from the face of the
sensor. Use the 1 or 3 keys to adjust the displayed distance value to the
actual target distance. The meter automatically determines the distance is
than 36 inches. Should the distance be less than 36 inches, the meter can
be forced into the Far adjustment mode by using the 7 or 9 keys instead
of the 1 and 3 keys. Far is displayed when the 7 or 9 key is pressed.
The Near and Far adjustment may need to be made several times until
distance readings are correct for both adjustments without making
adjustments to either.
3-11
>06)
Calibration
>1) Up 2) Down
. . . . . . . . . . . . . . . .
>3) Coarse 4) Fine
>5) 4 mA 6) 20 mA

 Loading...