EN 34
Fitting the Accessories
CAUTION!
• Always disconnect the device from the mains power before you change or adjust
any accessories.
• Keep the collet, clamping nut, shanks of the attachments and all threads clean at all
times to ensure that the attachment fi ts securely.
Fitting the Handle and Edge Trimming Unit
1. Remove all accessories that may be fi tted from the motor unit (1).
2. Release the quick clamping lever (n) of the handle (5) and
push the clamping ring (m) as far as it will go onto the mo-
tor unit. Make sure that the spindle lock (f) is located in the
recess of the clamping ring.
3. Turn the quick clamping lever in such a way that it is re-
cessed in the matching recess of the clamping ring so that
it cannot be released accidentally during operation.
4. Release the quick clamping lever (j) of the edge trimming
unit (4) and push the clamping ring (i) as far as it will go
onto the tapered end of the motor unit.
5. Rotate the quick clamping lever if necessary and turn it
over so that the edge trimming unit is fi xed in place.
• Proceed in the reverse order for dismantling.
You can also use the edge trimming unit without a handle fi tted. This is particu-
larly advisable for assignments in confi ned spaces.
Fitting the Cutter to the Motor Unit
WARNING!
• Beware of sharp cutting edges! Wear protective gloves when inserting or removing
the cutter.
• Tighten the clamping nut (e) only when the attachment is fi tted. Otherwise the collet
could be damaged.
1. Press the spindle lock (f) and turn the clamping nut (e) with the spindle until it en-
gages.
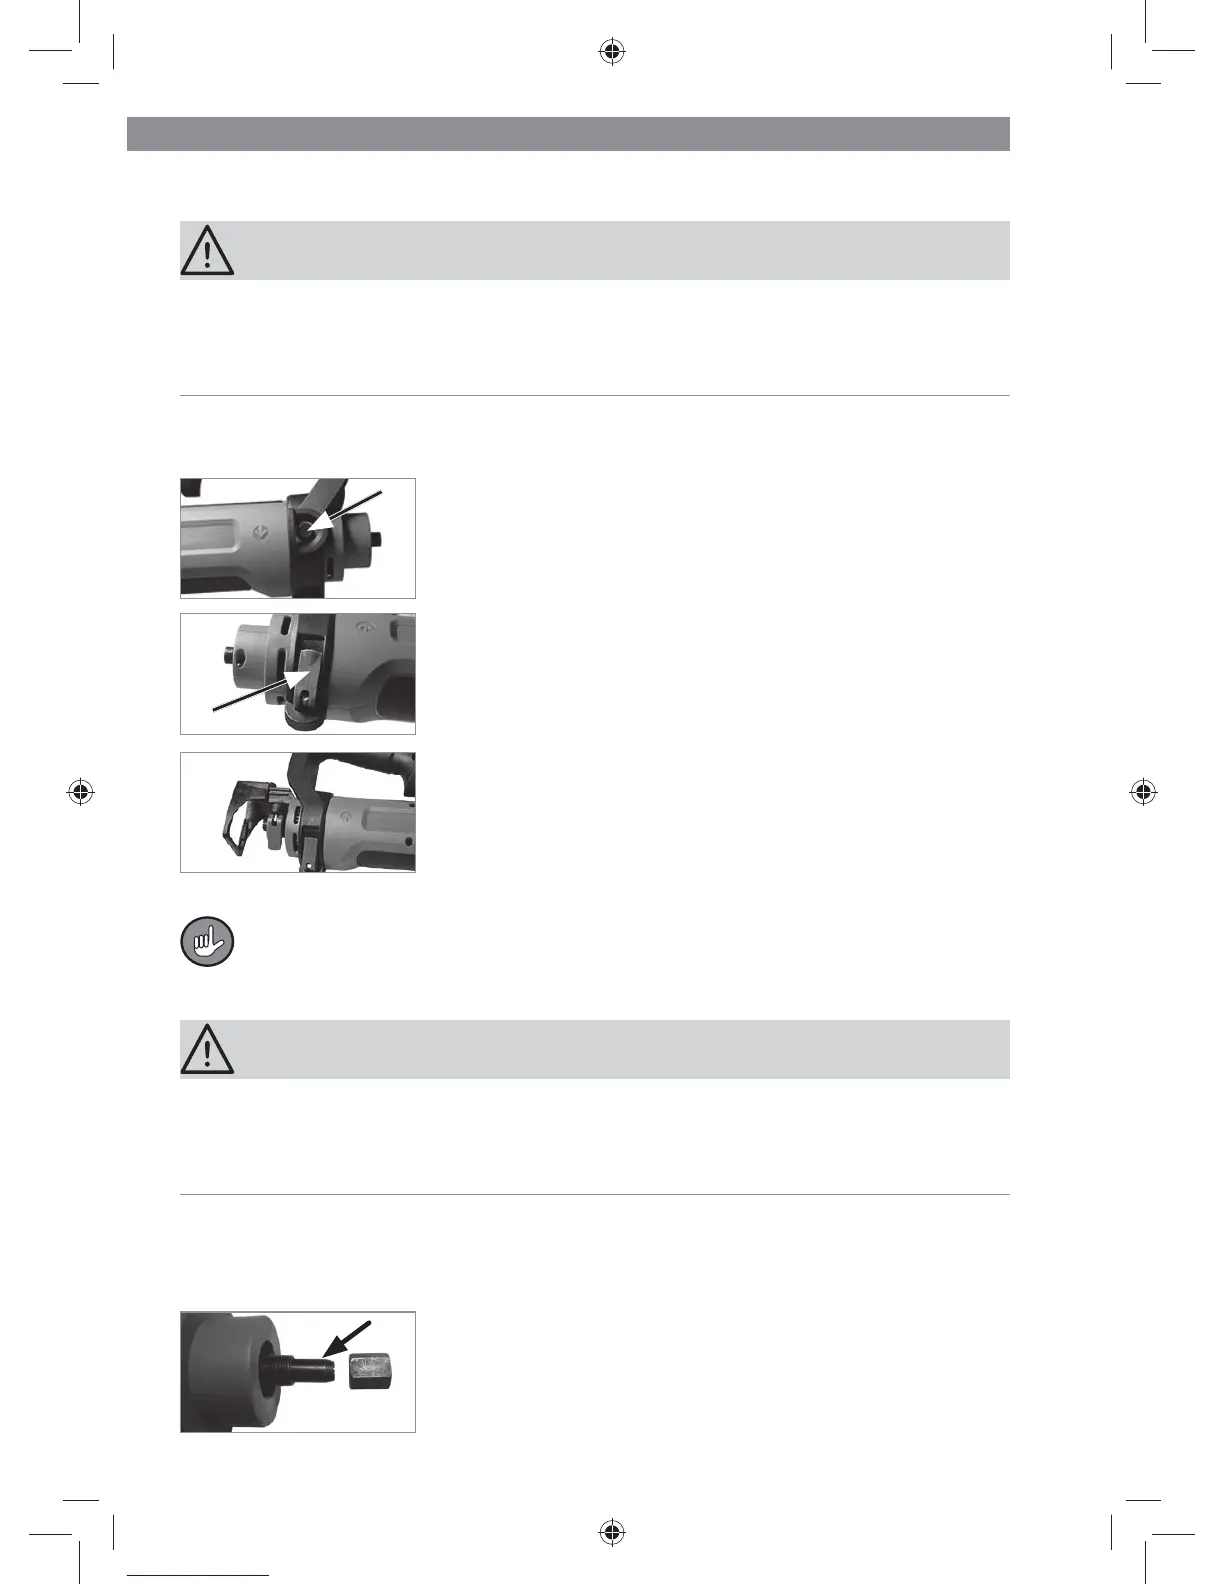
2. Undo the clamping nut. Use the open-jaw wrench (6) supplied to do this.
3. Make sure that a collet (7 – 9) in the correct size has been
inserted. If necessary, fully unscrew the clamping nut and
replace the collet. Then screw the clamping nut back on,
but not tight.
03906_de-gb-fr-nl_A5_V2.indb 3403906_de-gb-fr-nl_A5_V2.indb 34 18.08.2015 09:40:4718.08.2015 09:40:47
 Loading...