35 EN
The collets are the same size at both ends, which means it does not matter which
side is pushed in fi rst.
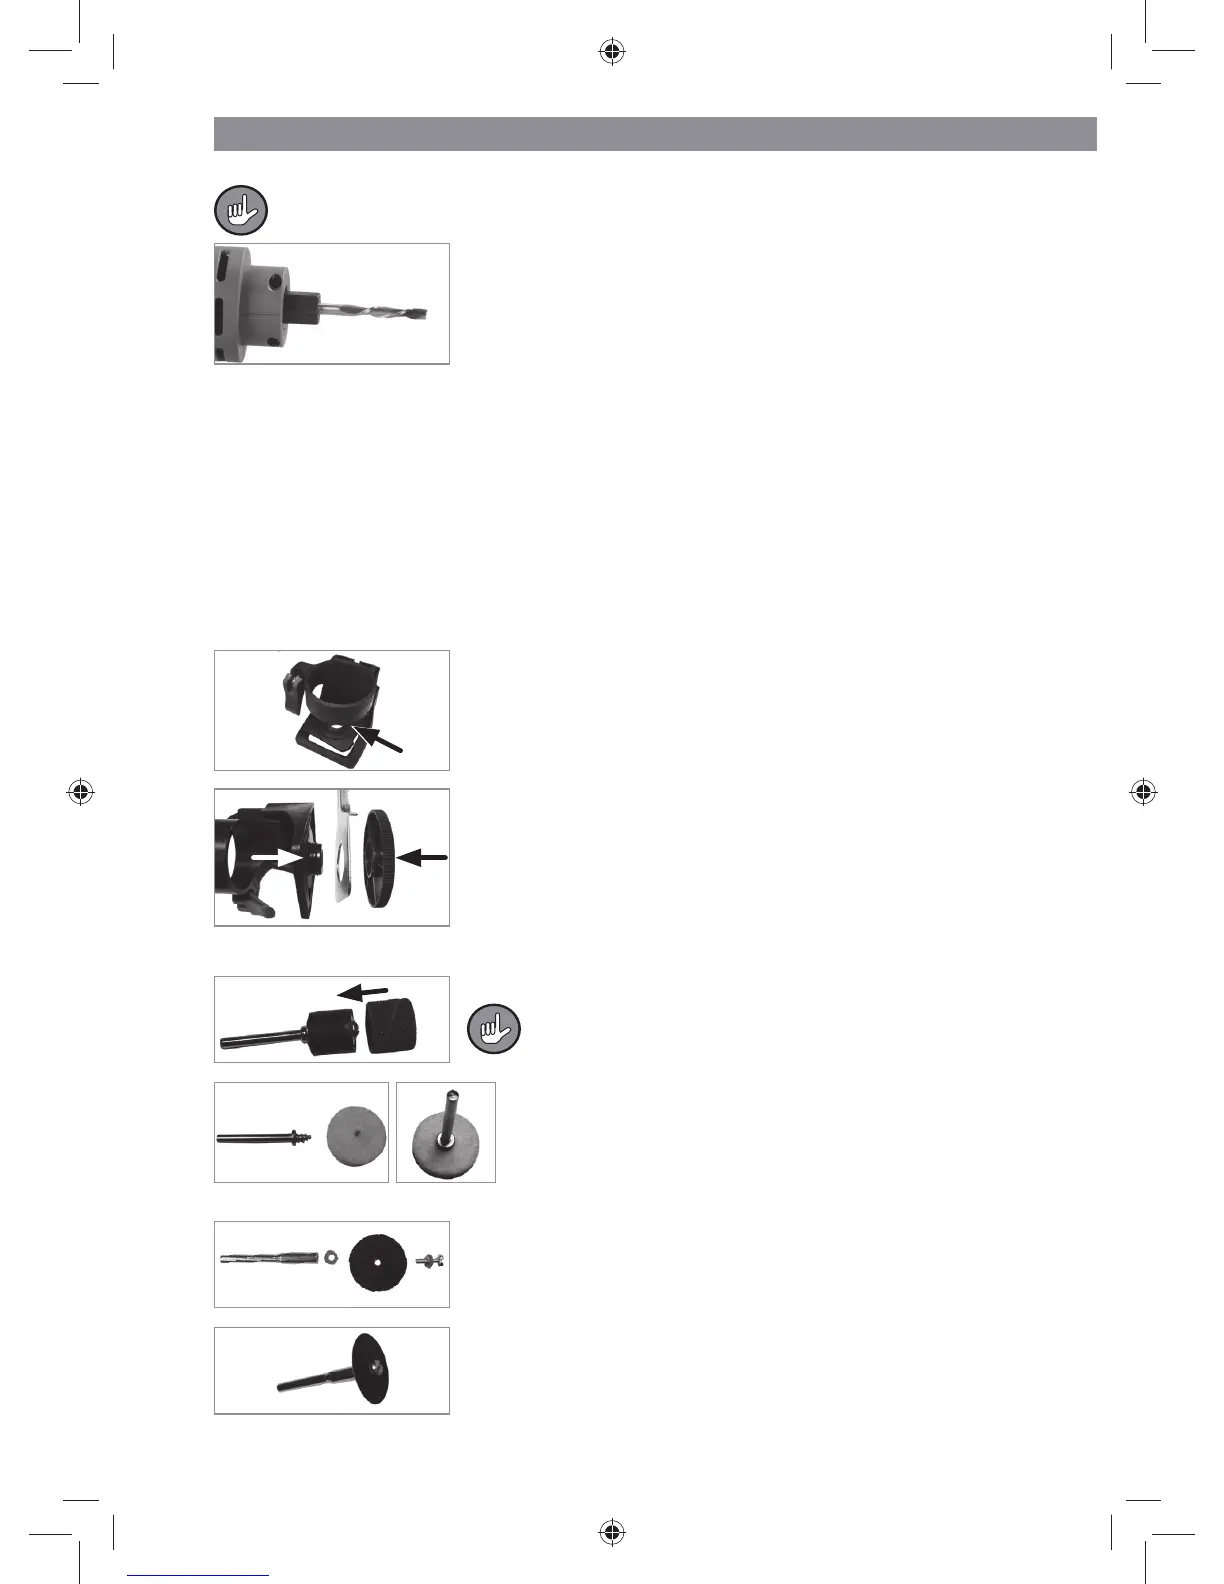
4. Push the shank of the cutter (11 – 13) into the collet. Half
or at least 2 cm of the shank must be recessed in the col-
let. But make sure that it is not pushed in too deep. The
cutting edges must not be in the collet.
5. Tighten the clamping nut using the open-jaw wrench.
CAUTION: Do not overtighten the clamping nut! The
collet or spindle lock could be damaged as a result.
• To remove the cutting attachment again, press the spindle lock and undo the clamp-
ing nut. Then remove the cutter. If it is not possible to remove it straight away, gently
tap on the clamping nut until it is released.
Fitting the Router Compass
The router compass (3) is attached to the edge trimming unit (4).
1. Remove the edge trimming unit from the motor unit.
2. Unscrew the round plastic disc from the router compass.
3. Insert the square mating part into the edge trimming unit.
It must be recessed to fi t precisely. The thread faces out-
wards.
4. Place the router compass onto the edge trimming unit and
screw the round disc onto the thread. Make sure that the
edge trimming unit is not tilted and can be rotated.
• Attach the edge trimming unit to the motor unit (see above).
Assembling Attachments
• Push an abrasive sleeve (16) onto the grinding roller (31).
To make it easier to remove the abrasive sleeve from
the roller, hold the attachment under cold water.
• In the middle of the polishing felt pad (20) there is an
opening. Rotate the thread of the pin (30) as far as it
will go into the opening.
• The cutting disc (19) and abrasive disc (17, 18) is fi xed on the pin (29) with a screw:
1. Undo the screw from the front side of the pin. Use the
screwdriver (14) to do this.
2. Remove one of the two washers.
3. Push on a cutting disc or abrasive disc and then push
the washer back on.
4. Rotate the screw into the front side of the pin.
• The other attachments are complete and do not need to be assembled.
03906_de-gb-fr-nl_A5_V2.indb 3503906_de-gb-fr-nl_A5_V2.indb 35 18.08.2015 09:40:4718.08.2015 09:40:47
 Loading...