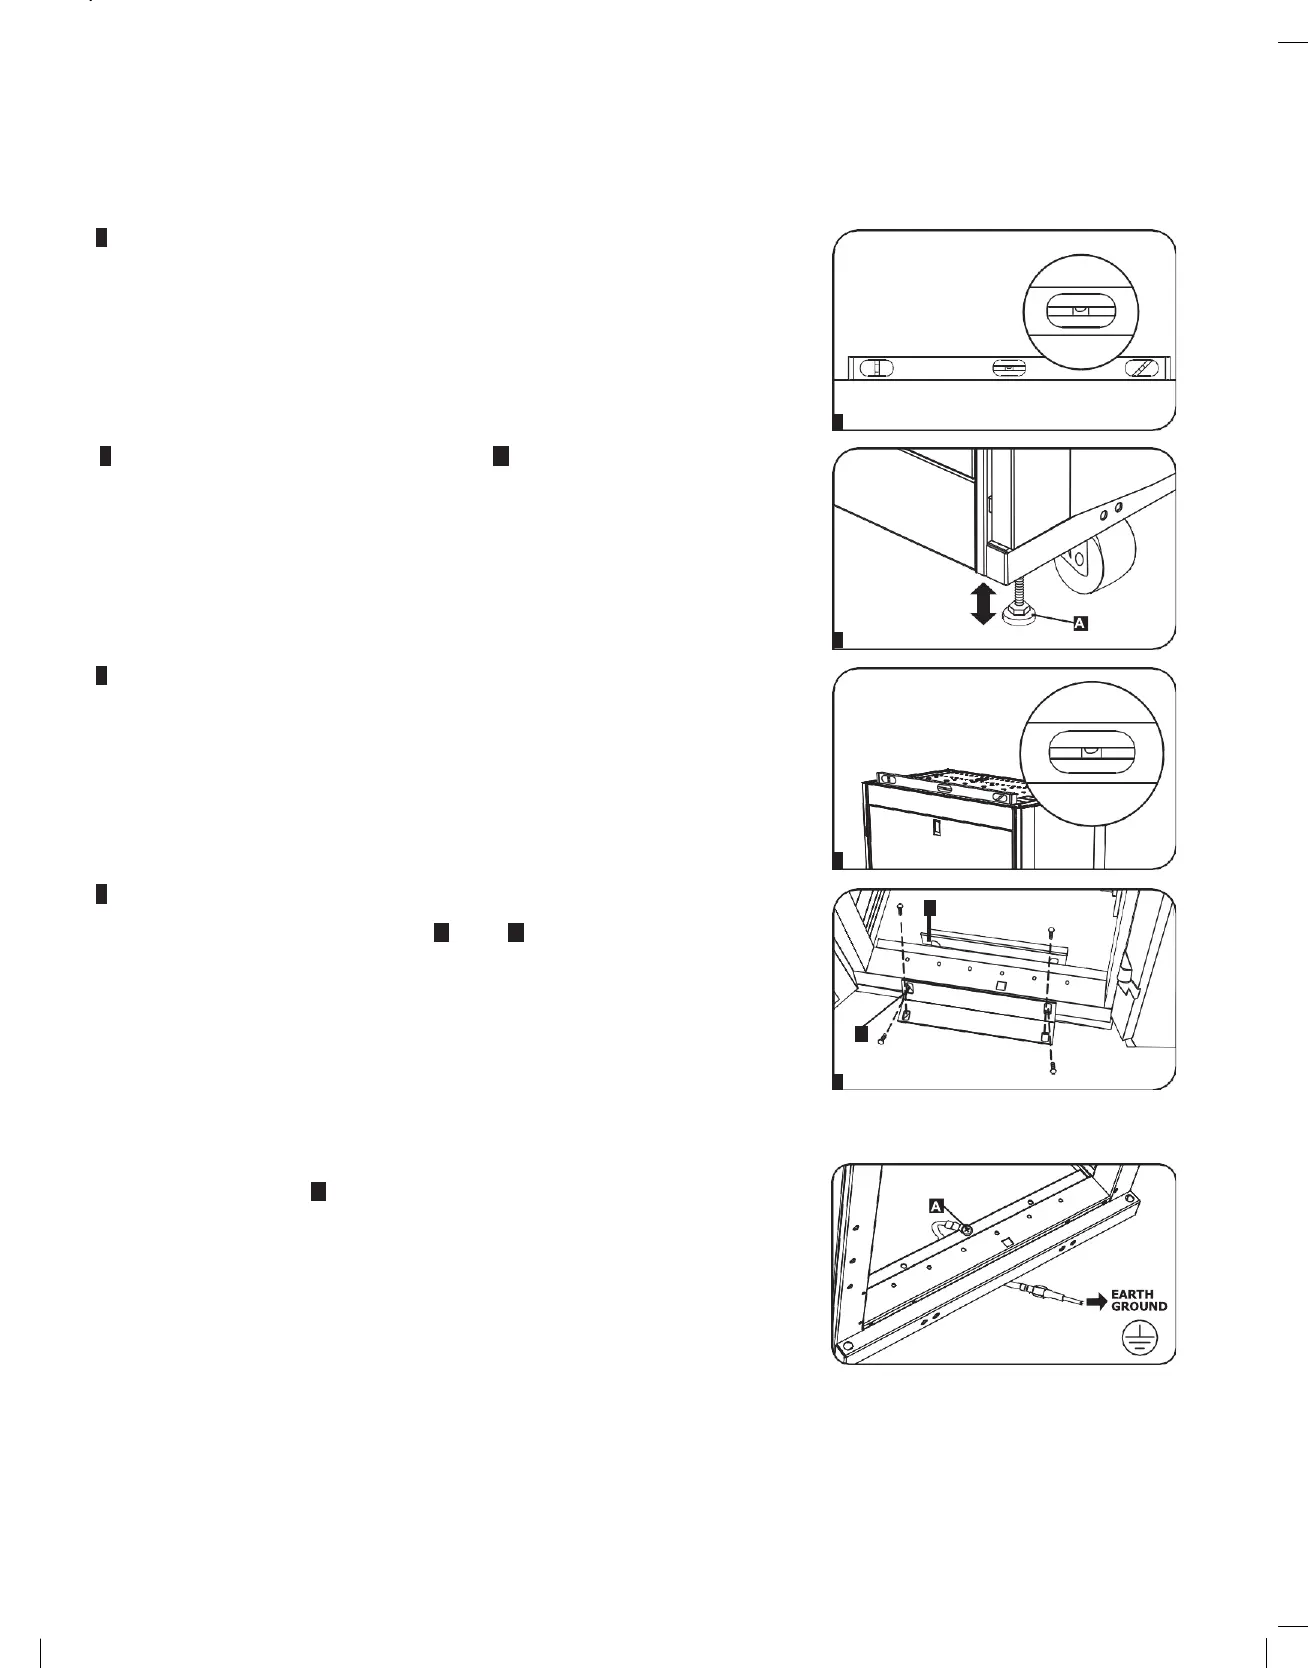
Leveling
WARNING: Level the enclosure before attempting to install equipment. The casters are not designed to provide long-term support for the
enclosure. Use the levelers to provide long-term support. Install the enclosure in a structurally sound area with a level floor that is able to
bear the weight of the enclosure, all equipment that will be installed in the enclosure and any other enclosures and/or equipment that will be
installed nearby.
1
After the enclosure has been moved to the installation location, use a carpenter's level to check
the slope of the floor. If the floor slopes more than 1%, choose an alternate installation site.
2
Use an 18 mm open-end wrench to lower each leveler
A
until it reaches the floor. (There are 4
levelers, 2 at the front and 2 at the rear.) Make sure each leveler contacts the floor solidly.
Note:
Lower a leveler by turning it clockwise; raise a leveler by turning it counter-clockwise.
3
After lowering each leveler, use the carpenter's level to confirm that the enclosure is level in all
directions. Adjust the levelers as required until the enclosure is level.
4
In order to secure the cabinet to the building structure for stability, attach the 2 shipping brackets
using the hardware that attached the enclosure to the shipping pallet. Use a 13 mm open-end
wrench to connect the brackets to the outer
A
or inner
B
bracket mounting points of the
enclosure. Attach the brackets to secure mounting points in the floor using user-supplied
hardware
.
Ground Connection
All the parts of the enclosure are grounded to the frame of the enclosure. Use the enclosure's front or
rear threaded grounding point
A
and an M6 screw (included) to connect the frame of the enclosure
directly to your facility's earth ground connection with an 8 AWG ( D=3.2 mm ) wire(user-supplied).
Route the ground
wire under the enclosure's frame to ensure unhindered door operation.
WARNING: Attach each enclosure to earth ground separately. Do not use the enclosure
without an earth ground connection.

 Loading...