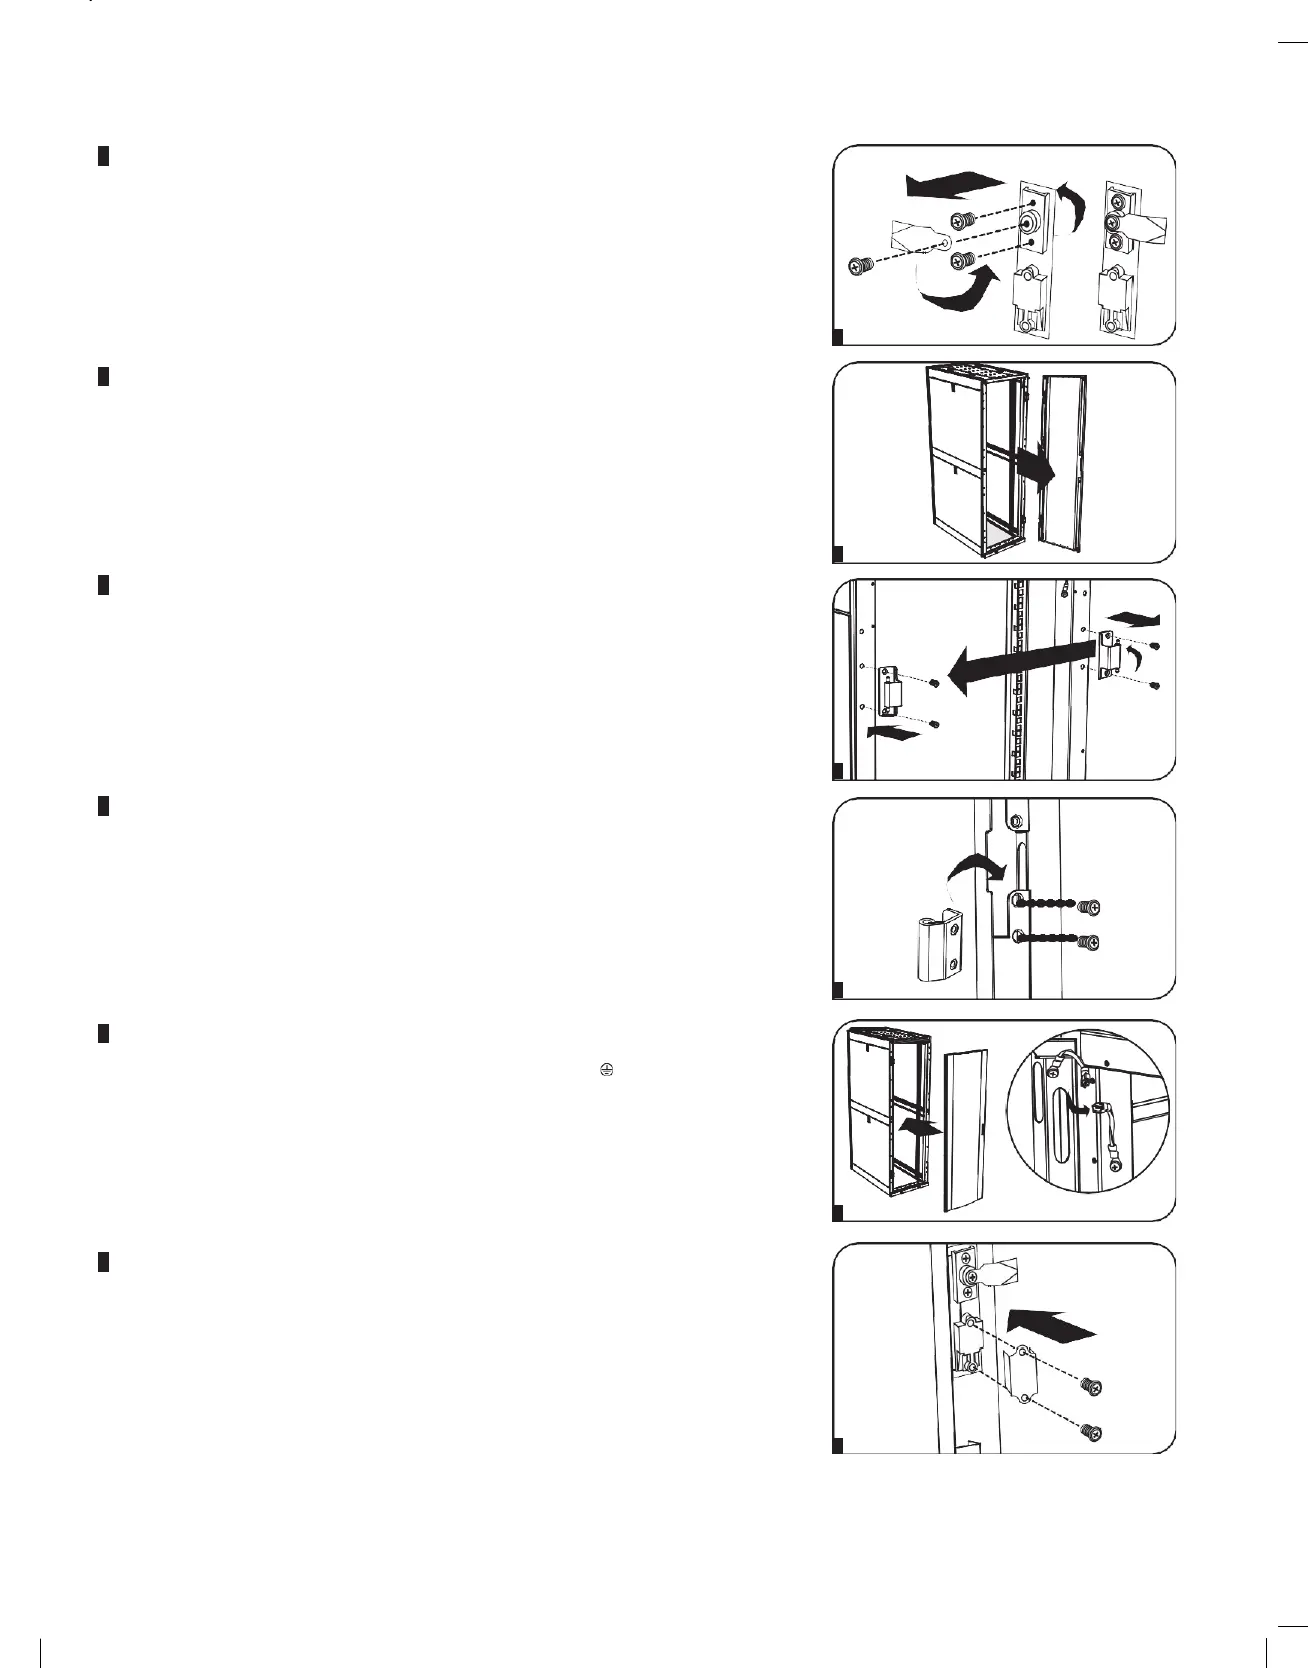
Reversing Front Door (continued)
3
Remove the screw and washer from the rear of the door handle and remove the latching
mechanism. Rotate the latch washer counter-clockwise 90 degrees and reverse the latch so it
points in the opposite direction, then use the screw and washer to re-attach the latch to the rear
of the door handle.
4
Remove the door by following the steps in the previous section.
5
Remove the door hinges from the enclosure, rotate them 180 degrees and attach them on the
opposite side of the enclosure.
Note:
The alternate door hinge attachment points have plastic plugs in the screw holes. Remove
the plugs and insert them in the original door hinge attachment points.
6
Unscrew the 2 hinge mechanisms from the hinge openings inside the door, then reattach each of
them using the set of screw holes immediately opposite their original position.
7
Rotate the door 180 degrees and reinstall it on the enclosure. Remember to connect the ground
wire to the inside of the door, using the attachment point nearest the hinge at the top of the door.
The attachment point is marked with the ground connection symbol:
.
8
Reinstall the door handle.

 Loading...