47
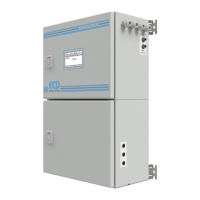
10.0 ANALYZER START UP AND SHUT DOWN
FIRST START-UP PROCEDURE
Refer to Section 6.0 for an in depth procedure.
Open the liquids compartment (the bottom compartment)
Remove the plastic block in the pinch valve (see label)
Install the fast loop reservoir close to the right part of the analyzer and connect the cable of the level
switch (fast loop reservoir is an option for online applications)
Connect the drain of the fast loop reservoir with 12 mm tubing
Connect the sample feed to the fitting on the bottom part of the fast loop reservoir
Connect the Norprene tubing from the three way valve, sample port #2 to the fitting on top of the fast
loop reservoir.
Prepare reagents and fill the containers delivered with the analyzer
Put the reagent's containers in the dedicated bottle rack of the bench support (optional)
Switch on the analyzer (switch is located on the top compartment)
**Please make sure that the Sleeve Apparatus is positioned correctly. Align the white dots on the
sleeve and the heater block. This will ensure that the light is passing through the glass cell. **
SHUT DOWN PROCEDURE
If the CA-6 Analyzer will be out of service for a period of two weeks or greater, proceed as follows:
1. Empty all reagent containers.
2. Rinse and refill all reagent containers with distilled water.
3. Prime all of the pumps with DI water. (login with 1
st
level password, press DISPLAY,
MANUAL STEP, ADD REAG 1,2,3,4 for 40 seconds each)
4. Disconnect the sample feed line and fill the fast-loop reservoir (if present) with distilled
water.
5. With the sample inlet tubing attached to a container of distilled water, run the analyzer
for at least 2 cycles.
6. Empty the water from all lines.
7. Put the analyzer in stand-by condition.
8. Turn OFF the power to the analyzer and disconnect the plug from the wall socket.