35
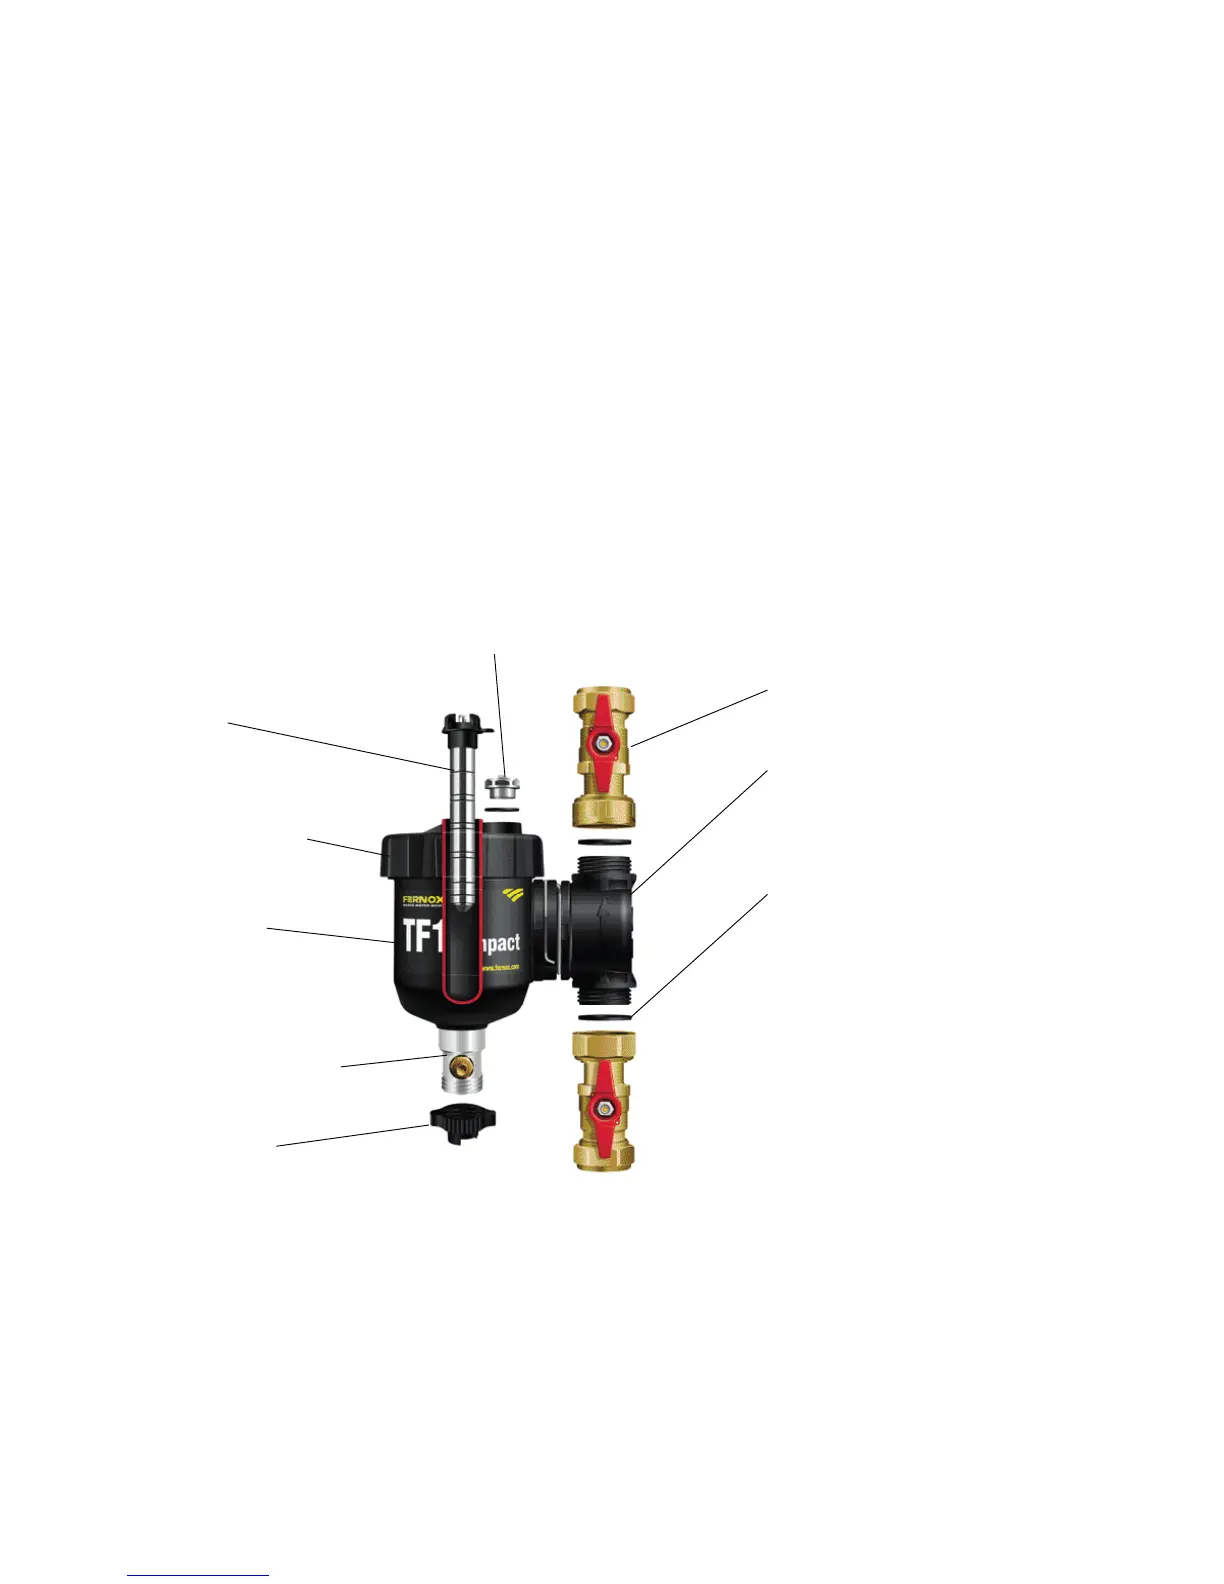
CLEANING THE FERNOX TF-1 COMPACT MAGNETIC FILTER
Note: There is no need to remove the cap of the TF-1 lter for cleaning
Close the isolating valves either side of the TF-1 magnetic lter. Remove the magnetic core by pulling upwards. Wait 30 seconds
for any collected particles to settle in the lter body. Open the lower isolating valve then open the drain valve, collect any uid
and debris in a suitable container. Close the drain valve and open the upper isolating valve. Vent any trapped air from the
lter by opening the air bleed screw on the cap. If necessary, re-pressurise the system using the lling loop tted to the unit.
Should the cap need to be removed a spanner is provided in the accessory kit for this purpose. When replacing the cap a
new ‘o’ ring should be used, this is also provided in the kit. Air can be vented by opening the bleed screw in the centre of the
air vent valve, the complete valve does not need to be removed. Should the valve be removed a replacement ‘o’ ring should
be used (provided in accessory kit) when re-assembling.
SERVICE LOG BOOK
On completion of any maintenance or service of the pre-plumbed cylinder, the Service Log Book should be lled in to record
the actions taken and the date the work was undertaken.
ISOLATING VALVES
( 2 OFF )
INLET / OUTLET PORT
ISOLATING VALVE
SEALING WASHERS
( 2 OFF )
FILTER BODY
DRAIN VALVE (DO NOT
REMOVE)
CAP AND KEY
FILTER BODY CAP
MAGNET
AIR VENT
CAUTION: CONTAINS STRONG MAGNETIC FIELDS
IF YOU HAVE AN IMPLANTED CARDIAC DEVICE EXTRA
CAUTION SHOULD BE TAKEN WHEN HANDLING THE
TF-1 COMPACT FILTER AND MAGNETIC CORE
Fig 22 - Fernox TF-1 Compact Magnetic Filter assembly