4.0 INSTALLATION
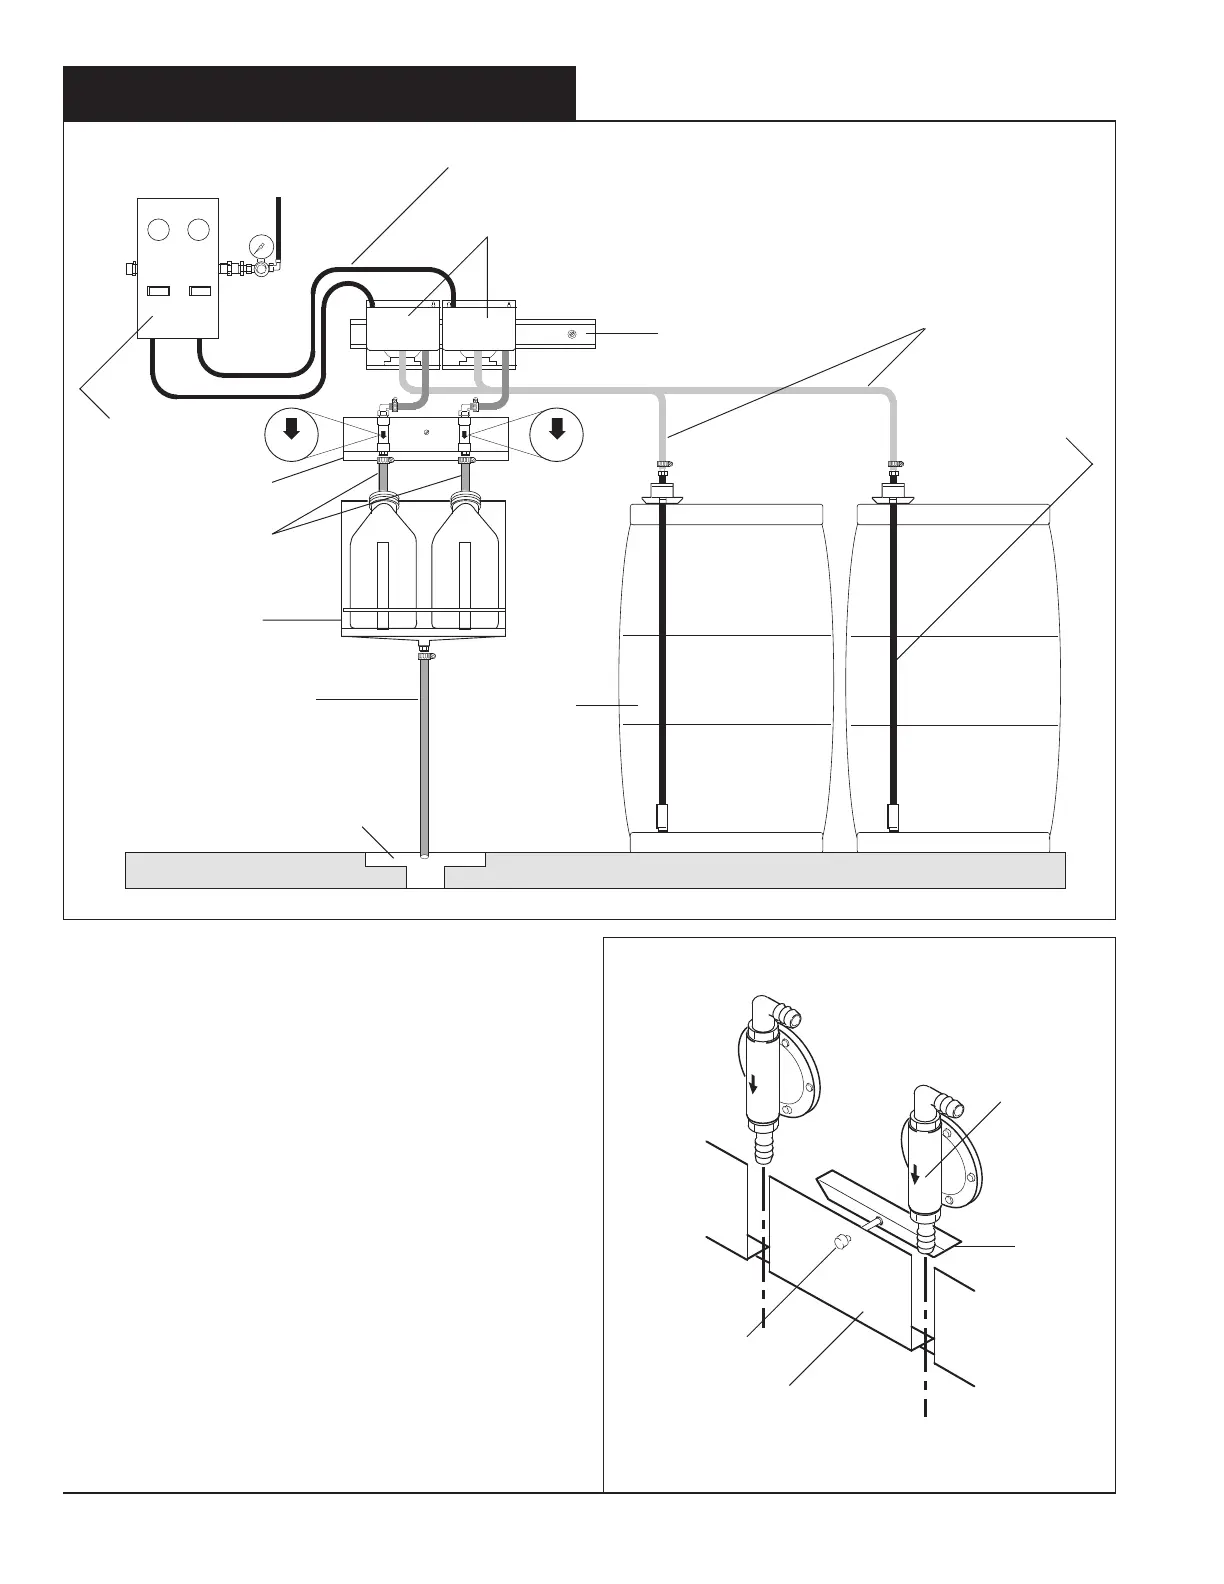
Figure 1
TO
AIR SUPPLY
FlowFlow
DISPENSER
PUMPS AND
PUMP SHELVES
PUMP SHELF
MOUNTING BRACKET
USE CONTAINER
HOLDER
DRAIN TUBE
FLOOR DRAIN
55 GALLON
PRODUCT
CONTAINER
ANTI-SIPHON VALVE
HOLDER
ANTI-SIPHON
VALVE
AIR LINES TO
PUMP
PRODUCT PICKUP
PROBE
PRODUCT SUC-
TION LINE
KNURLED
KNOB
FLOW ARROW
POINTS DOWN
BRACKET
ANTI-SIPHON
VALVE BRACKET
PRODUCT DISCHARGE
HOSES
Note: These installation and servicing instructions are
for use by authorized personnel only. The installation
must be made in accordance with local plumbing codes.
1. Remove the components of the Alligator Allocator
system from the shipping containers. Connect the
pressure regulator assembly to the Alligator Allocator.
2. Mount the system to the wall, adjacent to the air supply,
using the mounting hardware provided in the installa-
tion kit.
Refer to the Installation Diagram.
Note: For ease of operation the palm buttons of the
dispenser should be 4 to 5 feet (1.2 to 1.5 meters)
above the floor.
3. Place anti-siphon valves into holder. Refer to Figure 1.
Note: The bracket is captive. To install the anti-
siphon valves turn the knurled knob in front of the
anti-siphon valve holder so the bracket is loose.
Install the anti-siphon valves and tighten bracket
until the valves are secured in the anti-siphon valve
holder.
4. Connect the air, suction, discharge and use container
drain tube per the installation diagram.
System Diagram
4