7
I N S T A L L A T I O N
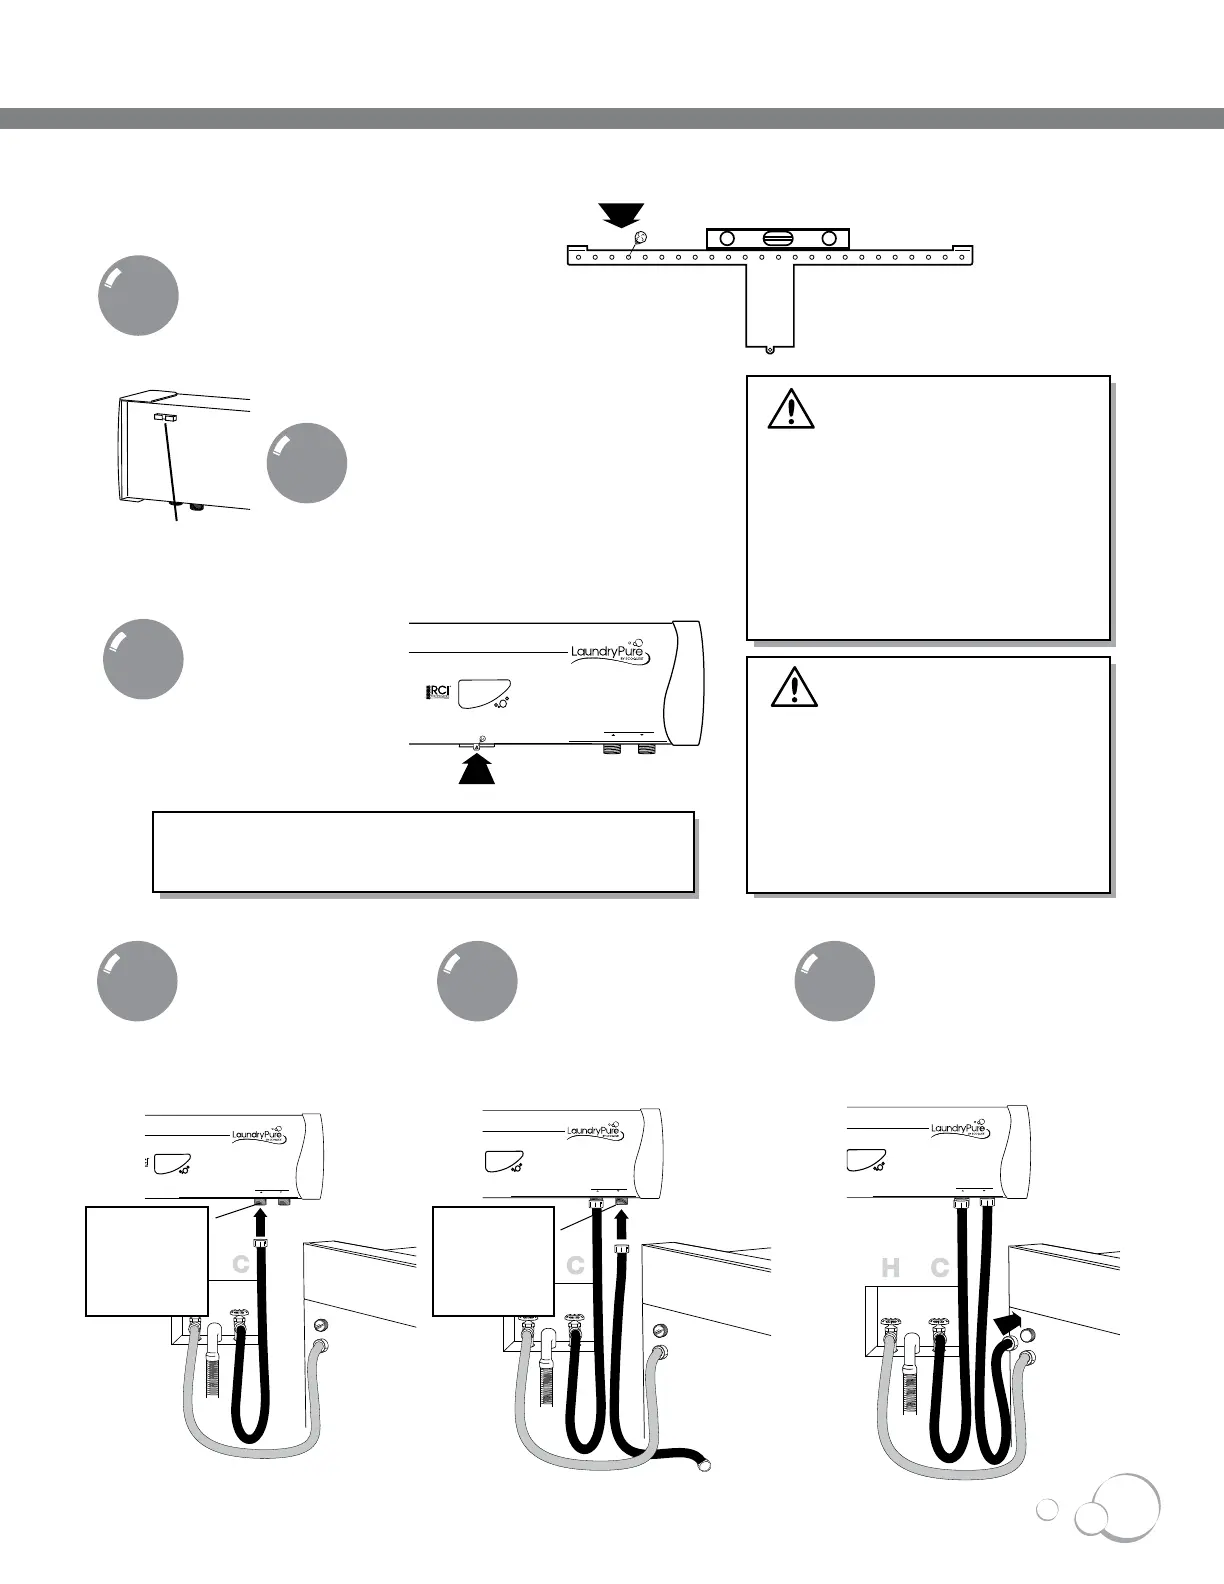
Level and fasten the LaundryPure
mounting bracket to a wall. Attach to
wall studs using 1 1/4” screws.
0/7%2).
3%26)#%
0/7%2/54
/54,%4
#/..%#44/#/,$7!4%2/.,9
).,%4
$)3#/..%#4"%&/2%3%26)#).'
MOUNTING CLIP
Use the retaining screw
to secure your
LaundryPure to the
mounting bracket.
On the backside of your
LaundryPure, locate the bracket
mounting clips. Place the
LaundryPure unit on the mounting
bracket, hanging it by the clips.
1
2
3
Connect the end of the
hose from your cold water
valve to your
LaundryPure’s INLET
connector (marked on
front of the LaundryPure).
0/7%2).
3%26)#%
0/7%2/54
/54,%4
#/..%#44/#/,$7!4%2/.,9
).,%4
$)3#/..%#4"%&/2%3%26)#).'
0/7%2).
3%26)#%
0/7%2/54
/54,%4
#/..%#44/#/,$7!4%2/.,9
).,%4
$)3#/..%#4"%&/2%3%26)#).'
0/7%2).
3%26)#%
0/7%2/54
/54,%4
#/..%#44/#/,$7!4%2/.,9
).,%4
$)3#/..%#4"%&/2%3%26)#).'
Finally, connect the
new hose to the cold
water inlet on your
washing machine.
Connect the new hose
provided with your
LaundryPure to the water
OUTLET connector on your
LaundryPure unit.
4 5 6
Be sure rubber washers are properly inserted
into hose connectors before installing hoses.
NOTE:
This appliance must be installed in
a level, horizontal configuration as
shown. Do not install the unit
vertically or at an angle. Failure to
follow these instructions may
prevent the internal moisture sensor
from operating properly.
CAUTION:
When connecting or disconnecting
hoses, hold the threaded connector
on your LaundryPure with pliers while
turning the hose connector. Failure to
follow these instructions may result in
damage to your appliance.
CAUTION:
Hold with pliers
while installing
hose in order to
prevent fitting
from rotating.
Hold with pliers
while installing
hose in order to
prevent fitting
from rotating.