19
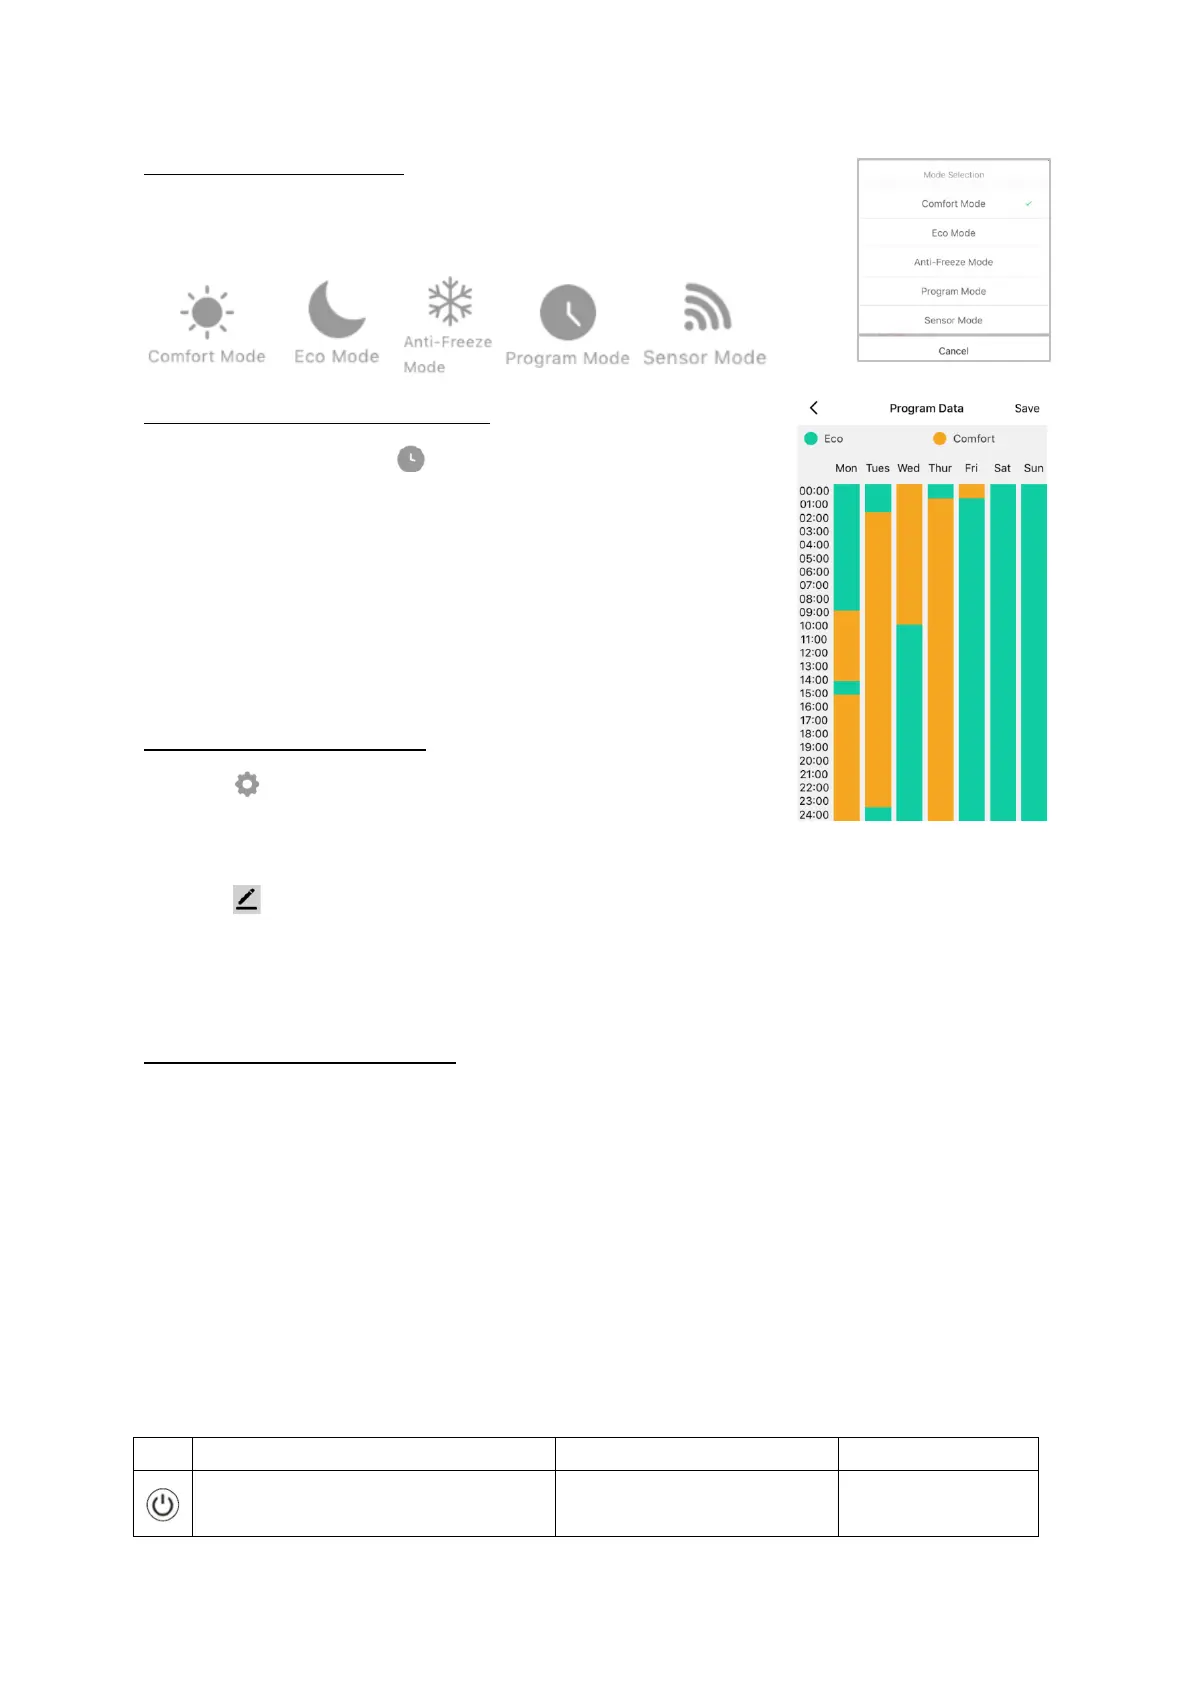
6 – 3 | Choose Mode
Tap the mode icon on the control interface to choose mode. The
five options correspond to the five modes on the control panel.
6 – 4 | Setting the Program
Tap the program data icon on the control interface to
configure a program.
A program consists of 24 hourly intervals for each day,
which you can set to Comfort or Eco temperature.
Tap the interval to choose Comfort (yellow bar) or Eco
(green bar). You can drag the start and end times of each
mode block to make setting your program quick and easy.
6 – 5 | Device Settings
Tap the icon to view and adjust the radiator’s settings.
These correspond to the settings available through the
control panel.
Tap the icon for settings that relate to the radiator’s listing on the app, including
its name, any automations it is included in, and the quality of its network connection.
Note – the limit function that appears in the settings menu is not available with this
model.
6 – 6 | Voice Integration
The Smart Life app is compatible with both Amazon Alexa and Google Home.
To connect, first download the Smart Life skill onto your Alexa or Google Home
app. You can then link your Alexa or Google Home app with your Smart Life app.
Depending on your device, your voice control app may discover your devices
automatically, or you may need to prompt it to do so. You can find quick guides for
both Google Home and Alexa in the Smart Life app's FAQ section.
Make sure you name the heater something that’s easy for you to say and for your
voice interface to understand!
Available commands:
• Turn on
.
• Switch on <device name>.
Switches the radiator
 Loading...