16
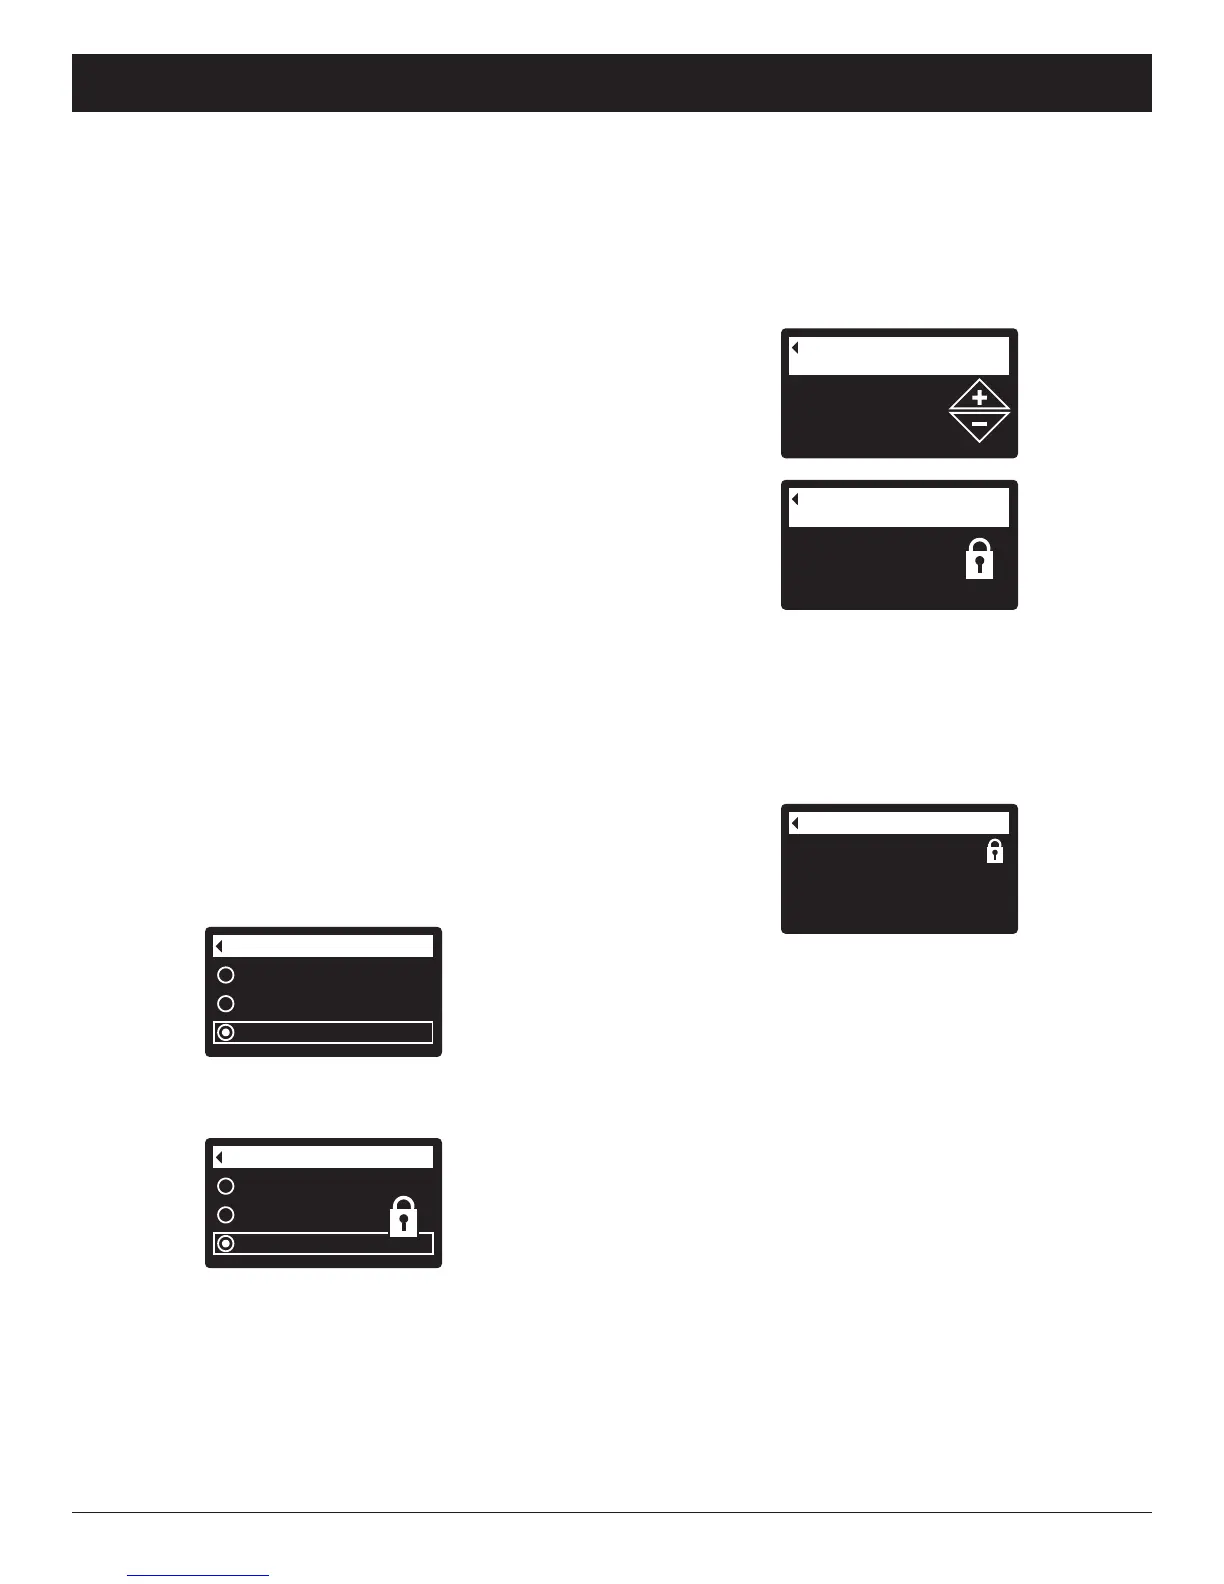
Another indicator that the lockout feature is on is the
Model Information screen. This screen appears on
power-up, and can also be displayed from the System
Information menu (See Page 21). If the lockout feature
is on, there will be a non-flashing padlock icon in the
upper right corner (See Figure 43).
FIG. 43
FIG. 42
Model information
Model: HAIV0
Version: T2.0
1 days
Max. days between
recharges
To turn off the lockout feature:
1-7. Go to the Setup changes screen (Figure 40) by
following Steps 1-7 at left.
8. Press the RIGHT (4) button. The flashing padlock
icon will disappear, as shown in Figure 39.
9. Press the SELECT (¡) button.
10. Press the LEFT (3) button three times to return to
the rolling status screens.
FIG. 40
FIG. 41
1 days
M
ax. days between
recharges
When the lockout feature is on, the flashing padlock
icon will appear in any screen that would normally be
u
sed to change a parameter in the list to the left. For
example, the Max. days between recharges screen
will look like Figure 42, instead of Figure 41.
Redo setup
Restore defaults
Cancel
Setup changes
FIG. 39
Redo setup
Restore defaults
Cancel
Setup changes
8. Press the RIGHT (4) button. A flashing padlock icon
will appear, as shown in Figure 40.
9. Press the SELECT (¡) button.
10. Press the LEFT (3) button three times to return to
the rolling status screens.
ECOWATER
S Y S T E M S
Filter Operation
LOCKOUT FEATURE
A
“lockout” feature is available to prevent user modifica-
tion of parameters that affect filter performance. The
unit is shipped from the factory with the lockout feature
off. After programming is complete, the lockout feature
can be turned on to prevent changes to the following:
=Max days between recharges
=Backwash time
=Fast rinse time
=Auxiliary control
=Chemical feed volume
=Chemical feed timer
=Service reminder
=Setup changes
To turn on the lockout feature:
1. From any of the rolling status screens, press the
SELECT (¡) button to display the Main menu.
2. Press the DOWN (6) button to scroll through the
menu options until Advanced settings is highlighted.
3. Press the SELECT (¡) button to display the
Advanced settings menu.
4. Press the DOWN (6) button to scroll through the
menu options until Troubleshooting is highlighted.
5. Press the SELECT (¡) button to display the
Troubleshooting menu.
6. Press the DOWN (6) button to scroll through the
menu options until Setup changes is highlighted.
7. Press the SELECT (¡) button to display the Setup
changes menu (See Figure 39).