EcubMaker TOYDIY
CNC 3D Printer
> CNC Print Guide
Utility
Back
> Step1:Place Objects
Step2:Move Axis
Step3:Set Origin
Step4:Print From SD
3.STEP
Use CNC Print Guide . Please bring goggles and PMMA ,then insert SD card
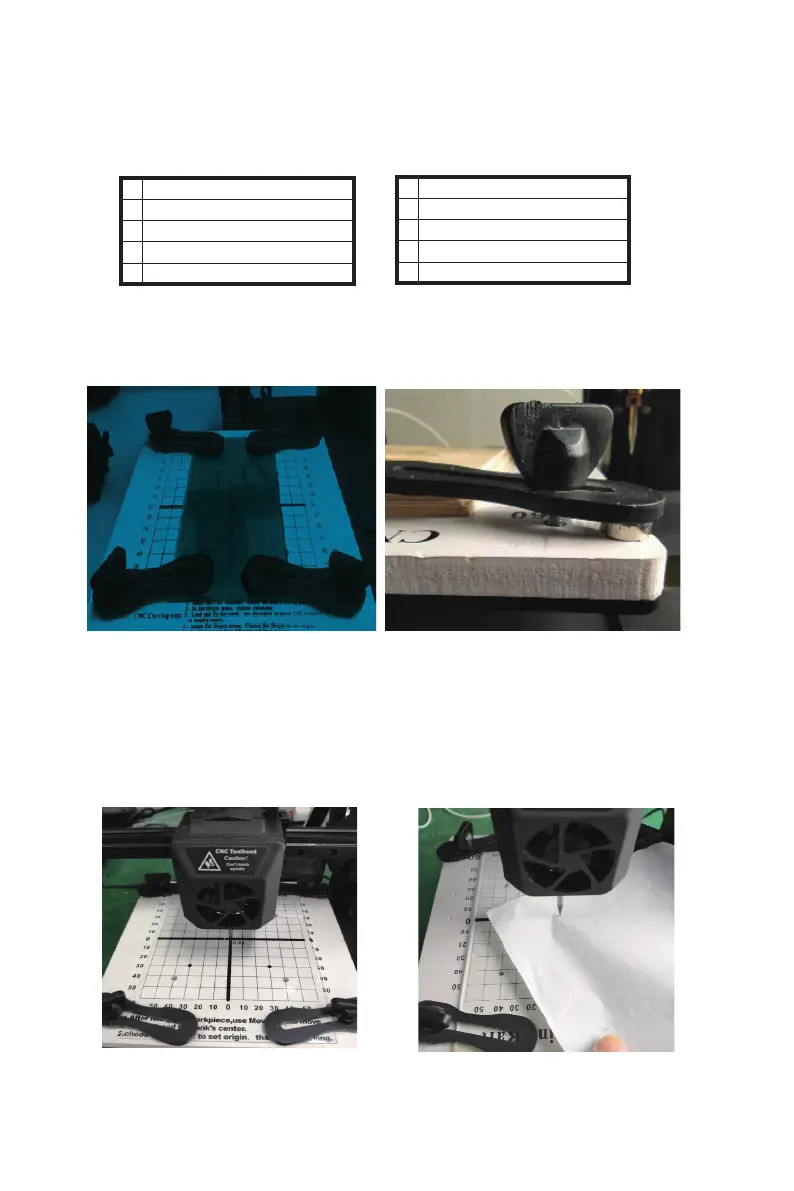
(1)Step1:Place Objects.The object to be carved is placed on the platform and fixed
with a CNC fixture, which is assisted by a CNC fixture and a magnet/washer to hold
the object.Because CNC work process can produce a lot of machining force, so be
sure to engrave the object fixed tight.So that it won't move.
(2)Step2:Move Axis。Move axis > Move XYZ,The tip of the CNC cutter is aimed
at the center of the surface of the object being processed(The gap between CNC
bit and PMMA must be same thickness as a piece of A4 paper)。
【CNC fixture fixed range】
*Make sure the fixed position of fixture is not within the carving range,
otherwise the equipment will be damaged.
(The default processing range of
CNC test model file of this equipment is 60*80mm, and the size of acrylic plate
provided is 80*150mm)
CNC function demonstration
--------------------------------------------------------------------------------------------------------------------------------------------
28
------------------------------------------------------------------------------------------------------------------------------------------
--------
B EcubMaker TOYDIY basic setup and installation