EasyManua.ls Logo

EDAN CADENCE II - User Manual

EDAN CADENCE II
78 pages
Print Icon
To Next Page IconTo Next Page
Loading...

Table of Contents

Questions and Answers

  • K
    Kelly CooperAug 19, 2025
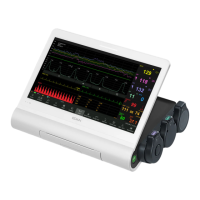
    What to do if my EDAN Monitor has no display?
    • K
      Karen ChavezAug 20, 2025
      If your EDAN Monitor isn't displaying anything, there could be a few reasons. First, ensure the power cable is securely connected and check the fuse. Also, check the battery. If the fuse is blown, replace it. If the battery is low, connect the monitor to AC power.
  • M
    Miguel SmithAug 21, 2025
    Why is my EDAN CADENCE II recorder not working?
    • D
      Daryl SmithAug 22, 2025
      If the recorder on your EDAN Monitor isn't working, there might be a few reasons. Check if the PRINT key is disabled and press it again. Also, ensure that there is paper in the recorder. Finally, verify that the ultrasound transducer or DECG cable connector is properly plugged in.
  • Z
    zachary92Aug 25, 2025
    What to do if my EDAN Monitor has noise?
    • M
      Miss Alexandra Sanchez DDSAug 25, 2025
      If your EDAN Monitor is producing noise, it could be due to a couple of reasons. Try adjusting the FHR volume down. Also, make sure there are no interfering sources like handsets nearby; keep them far away from the monitor.
  • J
    Jerry BaileyAug 26, 2025
    What to do if my EDAN Monitor has inconstant trace / display?
    • N
      Nicole HartAug 26, 2025
      An inconstant trace or display on your EDAN Monitor can stem from several factors: * If the patient has a thick abdominal wall, consider monitoring FHR with DECG if the membrane is adequately ruptured. * Adjust the ultrasound transducer's position to get a better signal. * Tighten the belt. * Wipe off any superfluous aquasonic coupling gel. * If there are frequent fetal movements, delay monitoring. Request the patient to calm down and stay still if there is maternal movement. Ensure you're using the recommended quantity of aquasonic coupling gel.
  • S
    Suzanne DavisAug 27, 2025
    Why is my EDAN CADENCE II showing a doubtful FHR?
    • W
      wilkinsdavidAug 27, 2025
      If the FHR reading on your EDAN Monitor seems doubtful, it could be wrongly recording the maternal heart rate or recording mixed noise because the transducer is not well placed. Try changing or adjusting the position of the ultrasound transducer.
  • M
    Margaret VasquezAug 29, 2025
    What to do if my EDAN Monitor has paper jam?
    • D
      Danielle Greer MDAug 29, 2025
      If your EDAN Monitor is experiencing a paper jam, it may be due to incorrect paper feeding or damp paper. Ensure you feed the paper correctly and keep the paper protected from moisture.
  • N
    nelsonmichelleAug 31, 2025
    What to do if my EDAN CADENCE II shows faint trace or no trace?
    • S
      Scott GillespieAug 31, 2025
      If your EDAN Monitor is showing a faint trace or no trace, make sure you are using the paper recommended by the manufacturer. If the issue persists, contact the manufacturer for service because the adjusting nuts of the print head may be unbalanced.
  • H
    harrisonchristopherSep 2, 2025
    Why does my EDAN CADENCE II show inconstant trend Inconstant display?
    • A
      Anthony WallSep 3, 2025
      If your EDAN Monitor is showing an inconstant trend or display, it may be due to no ECG signal or bad contact between the reference electrode and the patient. In this case, use a new spiral electrode.
  • W
    William FisherSep 4, 2025
    Why is my EDAN CADENCE II trend inconstant?
    • J
      Jay DawsonSep 4, 2025
      If the trend on your EDAN Monitor is inconstant, the DECG cable may not be fixed firmly. Try fixing an attachment pad at the DECG cable.
  • D
    dhicksSep 6, 2025
    What to do if EDAN CADENCE II Monitor shows poor trend quality or fluctuant UA baseline?
    • D
      dianemillerSep 6, 2025
      If your EDAN Monitor is showing poor trend quality or a fluctuating UA baseline, it could be because the belt is either too tight, too loose, or lacks elasticity. Make sure the belt is used accurately, not too tight and not too loose. Maternal movement can also cause this, so relax the patient. Additionally, fetal movement can interfere, so wait for a moment.

Summary

User Manual

Statement

Responsibility of the Manufacturer

Using This Label Guide

WARNING

Advises against actions or situations resulting in personal injury or death.

CAUTION

Advises against actions or situations causing equipment damage or inaccurate data.

NOTE

Provides useful information regarding a function or procedure.

Revision History

Chapter 7 Monitoring

Chapter 8 Maintenance, Care and Cleaning

Chapter 1 Safety Guidance

1.1 Intended Use

Specifies the intended purpose and user for the fetal monitor.

1.2 Instruction for Safe Operation

Guidelines for safe and proper operation of the fetal monitor.

1.3 Ultrasound Safety Guide

1.4 Safety Precautions

1.5 Definitions and Symbols

Chapter 2 Installation Guidance

2.1 Opening the Package and Checking

Steps for unpacking and inspecting the monitor and accessories.

2.2 Installing Battery

Procedure for installing or removing the rechargeable battery.

2.3 Connecting the Power Cable

2.4 Feeding Paper

Chapter 3 Introduction

3.1 Functions

Overview of the monitor's capabilities and configurations.

3.2 Monitor

3.2.1 Display

Details on the monitor's display screen and its frames.

3.2.2 Key Functions and Operations

3.2.3 Indicators

3.2.4 Sockets on the Right Side of the Monitor

3.2.5 Base Panel

3.3 Transducers and Cables

3.3.1 Transducers

3.3.2 Remote Event Marker

3.3.3 Fetal Spiral Electrode

3.4 Ordering Information

Chapter 4 Alarm

4.1 Alarms Classification

Categorization of alarms based on severity and priority.

4.2 Audible Alarm

Description of audible alarm sounds and how to manage them.

4.3 Visual Alarm

Explanation of visual alarm indicators and messages on the screen.

4.4 Treatment Measures

4.5 Testing Alarms

4.6 Alarm Messages

4.7 Alarm Defaults

Chapter 5 Printing

5.1 Function Description

Overview of the built-in thermal recorder's functions.

5.2 Printing Configuration

5.3 Examples of Printing Pattern

Chapter 6 Pre-Monitoring Preparation

6.1 Confirming Fetal Life

Methods to confirm fetal life before starting monitoring.

6.2 Switching On the Monitor

Procedure for powering on the fetal monitor.

6.3 Setting Date and Time

6.4 Connecting Transducers

6.5 Adjusting the Volume

Chapter 7 Monitoring

7.1 Confirming Fetal Life

Verifying fetal life using external methods before using the fetal monitor.

7.2 Monitoring FHR with Ultrasound

Obtaining FHR via maternal abdominal wall using ultrasound transducer.

7.2.3 Switching the FHR Alarm On or Off

7.2.4 Changing the FHR Alarm Limits

7.2.5 Changing the FHR Alarm Keep Time

7.2.6 Switching the Probe Detecting Alarm On or Off

7.2.7 Switching the FHR Signal Quality Alarm On or Off

7.3 Monitoring FHR with DECG (optional)

7.3.1 Contraindications

Conditions where DECG monitoring should not be used.

7.3.2 Parts Required

7.3.3 Preparing the Patients Skin Prior to Placing Electrodes

7.3.4 Directions for Use of Fetal Spiral Electrode

7.3.5 DECG Monitoring Procedure

7.3.6 Detaching the Fetal Spiral Electrode

7.3.7 Switching DECG Arrhythmia Logic On or Off

7.3.8 Changing DECG Volume

7.4 Dual Heart Rate Monitoring

7.4.1 Monitoring Twins Externally

Monitoring twin FHRs using two ultrasound transducers.

7.4.2 Monitoring Internally (Optional)

Monitoring one twin externally and the second internally (DECG).

7.4.3 Signals Overlap Verification (SOV)

7.4.4 Changing FHR2;DECG Offset

7.5 Monitoring Uterine Activity (UA) Externally

7.5.1 Parts Required

List of components needed for external UA monitoring.

7.5.2 Operation Procedure

Step-by-step guide for external UA monitoring.

7.5.3 Changing the UA Baseline

7.5.4 Switching the UA Probe Detecting Alarm On or Off

7.6 Monitoring Uterine Activity Internally (optional)

7.6.1 Parts Required

List of components needed for internal UA monitoring.

7.6.2 Directions for Use of IUPC

Procedure for inserting and using the intrauterine pressure catheter.

7.6.3 Operation Procedure

7.6.4 Checking Intrauterine Pressure Cable Function

7.7 Fetal Movement Monitoring

7.7.1 Choosing the FM Source

Selecting the source for fetal movement detection (Manual or AFM).

7.7.2 Auto Fetal Movement Monitoring (AFM)

7.7.3 Enabling;Disabling AFM Trend

7.7.4 Changing AFM Threshold

7.7.5 Changing AFM Gain

7.7.6 Manual Fetal Movement Monitoring (MFM)

7.7.7 Clearing FM Count

7.8 Login

7.8.1 Inputting Patients Bed ID

Entering the patient's Bed ID for printing.

7.8.2 Inputting Patients Information

Entering patient's name and other details.

7.8.3 Enabling; Disabling Manual Login

7.9 Start Monitoring

7.10 Screen Display

7.10.1 Fetal Monitoring Trends

7.10.2 Trends Playback

7.10.3 Trends Loading

7.10.4 Fetal Monitoring Values

7.11 Completing Monitoring

7.12 Switching Off the Monitor

Chapter 8 Maintenance, Care and Cleaning

8.1 Preventive Maintenance

Regular checks and upkeep to ensure monitor performance and safety.

8.1.1 Maintaining Inspection

8.1.2 Maintenance of the Monitor

8.1.3 Maintenance of the Transducers

8.1.4 Storage of Recorder Papers

8.1.5 Cleaning of the Recorder

8.2 Cleaning

8.2.1 Cleaning of the Monitor

Detailed steps for cleaning the monitor enclosure and screen.

8.2.2 Cleaning of the Accessories

Cleaning instructions for transducers, leads, and belts.

8.3 Disinfecting

8.4 Sterilizing

Chapter 9 After-Sales Service

Appendix 1 Product Specifications

A1.1 Environmental Specifications

Operating and storage conditions for the monitor.

A1.2 Physical Specifications

Physical dimensions, weight, power, and standards compliance.

A1.3 Performance Specifications

A1.4 Recorder Specifications

A1.5 Lithium-ion Battery Specifications

A1.6 Low Output Summary Table

Appendix 2 Signal Input;Output Connector

Appendix 3 Troubleshooting

A3.1 No Display

Solutions for when the monitor display is off.

A3.2 Noise

Troubleshooting steps for audio noise during monitoring.

A3.3 Recorder Error

Solutions for paper jams and recorder malfunctions.

A3.4 Ultrasound Monitoring of FHR

A3.5 DECG Monitoring of FHR

A3.6 Monitoring Contractions (External)

A3.7 Monitoring Contractions (Internal)

A3.8 Blown Fuses

Appendix 4 Abbreviation

Appendix 5 EMC Information - Guidance and Manufactures Declaration

A5.1 Electromagnetic Emissions - for all EQUIPMENT and SYSTEMS

Guidance on electromagnetic emission compliance.

A5.2 Electromagnetic Immunity - for all EQUIPMENT and SYSTEMS

A5.3 Electromagnetic Immunity - for EQUIPMENT and SYSTEM that are not LIFE-SUPPORTING

A5.4 Recommended Separation Distance

EDAN CADENCE II Specifications

General IconGeneral
Display TypeTFT LCD
Parameters MonitoredECG, SpO2, NIBP, RESP, TEMP, PR
Resolution800 x 600
Touch ScreenYes
ECG3/5-lead ECG
BatteryRechargeable lithium-ion
Battery LifeApprox. 4 hours
ConnectivityWiFi (optional)
Storage Temperature-20°C to 55°C
Relative Humidity95 % (non-condensing)
Atmospheric Pressure700 hPa to 1060 hPa

Related product manuals