9
Step Procedure
11
Close the stopcock to the 50 cc or larger syringe. Remove the syringe. Verify that the inflation volume
is correct and lock the Inflation device provided by Edwards Lifesciences.
CAUTION: Maintain the Inflation device provided by Edwards Lifesciences in the locked
position until valve deployment.
7.2.3 Mount and Crimp the Valve on the Delivery System
Step Procedure
1
Set up two (2) additional sterile bowls with at least 100 mL of sterile physiological saline to thoroughly
rinse the Qualcrimp crimping accessory.
2
Completely submerge the Qualcrimp crimping accessory in the first bowl and gently compress it to
ensure complete saline absorption. Slowly swirl the Qualcrimp crimping accessory for a minimum of
1 minute. Repeat this process in the second bowl.
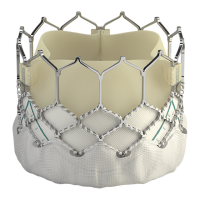
3 Remove the valve from the holder and remove the ID tag.
4 Attach the 2-piece crimp stopper to the base of the crimper and click into place.
5
With the crimper in the open position, gently place the valve into the crimper aperture. Gradually
crimp the valve until it fits into the Qualcrimp crimping accessory.
6
Place the Qualcrimp crimping accessory over the valve making sure the valve is parallel to the edge
of the Qualcrimp crimping accessory.
7
Place the valve and Qualcrimp crimping accessory in crimper aperture. Insert the delivery system
coaxially within the valve on the Valve Crimp Section (2-3 mm distal to the balloon shaft) with the
inflow (outer skirt) end of the valve towards the distal end of the delivery system.
8 Crimp the valve until it reaches the Qualcrimp Stop located on the 2-piece Crimp Stopper.
9
Gently remove the Qualcrimp crimping accessory from the valve. Remove the Qualcrimp Stop from
the Final Stop, leaving the Final Stop in place.
10
Fully crimp the valve until it reaches the Final Stop.
NOTE: Ensure that the Valve Crimp Section remains coaxial within the valve.
11 Repeat the full crimp of the valve two more times for a total of three full crimps.
12 Pull the balloon shaft and lock in the default position.
13
Flush the loader with heparinized saline. Immediately advance the valve into the loader until the
tapered tip of the delivery system is exposed.
CAUTION: To prevent possible leaflet damage, the valve should not remain fully crimped
and/or in the loader for over 15 minutes.
14
Attach the loader cap to the loader, re-flush the delivery system through the flush port and close the
stopcock to the delivery system.
Remove the stylet and flush the guidewire lumen of the delivery system.
CAUTION: Keep the valve hydrated until ready for implantation.
CAUTION: The physician must verify correct orientation of the valve prior to its implantation;
its inflow (outer skirt) end should be oriented distally towards the tapered tip.
7.3 Valvuloplasty and Valve Delivery
Valvuloplasty and valve delivery should be performed under conscious sedation and/or general
anesthesia with hemodynamic monitoring in a catheterization lab/hybrid operating room with fluoroscopic
and echocardiographic imaging capabilities.
Administer heparin to maintain the ACT at ≥ 250 sec during the procedure.
CAUTION: Use of excessive contrast media may lead to renal failure. Measure the patient’s
creatinine level prior to the procedure. Contrast media usage should be monitored.
CAUTION: Procedure may require an arterial cut-down with surgical closure of the puncture site
due to the size of the arteriotomy.

 Loading...