Setup for Testing
Deposit size is controlled by TIME, PRESSURE and
TIP SIZE.
Please follow these instructions in order to test
each function. Use the convenient Dot Test
sheet included in your Test Kit.
Setup for Testing
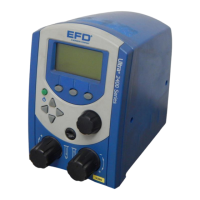
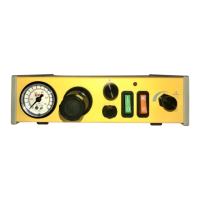
Press RUN/SETUP ❶ to set the dispenser into the
RUN mode (RUN indicator light on).
Press PRESSURE/TIME ❷ and set display to
pressure.
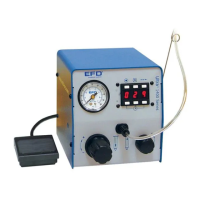
Pull out air pressure regulator knob ❸ until it
"clicks" into the unlocked position. Turn clock-
wise to adjust the pressure to 20 psi (1.4 bar).
Note: Dispensers with 5 psi or 15 psi gauges
should be tested with the clear test fluid, using a
lavender 30 gage tip and air pressure set at 5 psi.
Refer to "How to Use the Vacuum Control" on
page 16.
Always set the pressure desired by turning the air
regulator knob clockwise. To reduce the pres-
sure, turn the knob counterclockwise until the air
gauge reads a lower pressure than desired.
Then increase and stop at desired pressure.
Push knob in to lock.
Dispensers with air pressure gauges higher than
15 psi are tested using the nontoxic blue fluid
supplied in the Dot Test kit. This fluid is represen-
tative of thick, non-leveling fluids such as
sealants, pastes and greases and is used to
demonstrate the different control settings.
Attach the barrel containing the test material to the
adapter assembly ❹ as shown.
Remove the orange tip cap from the end of the
dispensing barrel and attach the green 18 gage
tapered tip ❺ found in the Dot Test Kit. Place the
barrel in the barrel stand.
Press STEADY/ TEACH ❻ to place the 2000XL into
STEADY mode. (STEADY indicator light on.)
Rest the dispensing tip on the Dot Test sheet.
Press and hold the foot pedal until the tip fills with
test material.
Go into TIME mode by pressing STEADY/ TEACH ❻
again (STEADY indicator light goes out) and time is
displayed.
Press RUN/SETUP ❶ to place the 2000XL into the
SETUP mode (SETUP indicator light on). Press
STEADY/ TEACH ❻ to zero the display.
Continue to page 12 for tests which will demon-
strate the ease at which deposit sizes can be
established using the foot pedal or TIME SET
feature.