12
Symbol for transmition
Unsuccessful
synchronisation
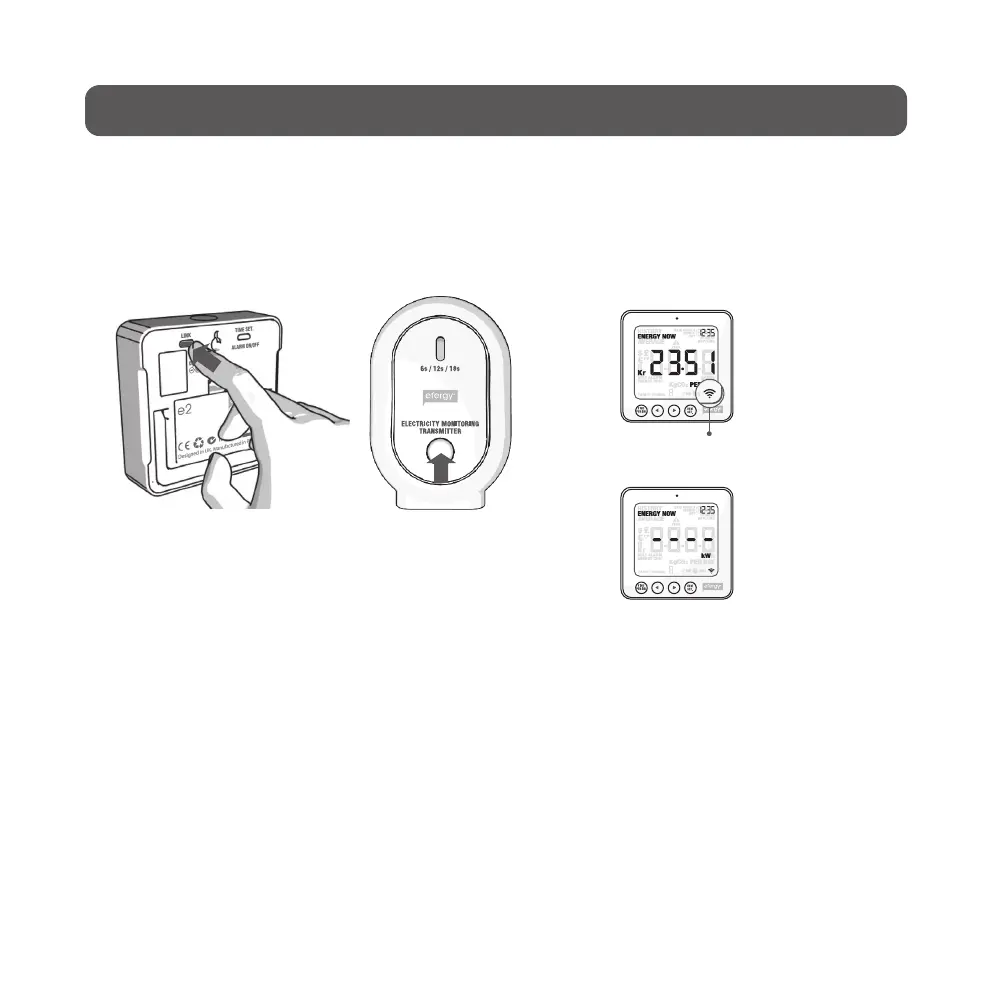
7. Linking the transmitter and display unit
1. Start by inserting three AA/LR6 batteries into the transmitter’s battery compartment, and three
AAA/LR03 batteries in the display unit’s battery compartment.
Tip: If the transmitter is located outdoors, it is extra important to use good quality batteries.
Use alkaline batteries which withstand cold better.
2. Hold in the [link] but-
ton on the back of the
display unit for 2sec-
onds. The signal
symbol should flash
for one minute.
3. Press the button on the
front of the transmitter
once whilst the signal
symbol is flashing and
then wait until the sym-
bol stops flashing.
Tip: If syn-
chronisation is
successful, the
signal symbol
will appear on
the display.
If unsuccess-
ful, ─ ─ ─ will
appear on the
display.
N.B. The default update time is 6 seconds (LED flashes red). This means that the transmitter
relays information every 6 seconds. You can change the update time from 6 s to 12 s or 18 s by
pressing and holding in the button on the transmitter for two seconds (the LED changes colour).
Red = 6 s.
Orange = 12 s.
Green = 18 s.