Printer Setup
Document ID: OMM-00174 Rev. D Pro 30f Operations Guide 39
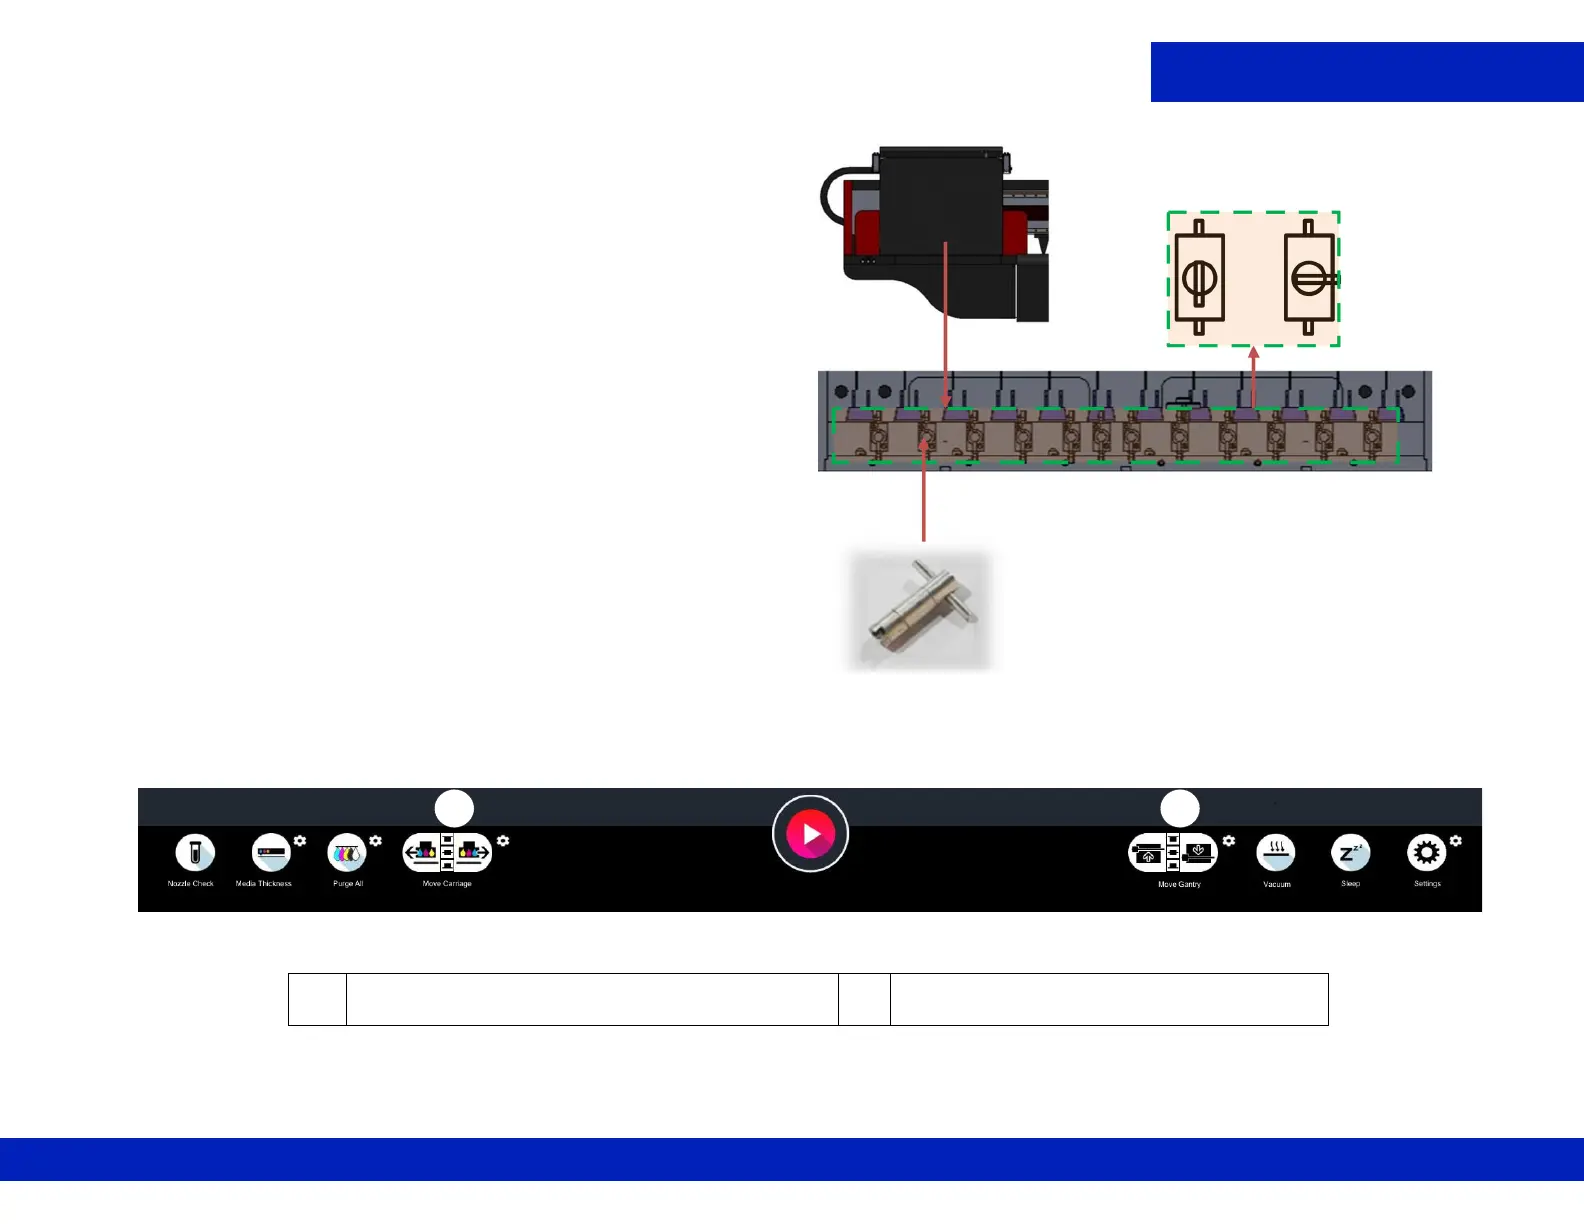
10. If air bubbles come out of the print heads during
purging, conduct an ink bleed by opening the bleed
valves and pressing the associated ink purge button.
Continue until no air bubbles come out. Then close
the bleed valves.
11. Choose Settings to open the Test Printer window,
and then choose Purge All to perform a purge and
sweep to clean the print heads. The carriage moves
from left to right during sweeping and returns to the
home position. Waste ink is then exhausted by the
vacuum plate.
12. Test the movement of carriage and gantry using the operation panel.
NOTE: The LED lamps turns on when the machine is powered up, and automatically work once printing starts.
Figure 5-11 Conduct an Ink Bleed
ClosedOpen
I J
Figure 5-12 Tool Bar
I Move carriage to the left, right (X-axis).
Move carriage up or down on Z-axis.
J Move gantry front/back (Y-axis)