108
Page
Apply soapy water to
the fitting and to the
connection on the rooftop
termination
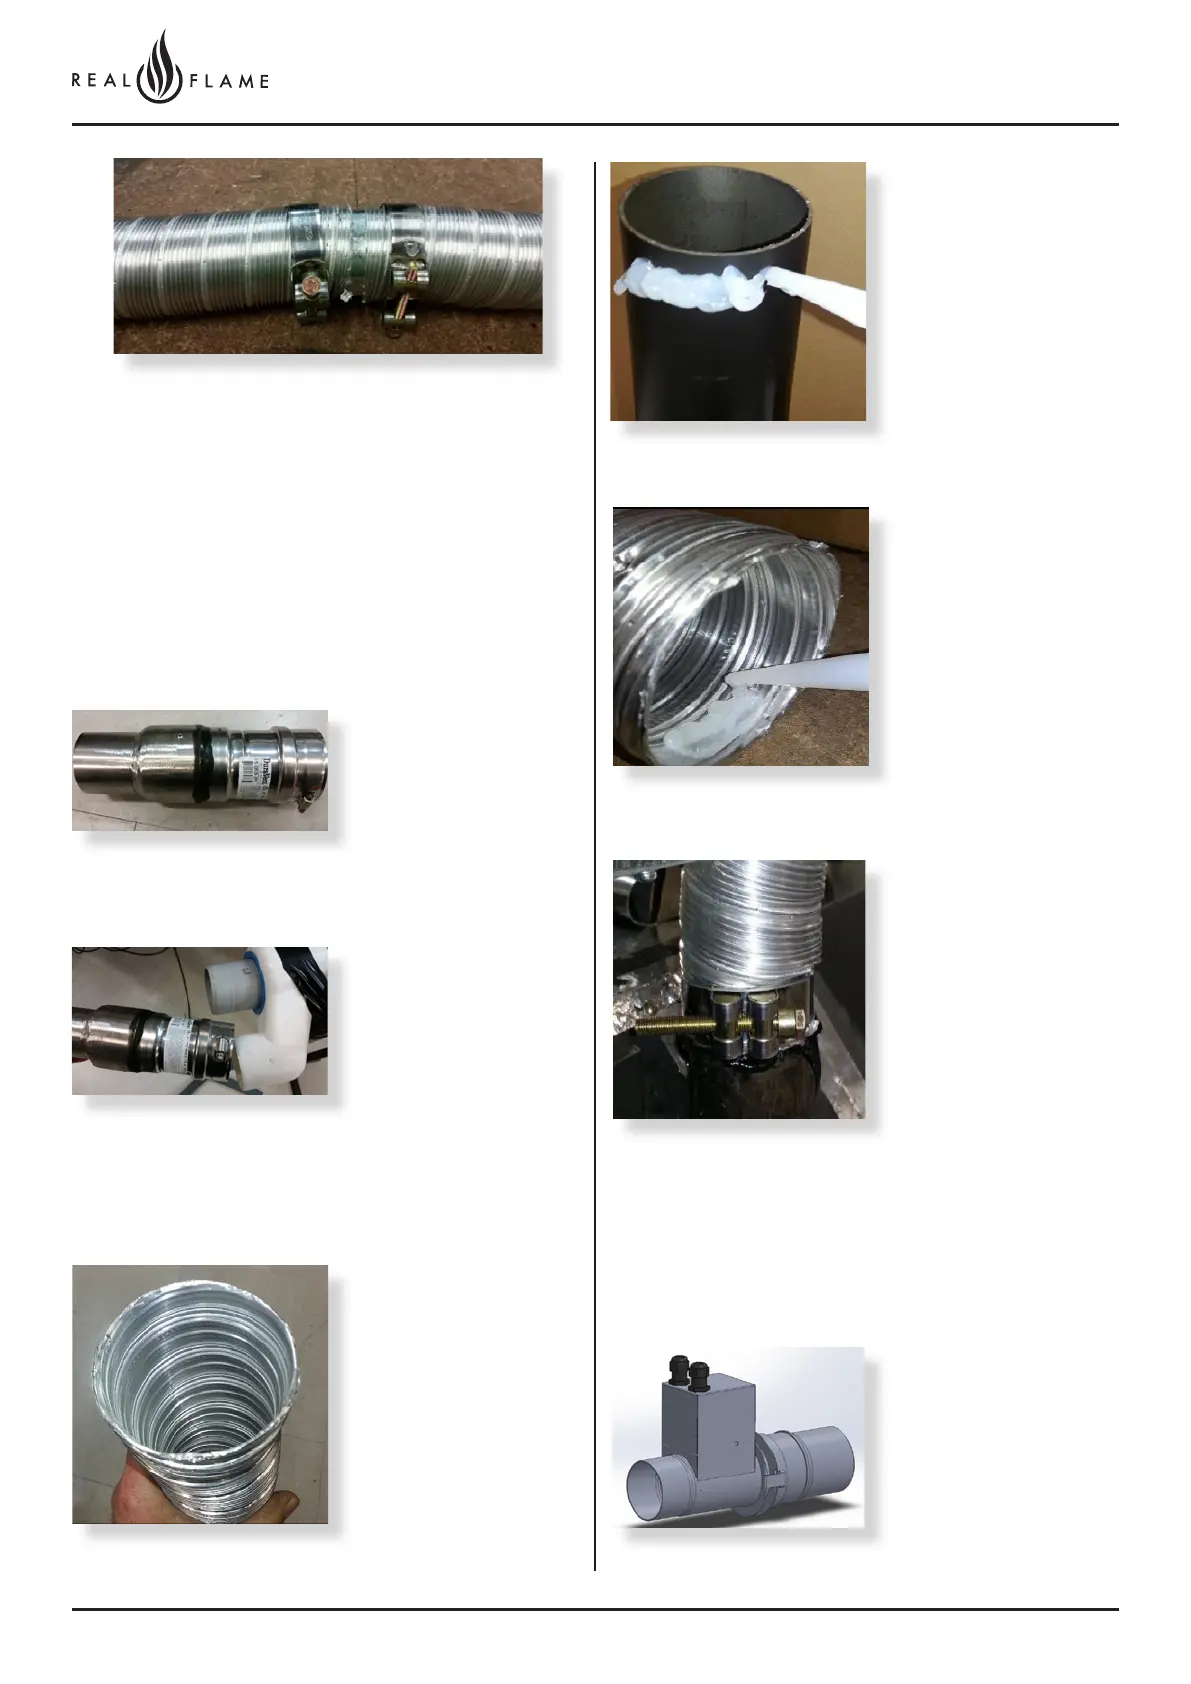
Apply an 8mm silicon
bead fully around the
inside of the flue end
(heater connection end)
Fit flue clamp over flue
(loosely).
Rooftop termination
should be mounted and
adequately supported.
Ensure clearances
to combustibles are
maintained.
Termination must be
installed to AS5601 gas
installation codes.
Slide each flue halfway onto connection
joiner.
Tighten clamp fully.
Wipe excess silicon, visually check connection to ensure
connection is fully sealed.
Intake connection to rooftop terminal
Note: The full 5m of flexi
flue must be used.
Fully extend the 5m
aluminum flexi flue.
NOTE- FULL LENGTH
MUST BE USED.
Ensure ends are burr free
and round, test fit flue will
slide over connection.
Apply an 8mm thick silicon
bead fully around heater
connection approx. 10mm
from the top.
Aluminum to Poly Pro flue connection
Slide flue onto connection
spigot fully.
Tighten clamp fully.
Wipe excess silicon,
visually check connection
to ensure connection is
fully sealed
Note: A total of 5m of
aluminum flexi flue must
be used prior to the joiner.
Failure to do this will result
in appliance shutdown.
EXHAUST OUTLET CONNECTION TO HEATER