48
Page
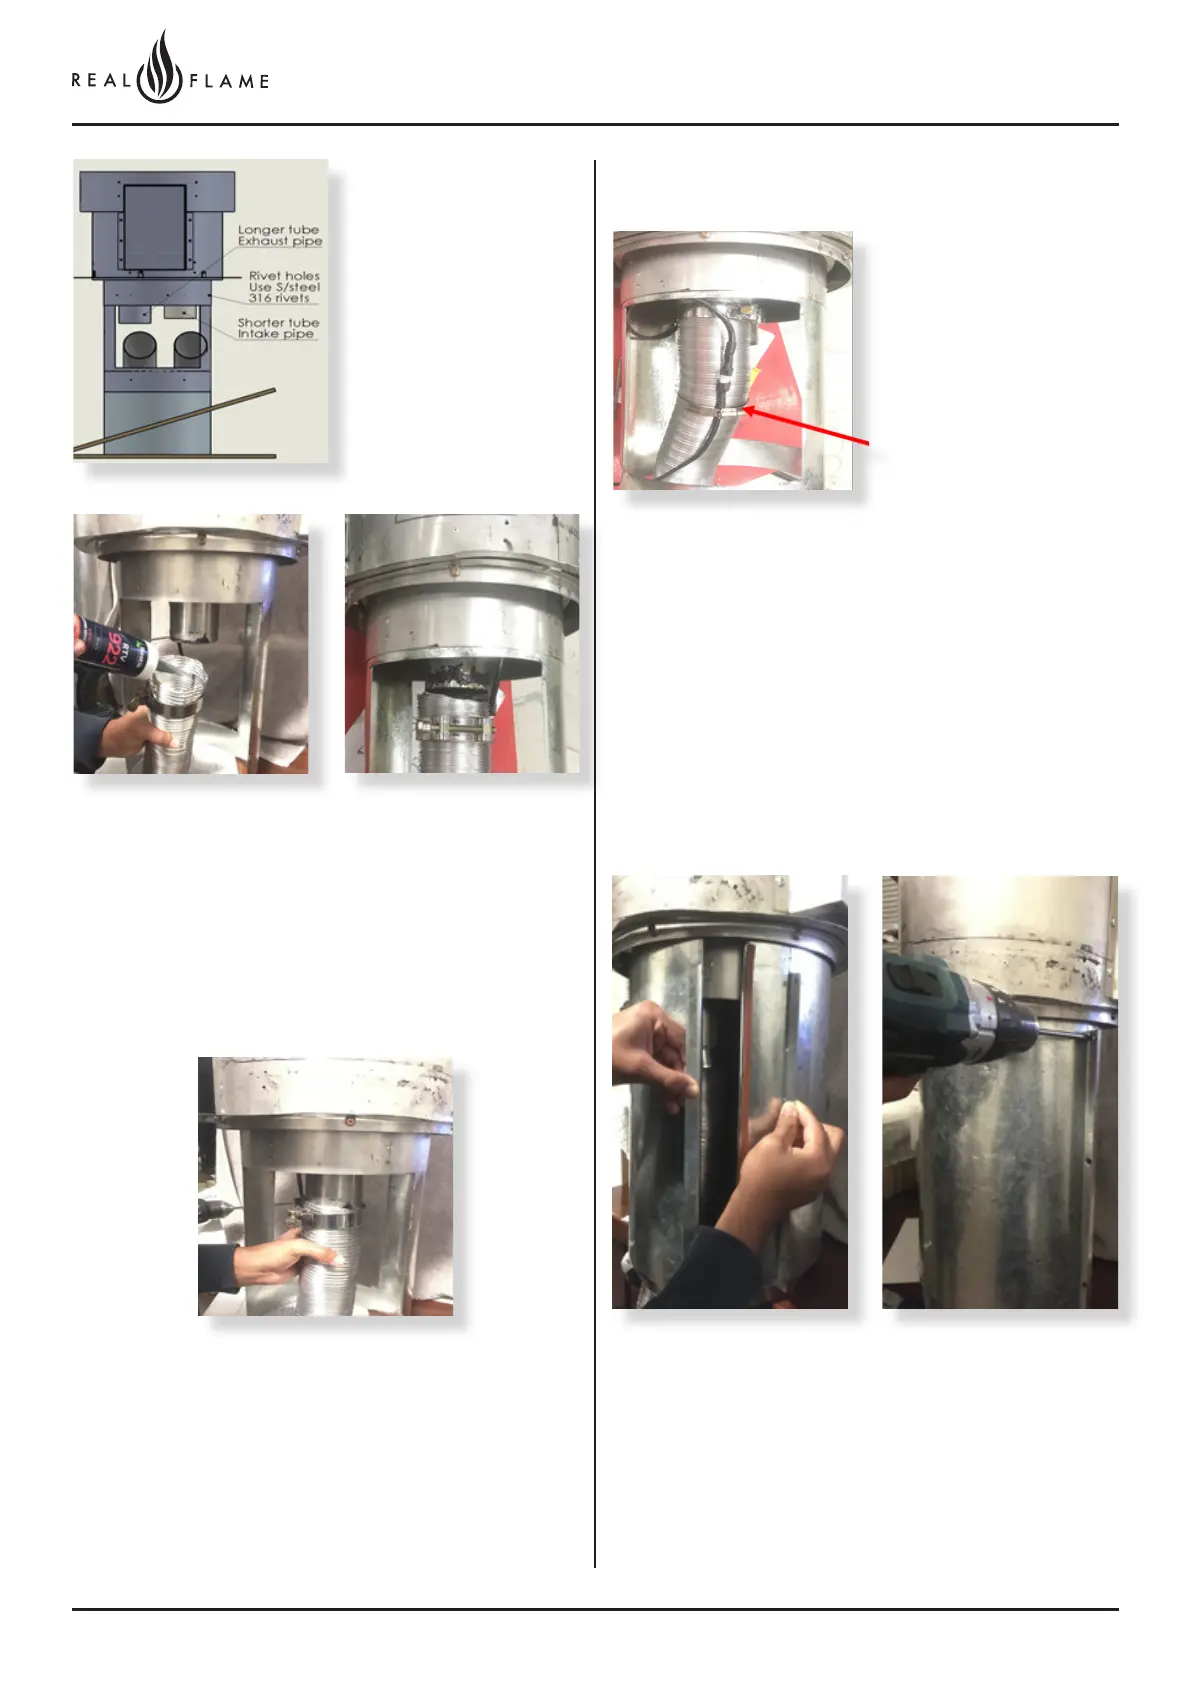
Fit the termination on to the
access panel and match
the rivet holes to rivet the
termination to the access
panel.
Use only the rivets
provided.
Slide flue onto connection spigot fully. Tighten clamp fully.
Wipe excess silicon, visually check connection to ensure
connection is fully sealed.
Ensure that the pipes are connected correctly and are not
inverted.
Use the labels to identify exhaust and intake spigots
On the termination end - Fit clamp loosely & apply
silicon inside the pipes. Apply an 8mm silicon bead fully
around the inside of the flue and on the flue spigot. Smear
smoothly around the surfaces.
Recommended Silicon – Non-acetic, neutral cure 200°C
or higher temperature rated. Bostik RTV 922 or similar.
Connect the fan power
cable from the appliance
to the termination.
Ensure the cable is
clamped only to the intake
pipe to secure the cable
from hanging loose &
touching the hot flue gases
pipe.
Use the clamp provided.
The clamp can be opened
like a collar and fitted
around on the flue.
Flex collar and fit around the access panel. Socket the
collar all the way up close to the air intake slots Ensure
there is a rubber seal top and bottom of the collar.
Use only the screws provided to tightly fit the collar to seal
the access panel.