42
➌-2 ABOUT RS-232C
◆CONNECTION VIA RS-232C
When the RS-232C port is connected to a PC, the PX-10E/30E can be controlled from the PC.
When using a commercially available RS-232C cable, make sure that the pins are connected as
shown below.
For details of the RS-232C cable, contact the dealer from whom you have purchased the
PX-10E/30E or our nearest branch office or sales office.
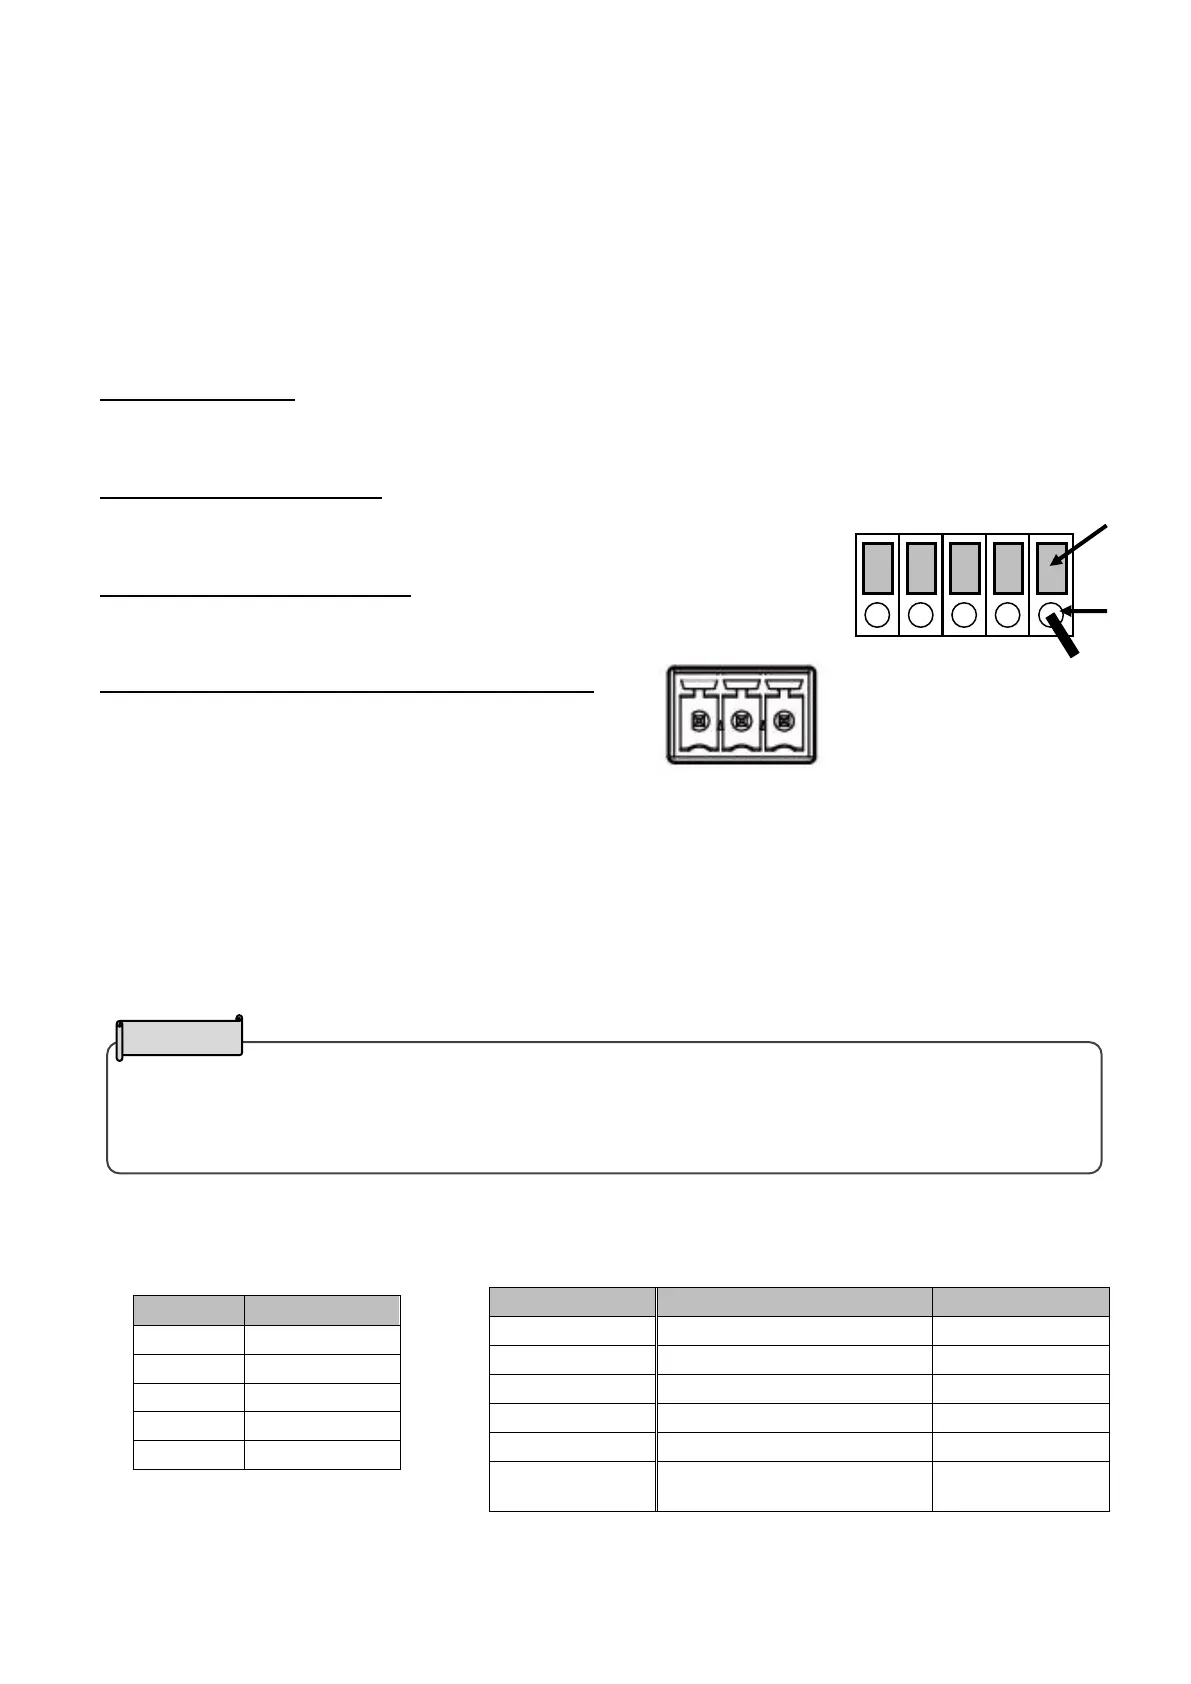
●Unit with the screw lock terminal block
Applicable lead wire
Single cable: Φ0.32mm~Φ0.65mm (AWG28~AWG22)
Stranded cable:0.08mm2~0.32 mm2(AWG28~AWG22) Strand diameter: more than Φ0.12mm
How to connect the lead wire
Press and hold ① with a flat screwdriver. Insert the lead wire into ② firmly.
Release the flat screwdriver from ①.
How to disconnect the lead wire
Disconnect the lead wire while pressing ① with a flat screwdriver.
●Unit with the Euro terminal block
Specifications of the Euro terminal block of the unit
Number of pins:3pin
Pitch:3.5mm
The wire mounting side (plug side) of the Euro terminal block is not included in the product.
For setting up
To use communication control, be sure to set up in the order described below.
①Connect the PX-10E/30E to your PC with the RS-232C cable.[Rear panel: RS-232C port
(⇒P.14)]
②Start your PC and set the communication mode of the RS-232C to the communication mode of
the PX-10E/30E.
③Start the program to control the PX-10E/30E from your PC and start the RS-232C control.
RS-232C connector specifications
(←:Reception →:Send) RS-232C communication specifications
※Pins 1 and 4 are used only on the screw
lock terminal block.
・To protect the PX-10E /30E and your PC, be sure to turn off the power of each unit before starting
the connection work.
・For the information how to set the communication mode of the RS-232C, refer to the instruction
Screw lock terminal block