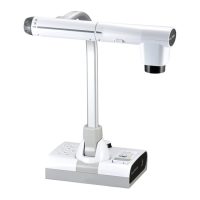
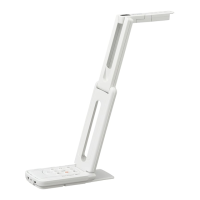
Function buttons on the base of the unit include:
Power: Turn Elmo ON or OFF (keep Power button
held down for 2-3 seconds to turn OFF).
PC: Display computer image on projector
(if using a VGA connection)
Camera: Display Elmo image on projector
Brightness: Brighten or darken the camera image
Save image to SD card
Switch output image to SD mode
Display Print or 3-D Objects…Endless Possibilities
After connecting the appropriate cables and turning the power ON,
place a print or 3-D object beneath the camera. Objects may be placed
on the stage or the stage may be removed. Use the zoom and auto-
focus features (and lamp, if needed) to project a clear, sharp image.
Tip: To reduce glare when displaying glossy objects, place the supplied
anti-glare sheet over the area where the glare is occurring.
Ways to use the Elmo for instruction in your classroom:
Read a book for all to see
Demonstrate with manipulatives (coins, blocks, letters), tools such as
a clock or ruler or any “show and tell” object.
Display and discuss artwork, primary source documents, newspapers,
maps, graphs, nutrition labels and other print or graphic objects.
Mark-up/edit writing pieces by overlaying with acetate.
Demonstrate a process such as a science dissection or art technique.
Rather than projecting onto a screen, tape a large sheet of paper to
the wall when displaying a graphic organizer, venn diagram or blank
map and have students filling in the necessary information.
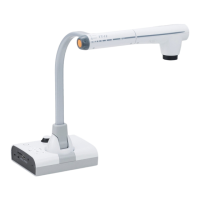
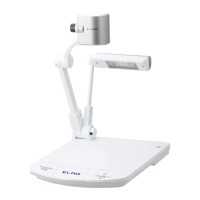
zoom dial
rotate dial to
zoom in or out
auto-focus
press once to focus automatically
lamp switch
illuminate objects
Capture Images with TWAIN software
Camera head folds
down 90˚ for storage
SD (Secure Digital) is a type of memory card commonly used in digital
cameras and other devices. If you choose to use the optional SD slot,
you must supply your own SD card (it does not come with the Elmo).
Display images from an SD card:
1. Insert an SD card into the slot on the side panel (push the card
again to remove it).
2. Press the button to display images saved on the SD card.
3. Press or to advance to the next image. Press or to
display the previous image.
The zoom feature can be used with SD card images.
Save images to an SD card:
1. Press the
button to switch to camera mode.
2. Press the
button to save whatever image is being displayed.
When the
mark lights up on the screen, the saving is in
process. When the mark goes out, the saving process is complete.
Capturing images is only possible when using a VGA connection.
To “scan” or capture images displayed via the Elmo you must first
install the Elmo TWAIN software. Use the Start menu to select My
Computer. Navigate to S:\Software\Elmo. Double-click the Setup
icon and follow the prompts.
After the software is installed, use the supplied USB cable to connect
the Elmo to the computer. Once the software is installed and the USB
cable is connected, images from the Elmo can be “scanned” into
programs such as Powerpoint or Word.
1. Open the program in which you wish to insert an image.
2. Use the Insert menu to select Picture… From
Scanner or Camera. Click the Custom Insert button.
3. Click the Still button to preview the image. When ready,
click the Transfer button and the image will be
transferred to the open document.
 Loading...