Operating & Maintenance Instructions 29
_____________________________________________________________________________________
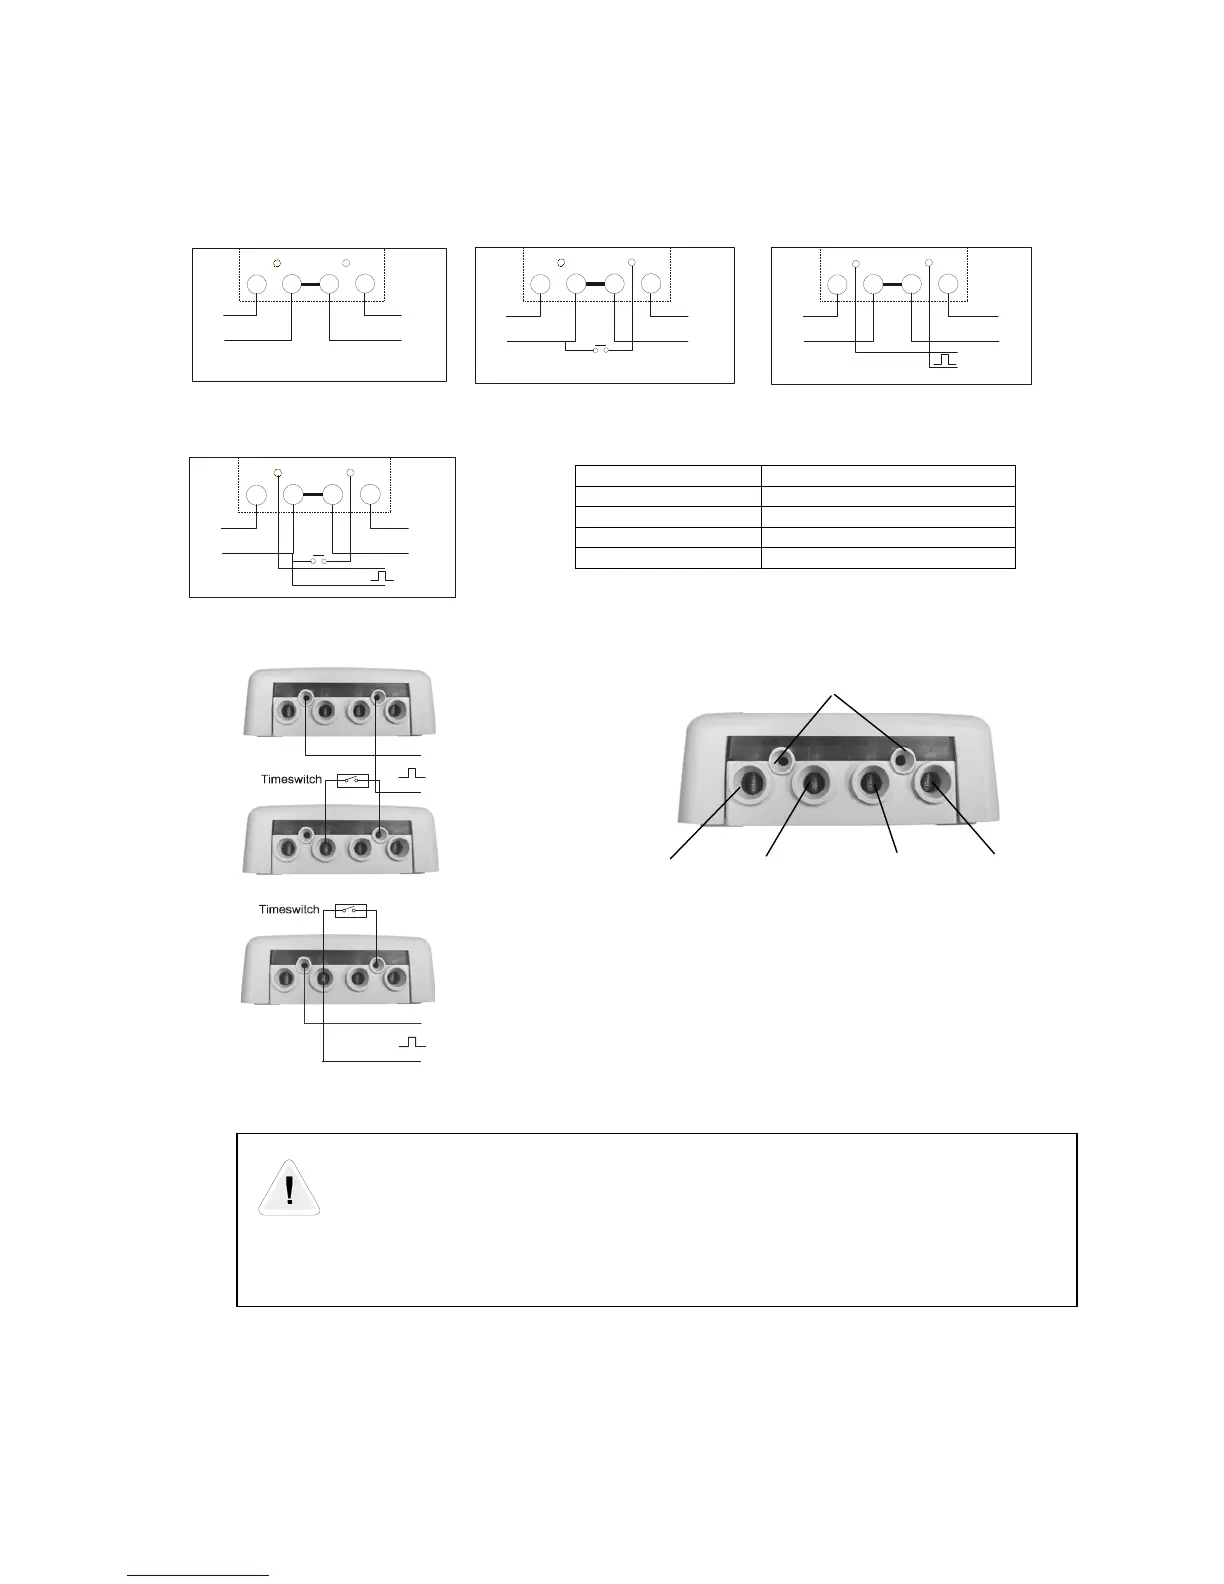
Typical wiring diagrams
Single rate Two rate Single rate – SO output
1 2 3 4
L
N
L
N
MAIN LOAD
13
1 2 3 4
L
N
L
N
MAIN LOAD
+
-
20 21
1 2 3 4
L
N
L
N
MAIN LOAD
Two rate - SO non-isolated output Auxiliary Terminal Numbering
1 2 3 4
L
N
L
N
MAIN
+
-
LOAD
13
20
Terminal numbers Configuration
One Rate, no SO
13 Two Rate
20 21 One Rate, Isolated SO
20 13 Two Rate, Non Isolated SO
Auxiliary Terminal Configurations
20 21
+
-
1 2 3 4
20
21
+
-
20 21
+
-
1 2 3 4
20
13
20 21
+
-
1 2 3 4
20
13
+
-
1 2 3 4
20
13/21
Auxiliary Terminals
SO – 1 Rate
2 – Rate
Live in Neutral in Neutral out Live out
SO – 2 Rate
WARNING
These diagrams are for reference purposes only.
Meters should always be wired to the diagram supplied on the inside of the meter terminal cover.
Figure 5 - Terminal Arrangements