3 Installation of Flatpack2 Rectifiers
User’s Guide Flatpack2 Rectifier Modules, 350002.013, 7v0-2010-09 13
3. Installation of Flatpack2 Rectifiers
Safety Precautions
Get acquantied with the satety precautions on page 2, before installing or handling the
equipment.
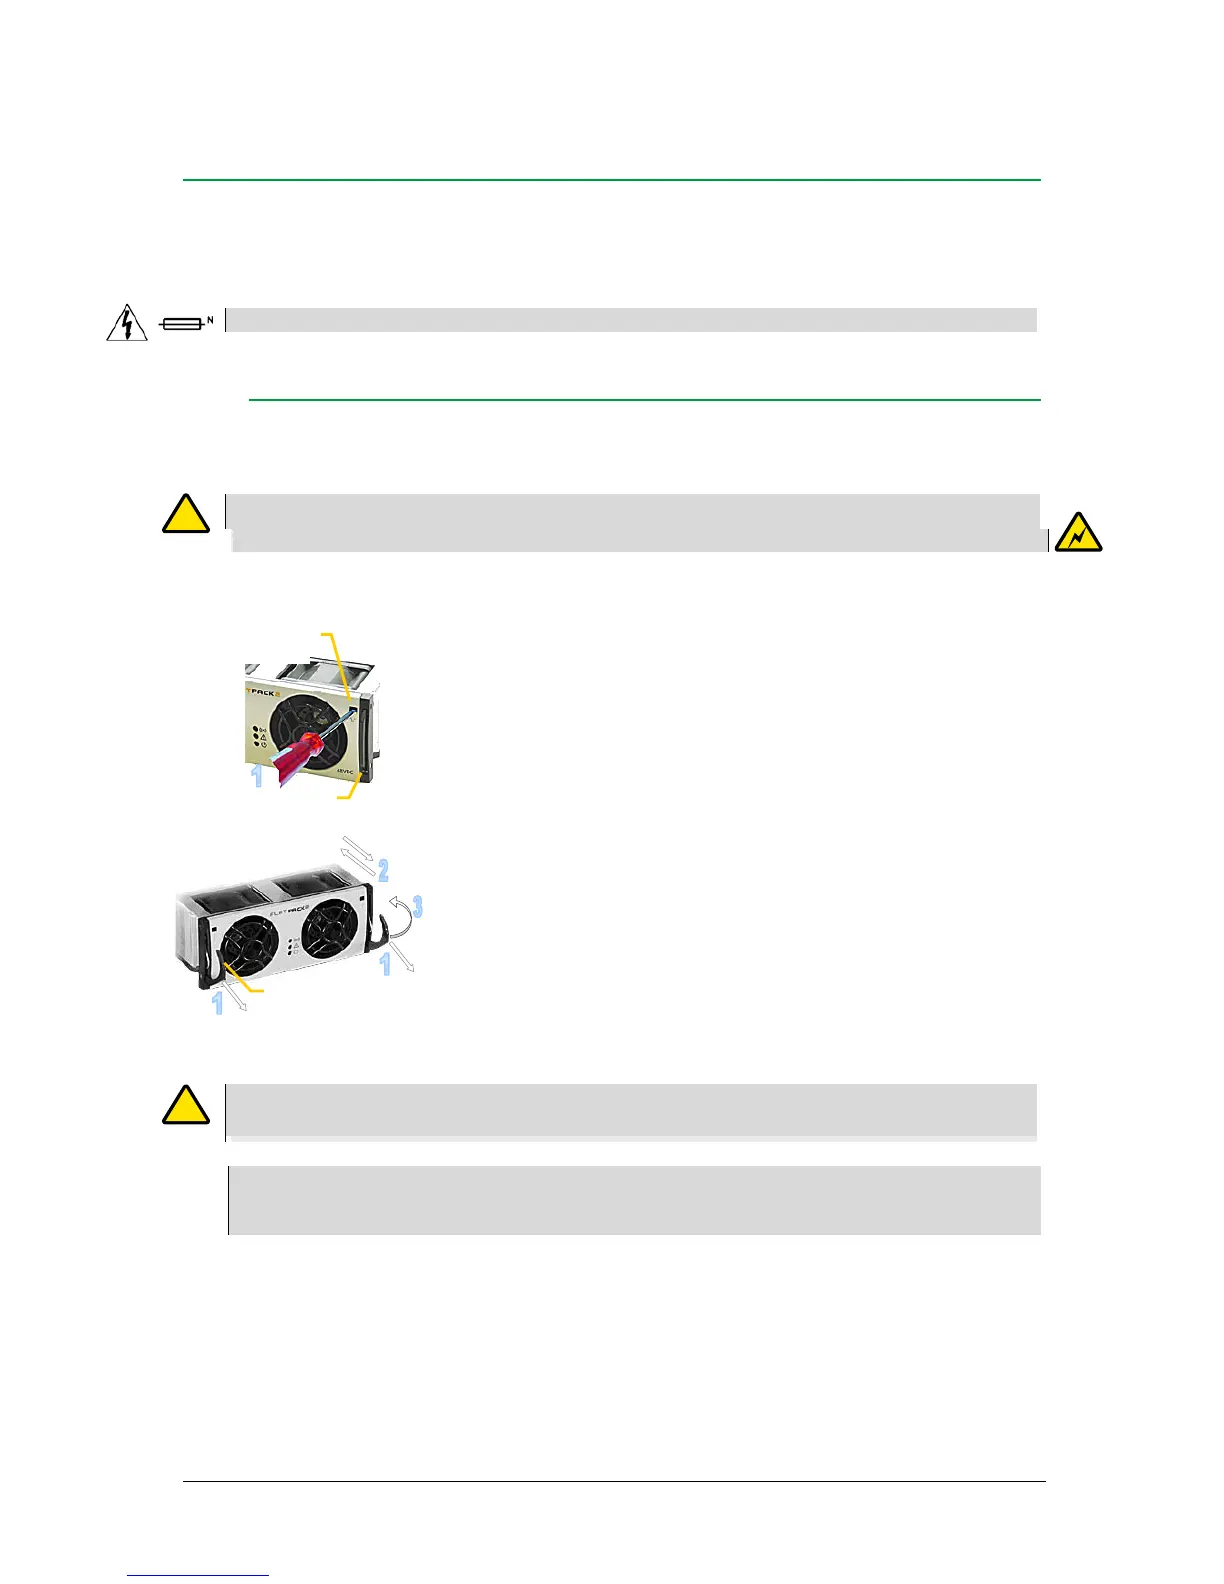
Mounting and Removing Rectifiers
The Flatpack2 rectifiers incorporate handles that serve both to lock the modules into
position and to pull them out of their housings.
Mounting the Flatpack2 rectifier (hot-pluggable)
1. Open the handles
(insert a screwdriver into the holes to release the
spring mechanism)
2. Insert the module fully into the power shelf
3. Lock the handles
(push the handles up into their housings (locked
position), so that the module is securely locked)
Removing the Flatpack2 rectifier
1. Open the handles
(insert a screwdriver into the holes to release the
spring mechanism)
2. Remove the module
(use both handles to pull the module loose from the
connector; support from underneath)
Figure 4 Flatpack2 rectifiers’s locking mechanism
WARNING: To replace installed rectifiers with new ones, remove the installed rectifiers and wait for the controller to
notify communication error with the extracted rectifiers. Push the new rectifiers firmly inwards — one module at a time,
allowing a 2s delay — to plug them in the power shelf. Start with the shelf position with lowest ID number. Lock their
handles.
Removing Blind Panels
Release the panel’s upper left and right corners by inserting a small screwdriver into the
panel’s upper left gap, and carefully press down and out to release the locking tabs.
Repeat on the upper right gap. Refer to the Flatpack2 system’s quick start guide for more
information.
New Flatpack2 rectifiers must be hot-plugged in the power shelf, one at time, starting with position 1, 2, 3 and so on.
This is usually performed before shipment of the system. Read your system’s quick start guide for more information.