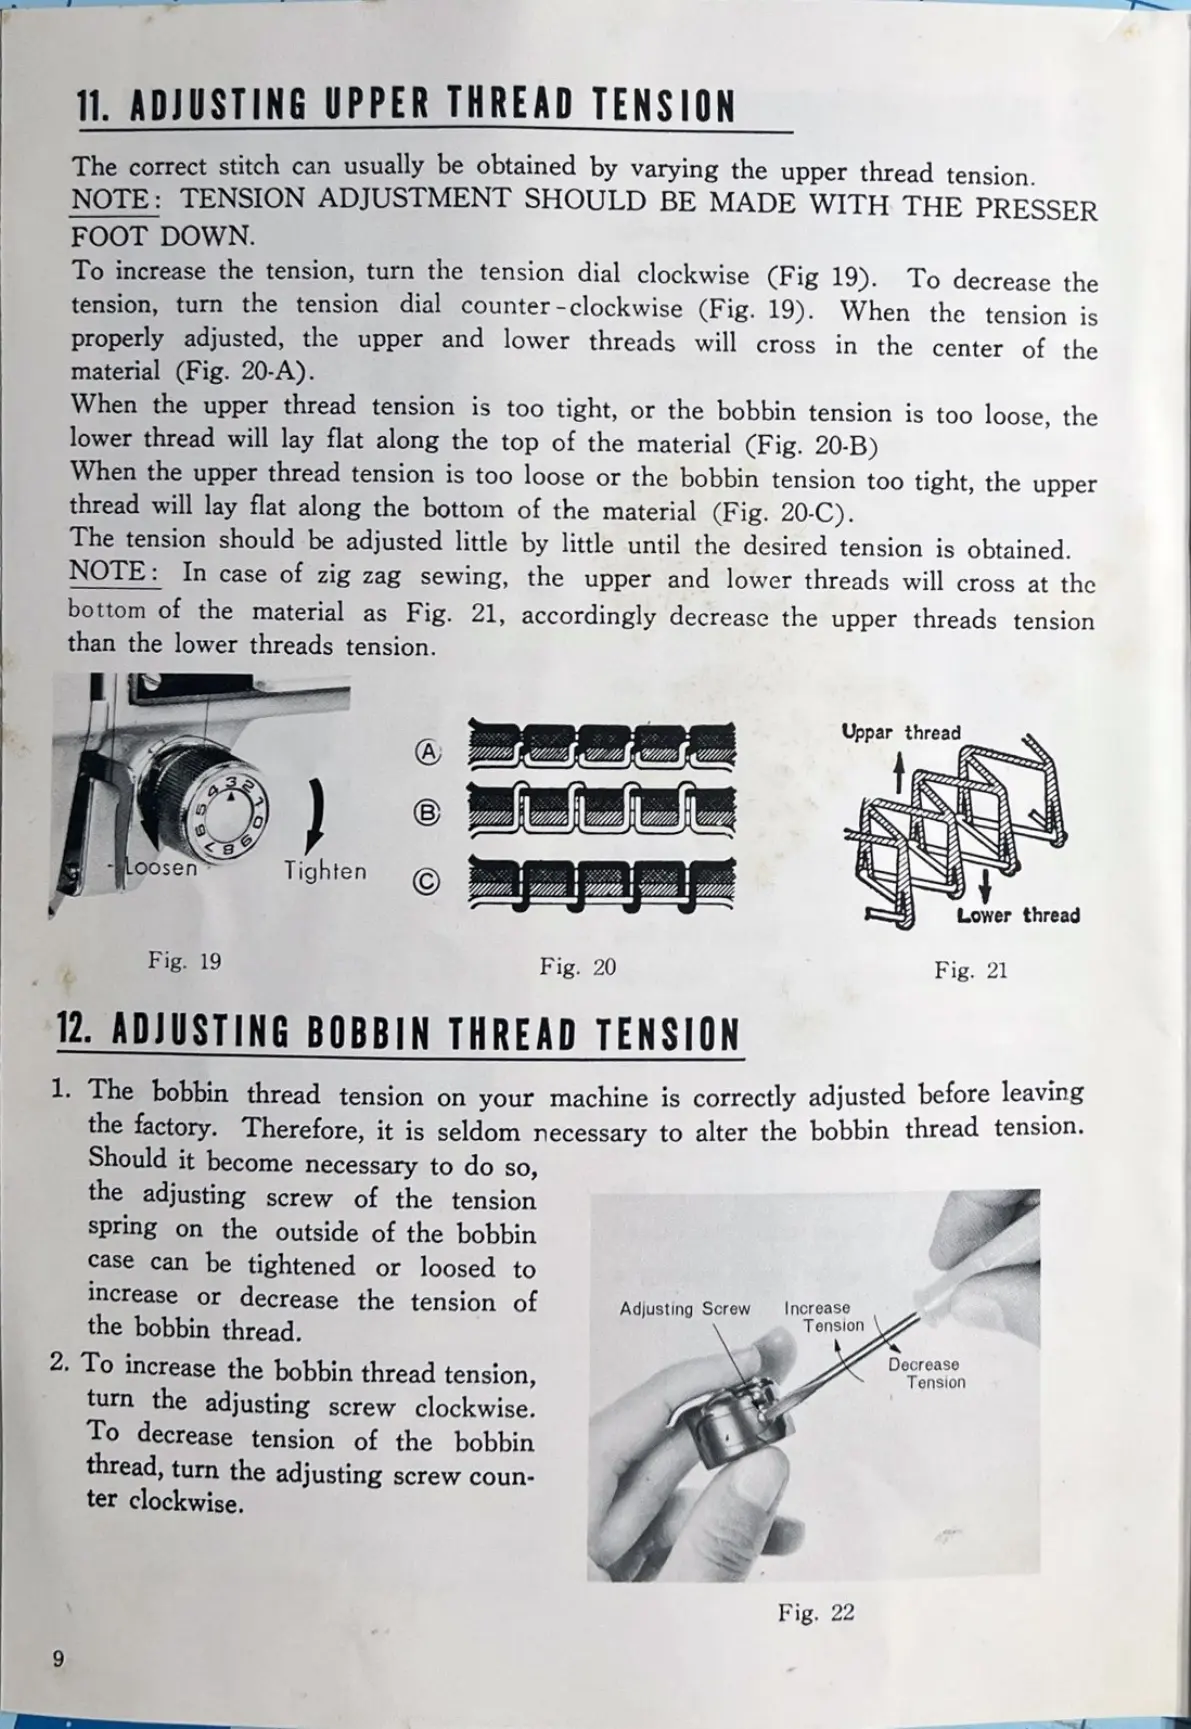
11. ADJUSTING UPPER THREAD TENSION
The correct stitch can usually be obtained by varying the upper thread tension.
NOTE: TENSION ADJUSTMENT SHOULD BE MADE WITH THE PRESSER
FOOT DOWN.
To increase the tension, turn the tension dial clockwise (Fig 19). To decrease the
tension, turn the tension dial counter-clockwise (Fig. 19). When the tension is
properly adjusted, the upper and lower threads will cross in the center of the
material (Fig. 20-A).
When the upper thread tension is too tight, or the bobbin tension is too loose, the
lower thread will lay flat along the top of the material (Fig. 20-B)
When the upper thread tension is too loose or the bobbin tension too tight, the upper
thread will lay flat along the bottom of the material (Fig. 20-C).
The tension should be adjusted little by little until the desired tension is obtained.
NOTE: In case of zig zag sewing, the upper and lower threads will cross at the
bottom of the material as Fig. 21, accordingly decrease the upper threads tension
than the lower threads tension.
Uppar thread
8
oosen Tighten
Lower thread
Fig. 21Fig. 19 Fig. 20
12. ADJUSTING BOBBIN THREAD TENSION
1. The bobbin thread tension on your machine is correctly adjusted before leaving
the factory. Therefore, it is seldom necessary to alter the bobbin thread tension.
Should it become necessary to do so,
the adjusting screw of the tension
spring on the outside of the bobbin
case can be tightened or loosed to
increase or decrease the tension of
Adjusting Screw
the bobbin thread.
Increase
Tension
2. To increase the bobbin thread tension,
Decrease
Tension
turn the adjusting screw clockwise.
To decrease tension of the bobbin
thread, turn the adjusting screw coun-
ter clockwise.
Fig. 22
9