B
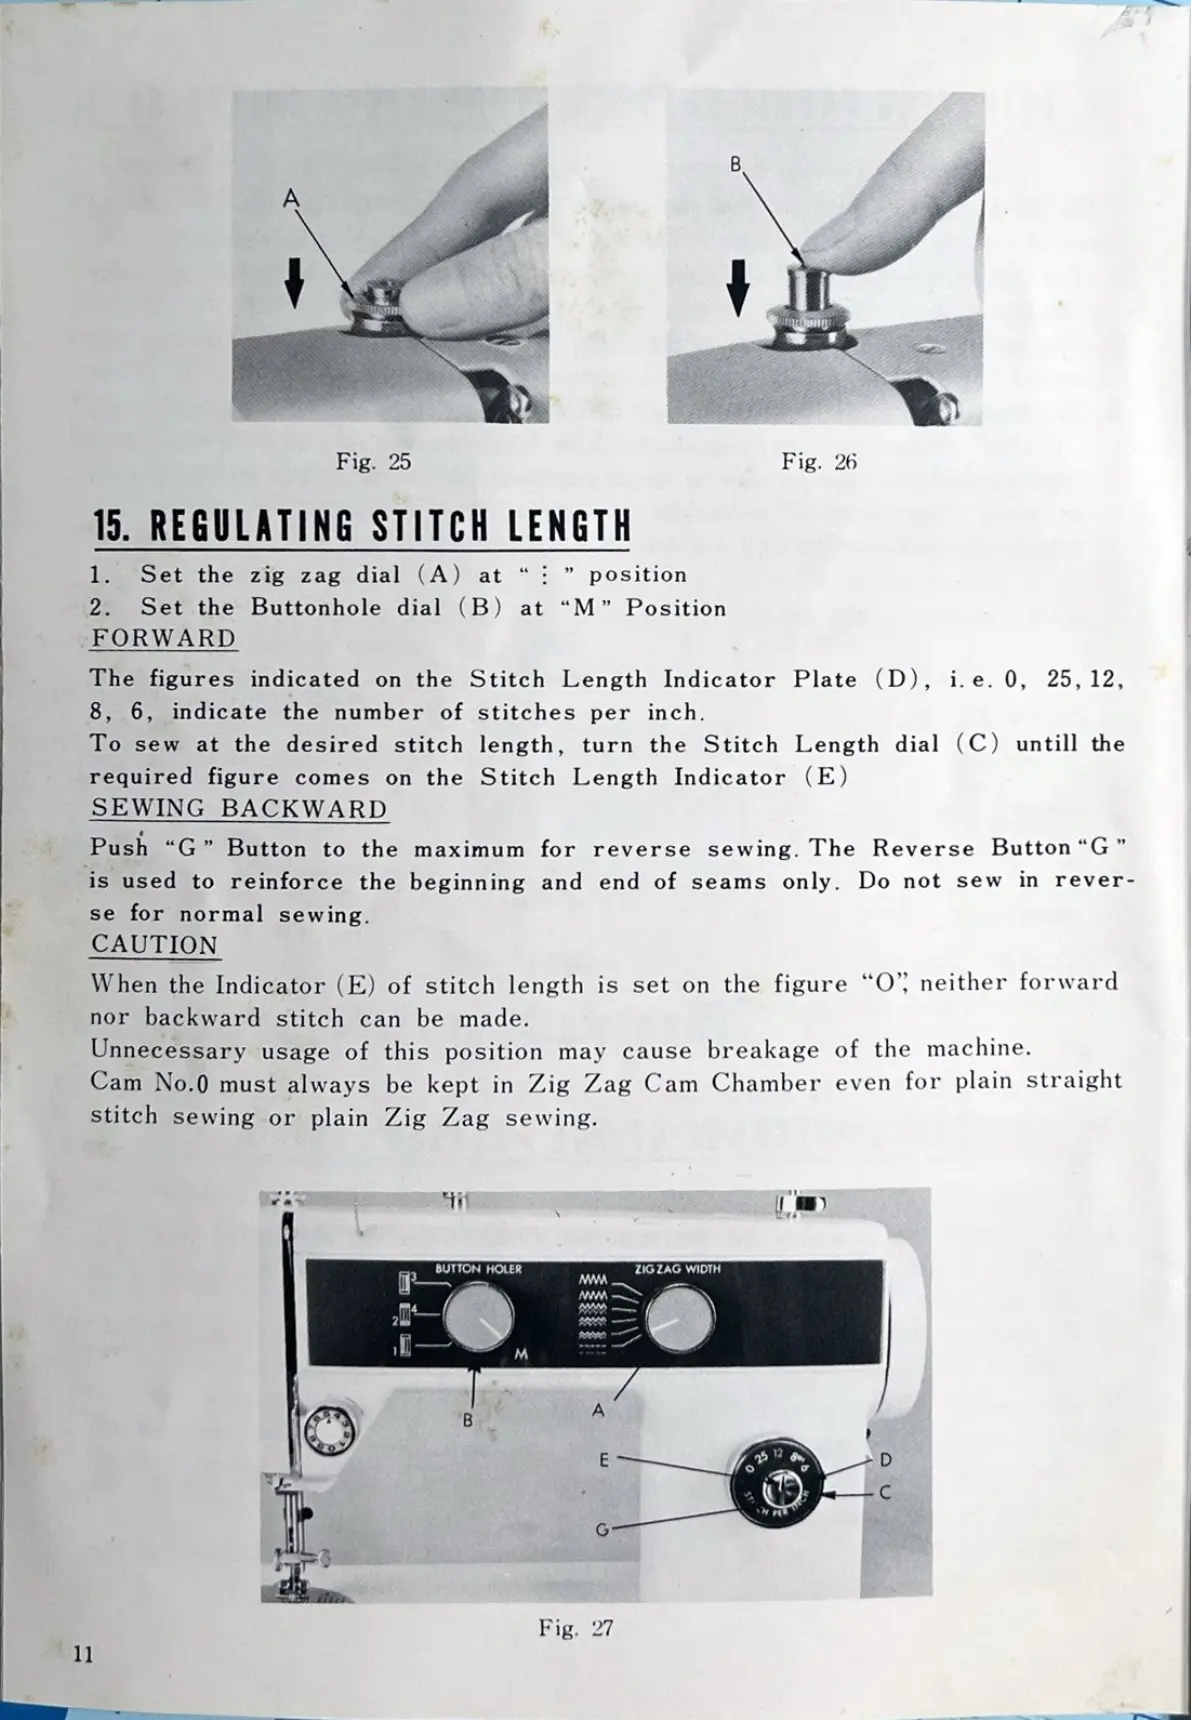
Fig. 25 Fig. 26
15. REGULATING STITCH LENGTH
1. Set the zig zag dial (A) at " : " position
2. Set the Buttonhole dial (B) at "M" Position
FORWARD
The figures indicated on the Stitch Length Indicator Plate (D), i. e. 0, 25, 12,
8, 6, indicate the number of stitches per inch.
To sew at the desired stitch length, turn the Stitch Length dial (C) untill the
required figure comes on the Stitch Length Indicator (E)
SEWING BACKWARD
Push "G" Button to the maximum for reverse sewing. The Reverse Button "G"
is used to reinforce the beginning and end of seams only. Do not sew in rever-
se for normal sewing.
CAUTION
When the Indicator (E) of stitch length is set on the figure "O", neither forward
nor backward stitch can be made.
Unnecessary usage of this position may cause breakage of the machine.
Cam No. 0 must always be kept in Zig Zag Cam Chamber even for plain straight
stitch sewing or plain Zig Zag sewing.
BUTTON HOLER ZIG ZAG WIDTH
wW
B
E 25 12
IN PER
C
G
Fig. 27
11