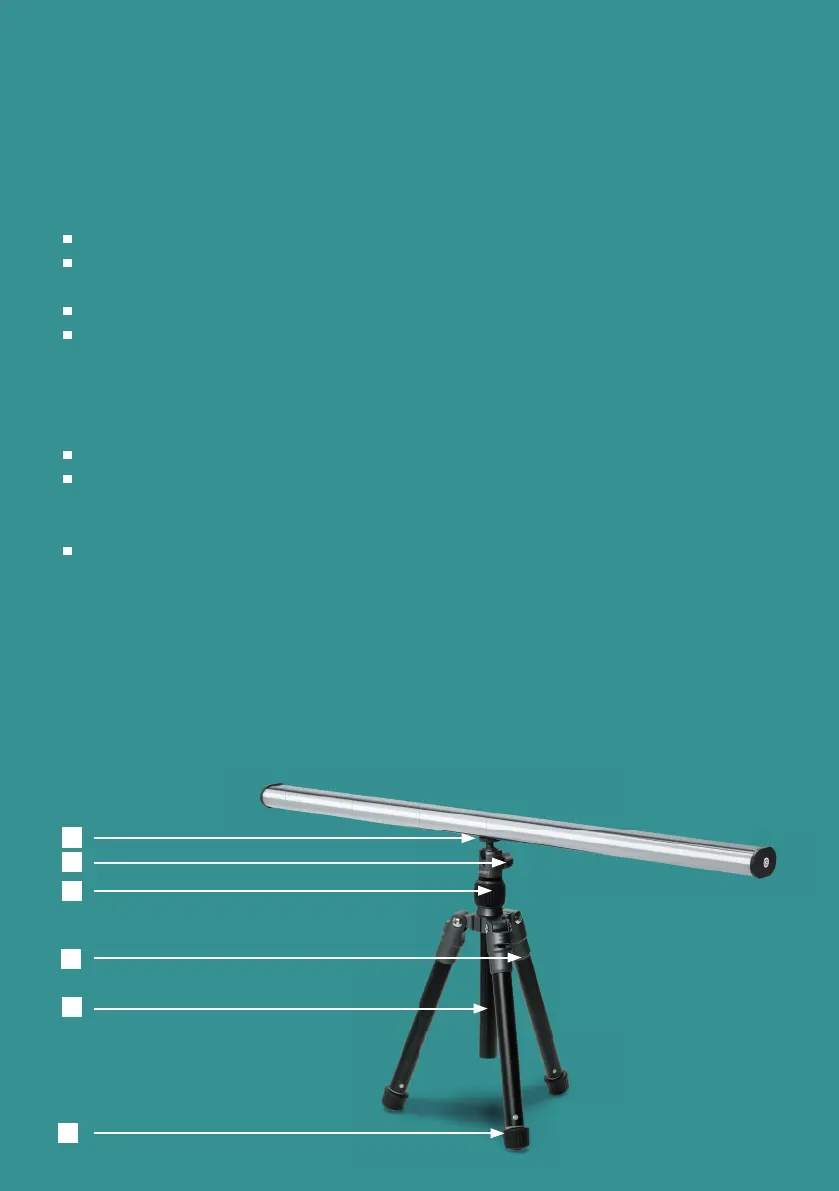
3 TRIPOD INSTRUCTIONS
Here we explain how to use the tripod. Some tripods are delivered in a
package. Others are already (partially) attached to the Light Tube.
Remove the tripod from the packaging if it is packed.
Fold out the legs of the tripod [ 1 ]. You will hear clicks during folding. At 3
clicks, the tripod is in the correct position for general use.
Put the tripod down.
The central stick [ 2 ] can be inserted or adjusted by loosening the central
black screw [ 3 ]. Turn the screw counterclockwise to loosen the central
stick. You can reattach the stick by tightening the central black screw.
Attaching the Light Tube
Make sure the ball part [ 4 ] is secure by tightening the screw [ 5 ] rmly.
Hold the Light Tube and screw the screw of part [ 4 ] into the screw hole on
the bottom of the Light Tube. It is convenient to hold the lever [ 2 ] and use
it to tighten the screw.
You can adjust the angle of the Light Tube with screw [5].
Adjust the tripod height.
You can extend or shorten the legs [ 1 ] [ 2 ] by turning the feet [ 6 ] clockwise.
Make sure you turn it all the way through. Then push or pull the leg out/in to
the desired height. Secure the legs again by turning the feet [ 6 ] counterclock-
wise.
TRIPOD INSTRUCTIONS
2
1
3
4
5
6
5