6 • MODBUS Termination 026-1727 Rev 3
should start blinking.
3. Using the UP and DOWN arrows (T4 and
T5), change the address to the desired value.
4. Press ENTER to save new address.The ad-
dress field should stop blinking.
5. Press MENU (T1) to go back to main menu.
3.1.2.3.1. Versions
The DAC and Visograph versions are also shown
on the Controller Info screen.
If the Visograph version shown is not the most
recent, set the Reload Display field to Yes. This will
cause the display to download the latest screens
contained in the DAC.
3.2. MODBUS Termination
The DAC has on-board termination capability. A
single termination jumper is located next to the
RS485 slave connector. If the DAC is located at the
physical end of the MODBUS network, the
termination jumper should be applied.
4 Input and Output Setup
4.1. The DAC Inputs
The DAC will be able to use input data from either
physical or network inputs. The DAC has connections
to analog and digital sensors, transducers, switches,
and other input types typically used in a rooftop
HVAC unit application. The input type and function
for each point must be programmed in the DAC
software by the installer.
The DAC application will support the following
analog inputs:
NOTE: When the MODBUS address is
changed, the DAC will automatically reboot.
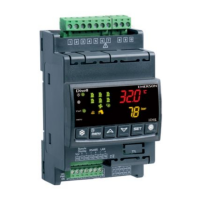
Figure 4-1 - DAC Input Locations
Analog Input Type Description
CO2 Level Local or
Network
Network CO2 Level
Duct Pressure Physical Local Duct Static
Pressure Sensor
Inside Humidity Local or
Network
Network Inside
Humidity
Mixed Air Temp Physical Local Mixed Air
Temperature Sensor
OAH Local or
Network
Outside Humidity
Table 4-1 - DAC Analog Inputs