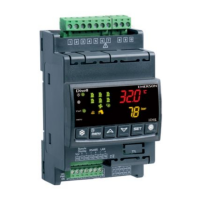
Discharge Air Controller (DAC) Manual E2 Setup • 29
termination jumpers to the TERMINATED &
BIASED position (all three jumpers UP); otherwise,
set all jumpers DOWN if not the first device.
8.1.1. Setup Network Ports
Before setting up a DAC, the port on the E2 that
has the MODBUS cable connected must be set up as
a MODBUS port.
1. Log in to the E2 with Level 4 access.
2. Press
followed by - General
Controller Info.
3. Press
+ to open the Serial tab of the General
Controller Info setup screens:
4. This screen will have a “Connection” field for all
COM ports on the E2. Highlight the COM port con-
nection field that will be used for DAC, and press
- LOOK UP. From the list of network types,
select MODBUS.
5. Four fields will become visible underneath the
COM port connection field, which pertain to the
way the device communicates:
• Baud - Default setting is 19.2k. This must be
changed to 9600. (All devices connected to the same
COM port should be set to the same baud rate.)
• Data Size - Leave this field at the default value (8).
• Parity - Leave this field at the default value (None).
• Stop Bits - Leave this field at the default value (1).
Press to save changes and exit.
8.2. Add and Connect DACs
To enable communications between E2 and the
DAC units, the devices must be added and addressed
in E2.
1. Log in to the E2 with Level 4 access.
2. Press
- Connected I/O Boards
and Controllers.
3. In the Connected I/O screen, under the ECT tab,
Enter the number of DAC devices in the iProDac
number field.
4. Press
to return to the Network Setup menu,
then select
- Network Summary.
5. Locate the DAC units you added to the network list
(press
and to scroll through the list). The
default name for a DAC increments up starting with
Figure 8-2 - Serial Communications Manager Screen
Figure 8-3 - Connected I/O Screen