3
MicroVission Retrot Instructions • 35391MVRF
1.0 General Information
This procedure denes the steps required to install Vilter´s MicroVission panel as the controller for a 400 series
reciprocating compressor.
It is highly recommended that the instructions be reviewed prior to retrotting.
Figures and tables are included to illustrate key concepts.
Safety precautions are shown throughout the manual. They are dened as the following:
WARNING - Warning statements are shown when there are hazardous situations, if not avoided, will result in serious
injury or death.
CAUTION - Caution statements are shown when there are potentially hazardous situations, if not avoided, will result in
damage to equipment.
NOTE & NOTICE - Notes and notices are shown when there is additional information pertaining to the instructions
explained.
Table of contents
1.0 General Information .......................................................................................................3
2.0 MicroVission Installation Recommendations ..................................................................4
........ 2.1 Installation when retrotting from Viltech, Vantage, or Keypad control panels ......4
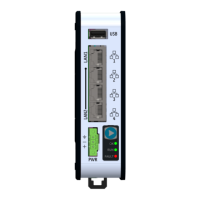
.......... Figure 1. Kit KT1133A ......................................................................................4
.......... Figure 2. Keypad UL Retrot .............................................................................5
.......... Figure 3. MicroVission Panel on Support Bracket .............................................6
.......... Figure 4. Tri-Micro lter with pressure switch ..................................................6
.......... Figure 5. Tri-Micro lter with pressure transducers ..........................................7
.......... Figure 6. Connection of 4-20mA Current Transmitter (Sensor) .........................7
........ 2.2 Installation when retrotting from pressure switches ............................................8
.......... Figure 7. Belt Drive and Direct Drive mounting ................................................8
.......... Figure 8. MicroVission Support .......................................................................8
.......... Figure 9. Tubing According to Compressor´s Drive: Direct Drive (Left) & Belt
.......... Drive (Right) .................................................................................................... 9
.......... Figure 10. Direct Drive Transducer Mounting (left) and Belt Drive Transducer
.......... Mounting (right) .............................................................................................9
.......... Figure 11. Well & Transducers Location ..........................................................10
.......... Figure 12. Tri-Micro Filter with Pressure Transducers for Inlet and Outlet
.......... Pressures ....................................................................................................... 11
.......... Figure 13. Location of RTDs (shown in blue) ...................................................11
.......... Figure 14. Connection of 4-20mA Current Transmitter (Sensor) .....................12
3.0 Field Wiring ..................................................................................................................13
........ 3.1 Power and Input/Output Wiring at the Panel ........................................................13
.......... Figure 15. 120 VAC Connection to MicroVission .............................................13
.......... Figure 16. Digital Input/Output Wiring .........................................................14
.......... Figure 17. Analog Input Wiring ......................................................................15
........ 3.2 Order of Analog Inputs .........................................................................................16
5.0 Power-up MicroVission and Enter Setpoints ..................................................................16
6.0 Pressure Testing and Returning Compressor to Service .................................................16
 Loading...