eMKW-TD0054-21- Page 69
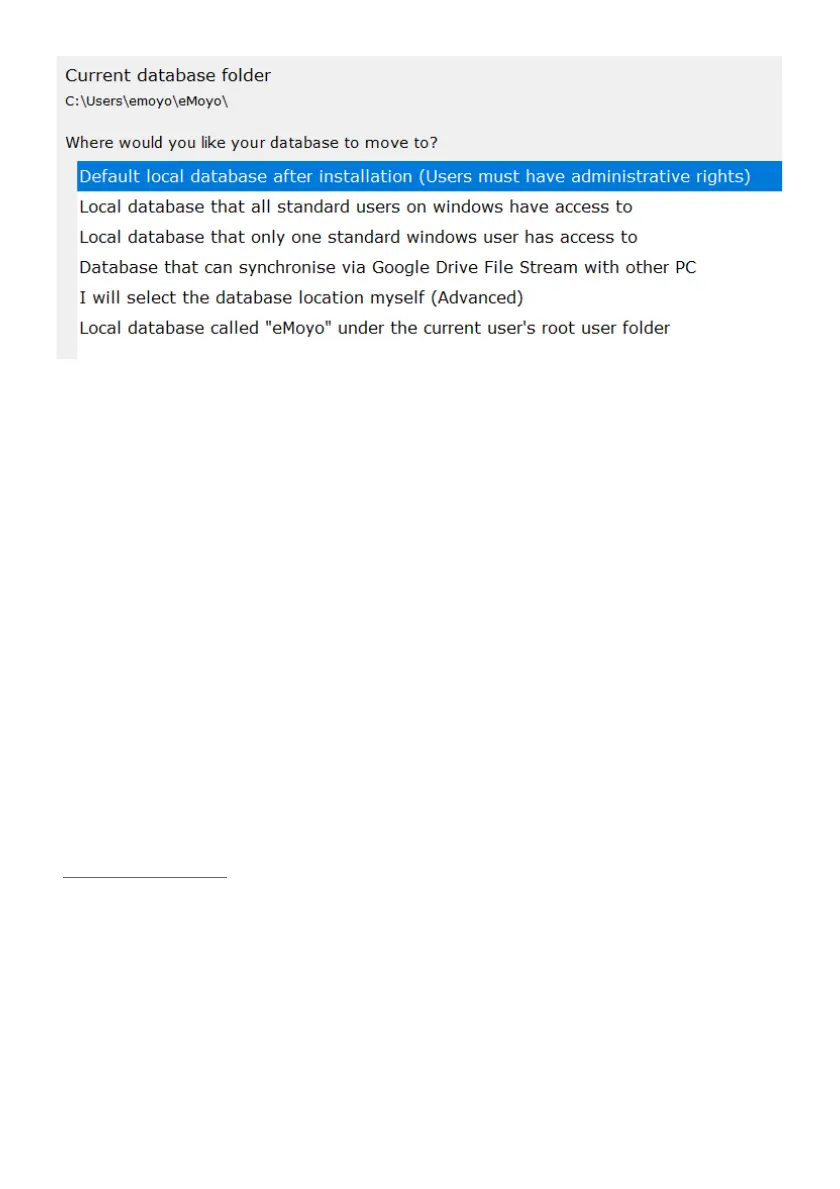
At the top you can see the current location of your database. Select an option from the list, then click the
arrow key in the top left hand corner to move the database location. Click the save icon to save the
setting change.
Warning: Data is not automatically moved with the database location change. You will need to create a
backup file and then import it into the new location. Alternatively call support for assistance.
Flag all existing data in the database to synchronise up to the cloud
All data previously captured in earlier versions (before 5.2) of KUDUwave 5 software, will not be flagged
for syncing to the eMoyo server. Click this option to process all existing data for syncing. This is only
necessary once, all tests done thereafter will be automatically flagged. To upload data to the eMoyo
server, click on the cloud button on the left hand side of the screen. Please contact support for assistance.
For private customers it is recommended to sync to your personal cloud storage account, support can
help you set this up. The eMoyo server is reserved for contracted cloud storage solutions.
Re-index the database for fast searching
To enhance the speed of the search tool on your home screen, click this option and the database will be
re-indexed.
Import eMoyo 4.0 Data
If you previously had eMoyo 4.0 you will need to import patient data into KUDUwave 5. By clicking
“Import eMoyo 4.0 data”, a new interface will open. Click “Start Migration”. Once completed close this
window and KUDUwave 5. Reopen the software and all patient data should be available. Contact support
if data is found missing.
Move all patients in the root folder to a separate folder
Set a default Smart Folder
All new folders created will have the settings associated with the smart folder type selected from the
drop down menu.