Attention!
Double-check all the wiring connections before supplying power to the device. Failure
to adhere to the following instructions can damage the device and lead to hazardous
conditions in and around the device!
Never handle the electrical connections with wet hands!
The AC versions of the electrolyser requires a ferrite on the power input cable. For the DC version, no
ferrite is needed. Before mounting the power input cable to the male connector, ensure the ferrite
(included with the shipment) is in place around the cable as close as possible to the male connector.
The ferrite has an internal diameter of 13.77 mm (350 Ohm, 150 MHz) and can simply be slid over the
cable.
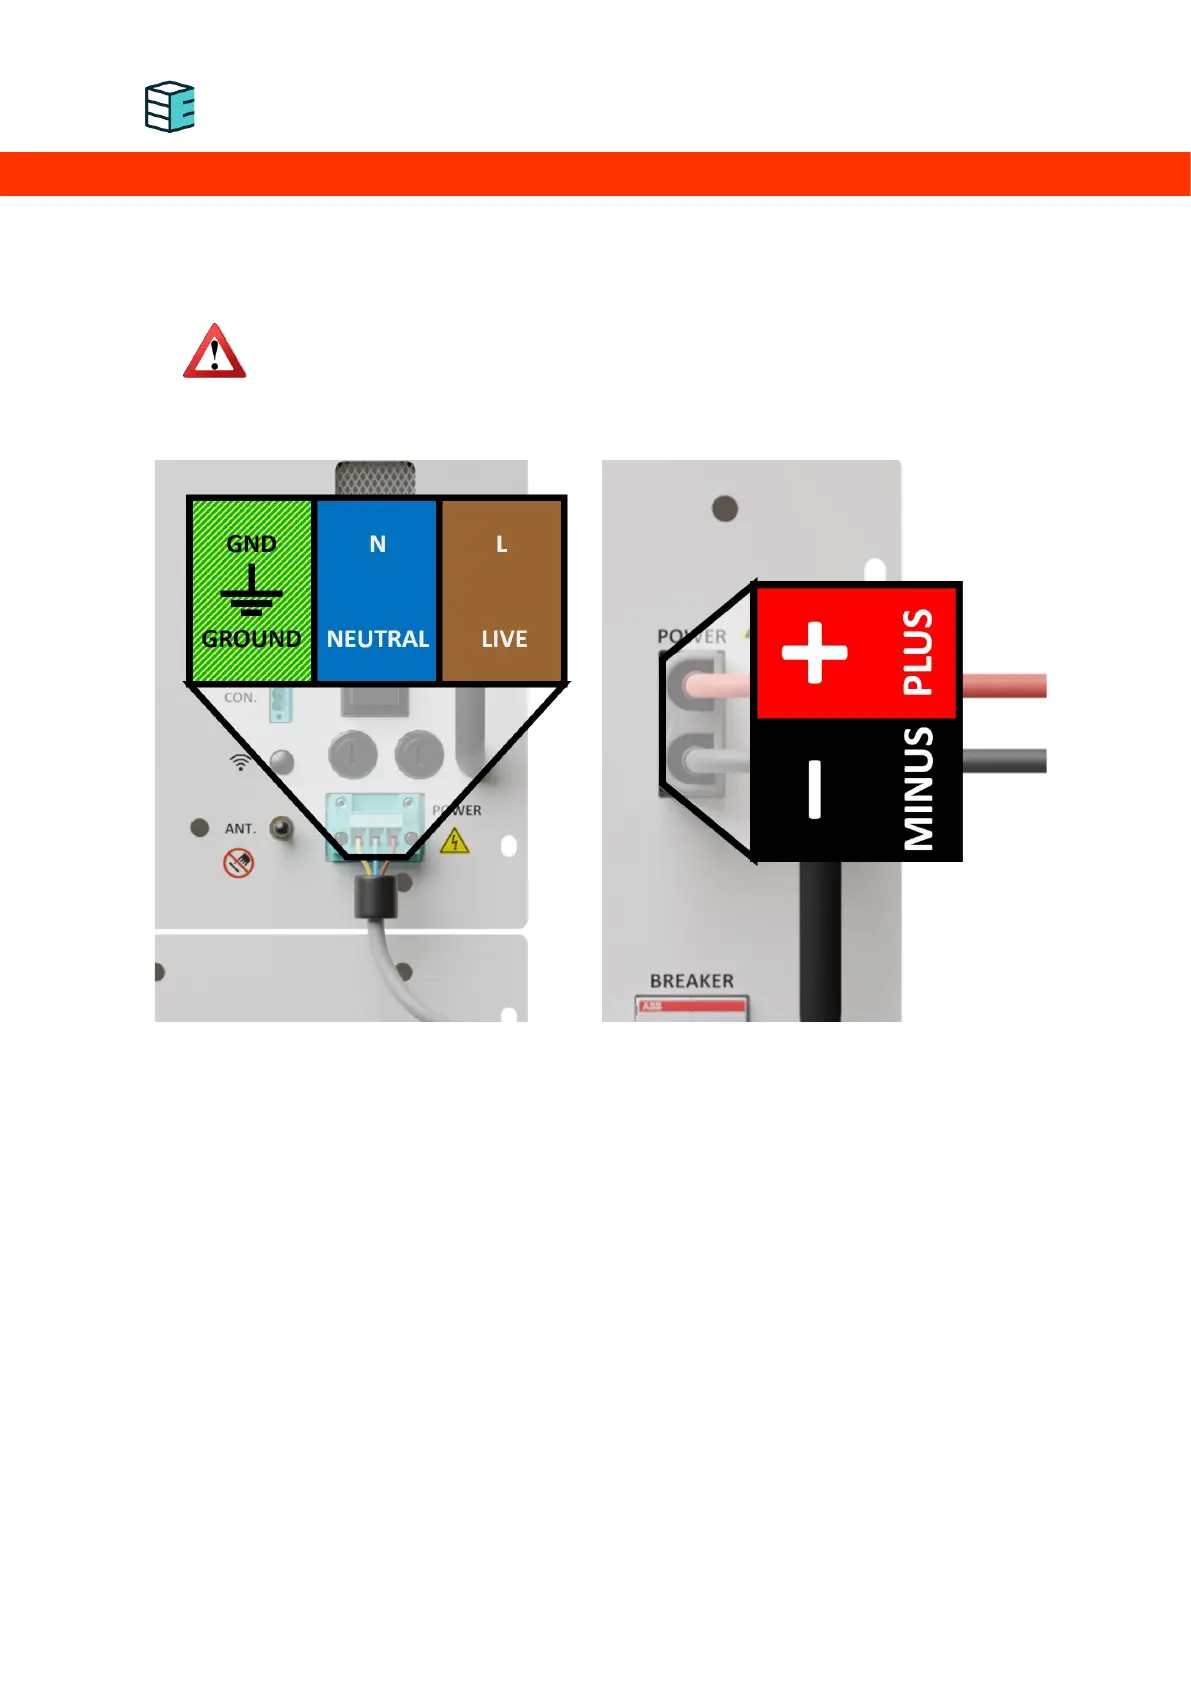
Connect the device as shown below to the socket labelled “Power”. In the image below, brown is live,
blue is neutral, and the yellow/green is the ground. In the DC version, there is a 2 pins connector
compatible with a cross section cables of 16mm². The upper one is the positive voltage input (usually
red cable). The lower one is the negative voltage input (usually black cable). Follow the relevant safety
standards and ensure compliance with local and national regulations. Ensure that the male connector
is used in the correct orientation, as shown below. Do not exceed the specified voltage and amperage
(see datasheet for more details).