18
Step 2
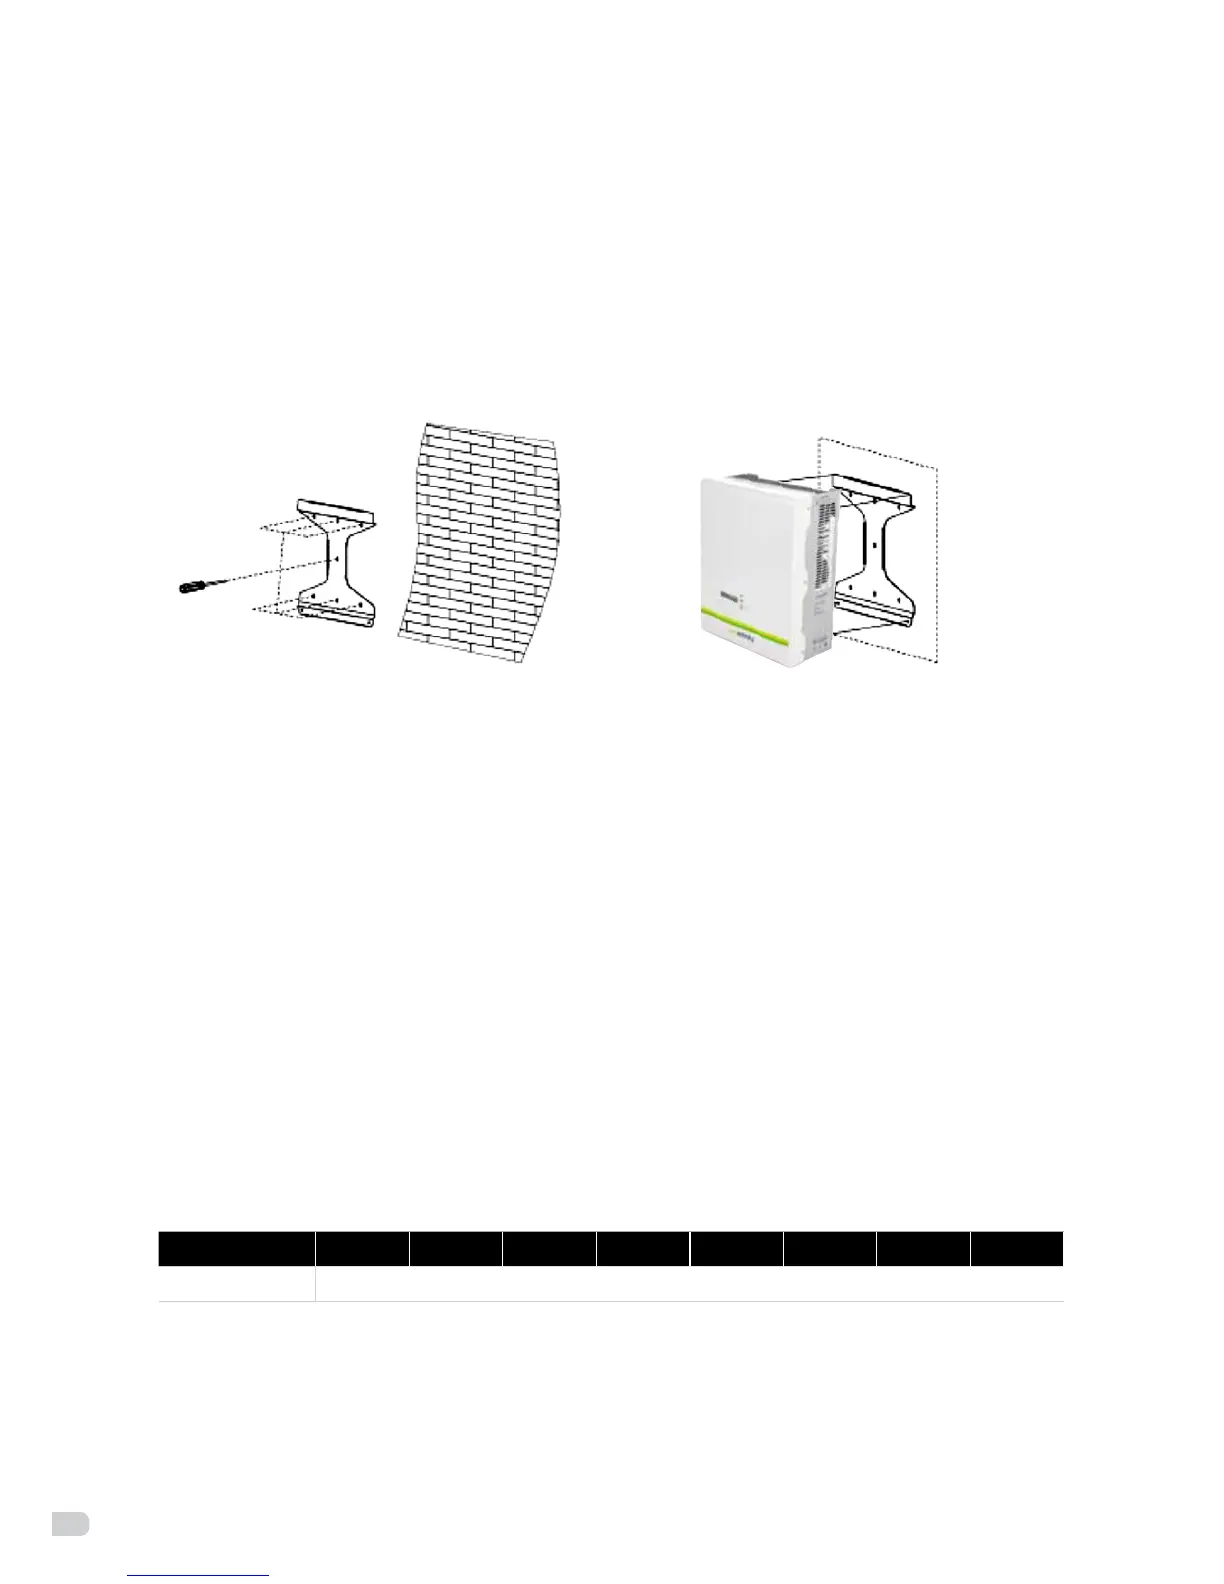
Clean all dust outside/inside the hole and measure pitch-row before installation. It needs repositioning
and drilling holes if the hole with much error. Then put expansion pipe into the hole vertically, use rubber
hammer to tap the pipe into the wall completely. After that, twist the 5 screws into 5 corresponding pipes.
Step 3
Usethebrackettoinstalltheinverterontothenarrowverticalpanel(orwall).
Put upper-part holes of the inverter onto the bracket, lower part onto the M5 screw rivet of
the bracket. Srew the 2 nuts on the M5 screw rivet (see figure 15).
Figure 15: installation of the bracket
Step 4
UseM5angenuttoxthebottomoftheinverter.
Step 5
You can connect PV-modules in serie into 1 string for the Enfinity inverters (1000TL/1650TL/2200TL/2800TL)
and 2 strings for the Enfinity inverters (3300TL/3680TL/4400TL/5000TL). Complete the installation process.
6.7 Connection of the PV power system
•PVstring
Please select PV modules with excellent function and reliable quality. Open-circuit voltage of module arrays
connectedinseriesshouldbe<Max.DC(tablebelow)inputvoltageatthemintemperatureaccordingto
the country ex. (-10°C for Belgium); operating voltage should be conformed to MPPT voltage range.
Enfinity model 1000TL 1650TL 2200TL 2800TL 3300TL 3680TL 4400TL 5000TL
Max. DC Voltage 550V
Please use a PV cable to connect modules to the inverter. From junction box to the inverter, voltage drop is
about1-2%.SowesuggesttoinstalltheinverternearthePV-modules,inordertosavecableandreduceDCloss.
5 screws 2 nuts