M215 Installation and Operation
2013 Enphase Energy Inc. 141-00012 Rev 05
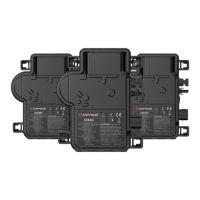
Install a Replacement Microinverter
If Enphase authorizes a replacement (RMA), replace the microinverter as follows:
1. When the replacement M215 is available, verify that the AC branch circuit breaker is de-
energized.
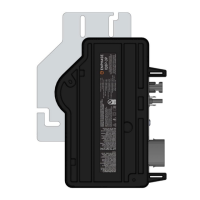
2. Attach the replacement microinverter to the PV racking using hardware recommended by
your PV racking vendor.
WARNING: You must install the M215 under the module, out of rain and sun. Do not
mount the microinverter in a position that allows long-term exposure to direct sunlight or
in a vertical orientation that allows water to collect in the DC connector recess.
NOTE: Installing the microinverter black side up or vertically, with the DC connectors
facing up, is not permitted.
3. Torque the microinverter fasteners to the values shown. Do not over torque.
6 mm (1/4”) mounting hardware: 5 N m (45 to 50 in-lbs) minimum
8 mm (5/16”) mounting hardware: 9 N m (80 to 85 in-lbs) minimum
NOTE: Using a power screwdriver to tighten the fasteners is not recommended due to
the risk of thread galling.
4. If you are using grounding washers (e.g., WEEB), the old grounding washer should be
discarded, and a new grounding washer must be used when installing the replacement
microinverter.
NOTE: Using a power screwdriver to tighten the grounding clamp screw is not
recommended due to the risk of thread galling.
5. Attach the grounding electrode conductor to the microinverter ground cleat. Torque the 10/32
grounding cleat screw to 2 N m (20 to 25 in-lbs) minimum. Do not over torque.
6. Connect the microinverter to the Engage Cable drop connector. There are two latching
mechanisms within the connectors. Listen for two clicks as the connectors engage. Ensure
that both latching mechanisms have engaged.
7. Mount the PV module above the microinverter.
8. Mate the microinverter and PV module as required.
9. Energize the AC branch circuit breaker, and verify operation of the replacement microinverter
by checking the indicator light on the underside of the microinverter. You may need a
handheld mirror to see the indicator light.
10. Initiate a device scan at the Envoy. To do this, press and hold the Menu button on the Envoy
for two seconds to bring up the Envoy menu on the LCD window. When the LCD window
displays “Enable Device Scan”, release the Menu button.
This starts a 30-minute scan at the Envoy to discover the new microinverter.
11. Use Enlighten’s Array Builder function to add the newly detected microinverter to the virtual
array.
12. Ship the old microinverter to Enphase using the supplied return-shipping label.