Copyright
©
2021 SolarV GmbH All rights reserved
CAUTION: The wire size is only for reference. If there is a long distance between the PV array
and the controller or between the controller and the battery, larger wires can be used to
reduce the voltage drop and improve performance.
CAUTION: For the battery, the recommended wire will be selected according to the
conditions that its terminals are not connected to any additional inverter.
2.4
Mounting
WARNING: Risk of explosion! Never install the controller in a sealed enclose with flooded
batteries! Do not install in a confined area where battery gas can accumulate.
WARNING: Risk of electric shock! When wiring the solar modules, the PV array can produce
a high open circuit voltage, so turn off the breaker before wiring and be careful when wiring.
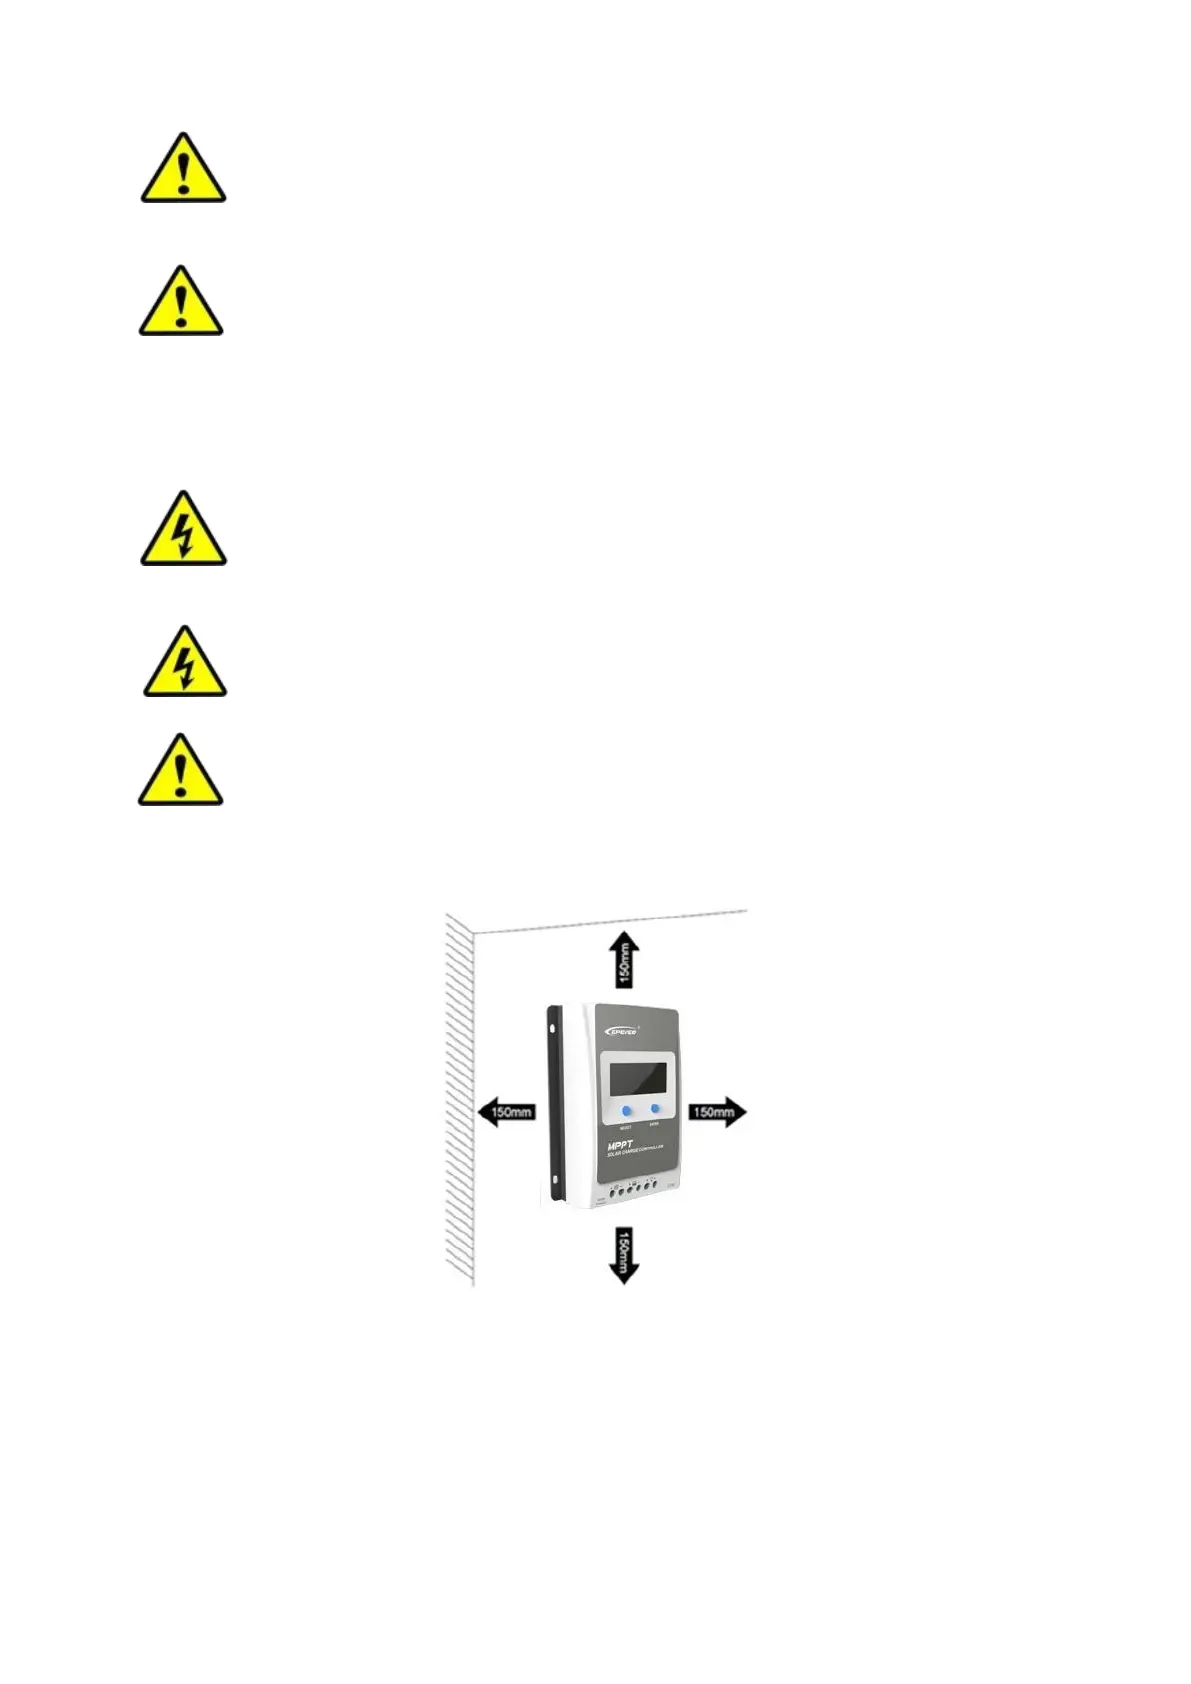
CAUTION:
The controller requires at least 150mm of clearance aboveand below for proper
air flow. Ventilation is highly recommended if mounted in an enclosure.
Installation Procedure:
Figure 2-1 Mounting
Step 1: Determination of Installation Location and Heat-dissipation Space
Determination of installation location: The controller shall be installed in a place with sufficient air flow
throughthe radiators of the controller and a minimum clearance of 150 mm from the upper and lower edges
of the controller to ensure natural thermal convection. Please seeFigure 2-1: Mounting
 Loading...